Topics Covered in This Ruby on Rails Tutorial:
Generating & Rolling Back a Migration, Updating Views & Controllers to Match an Updated Model
Exercise Preview
Exercise Overview
In this hands-on exercise, we'll demonstrate one of Rails' most powerful features: the ability to evolve your database schema safely and efficiently through migrations. You'll add additional columns to the movie model and learn how to synchronize views and controllers with these structural changes—a critical skill for maintaining production applications.
This exercise simulates a real-world scenario where business requirements change after initial development. Understanding how to manage these changes without breaking existing functionality is essential for any Rails developer working in a professional environment.
If you completed the previous exercises, you can skip the following sidebar. We strongly recommend completing the previous exercises before starting this one, as they build the foundation for the concepts we'll explore here. If you haven't finished them, follow the setup instructions below.
Prerequisites RequiredThis exercise builds on previous Rails exercises 3A-4B. If you haven't completed them, follow the setup instructions to get the proper starting point from the Git repository.
If You Did Not Do the Previous Exercises (3A–4B)
- Close any files you may have open.
- Open the Finder and navigate to Class Files > yourname-Rails Class
- Open Terminal.
- Type
cdand a single space (do NOT press Return yet). - Drag the yourname-Rails Class folder from the Finder to the Terminal window and press ENTER.
- Run
rm -rf flixto delete your copy of the Flix site. - Run
Git clone https://bitbucket.org/Noble Desktop/flix.Gitto copy the Flix Git repository. - Type
cd flixto enter the new directory. - Type
Git checkout 4Bto bring the site up to the end of the previous exercise. - Run
bundleto install any necessary gems. - Run
yarn install—check-filesto install JavaScript dependencies.
Project Setup Recovery Process
Clean Existing Files
Remove any existing flix directory using rm -rf flix to start fresh
Clone Repository
Download the complete project using Git clone from the Noble Desktop repository
Restore State
Use Git checkout 4B to jump to the exact point where the previous exercises ended
Install Dependencies
Run bundle and yarn install to ensure all gems and JavaScript packages are properly installed
Getting Started
Let's set up your development environment to begin working with database migrations. Proper workspace organization is crucial when working with Rails applications, especially when dealing with database changes that could affect your entire application.
Close all of the files you have open in your code editor.
Open the Finder and navigate to Class Files > yourname-Rails Class
Open Terminal.
Type
cdand a single space (do NOT press Return yet).Drag the flix folder from the Finder to the Terminal window.
Make sure you're in Terminal and hit Return to change into the new folder.
Use drag-and-drop from Finder to Terminal for accurate path entry. Type 'cd ' (with space), drag the folder, then press Return to navigate efficiently.
Generating & Rolling Back a Migration
Here's where Rails truly shines in enterprise development. The movie model we created in previous exercises isn't set in stone—one of Rails' greatest strengths is its ability to evolve database schemas safely over time. In real-world applications, requirements change constantly, and Rails migrations provide a robust, version-controlled way to implement these changes without losing data or breaking existing functionality.
Imagine you're working at a streaming company, and the Editorial Department at Flix has requested a new director field for the Movie Details sidebar on each detail page. This scenario happens daily in professional development environments, and handling it gracefully separates experienced developers from novices.
Since we already have an established model, we won't use rails generate model again. Instead, we'll use rails generate migration—a more surgical approach that modifies existing database structures while preserving data integrity.
Type the following command, but do NOT press Return yet:
rails generate migrationMigrations are the backbone of Rails' database management system. They allow you to modify your database schema in a controlled, reversible way—crucial for team environments where multiple developers need to synchronize database changes.
Complete the command with a descriptive name and field specification, then press Return:
rails generate migration add_director_to_movies director:textTerminal will confirm that a new migration file has been created. Notice how the naming convention
add_X_to_Yhelps Rails automatically understand your intent—this is Rails' "convention over configuration" philosophy in action.Switch to your code editor.
Open flix > db > migrate > #
_add_director_to_movies.rb (the # represents the file's unique timestamp).Examine this generated code:
def change
   add_column :movies, :director, :text
end
Rails' intelligence shines here. By parsing our migration name
add_director_to_movies, it automatically recognized that we want to modify the existing movies table and generated the appropriateadd_columncommand. This convention-based approach reduces boilerplate code and minimizes errors.Let's apply this migration. Switch to Terminal.
Run the migration:
rails db:migrateTerminal should confirm with an
add_columnmessage—but wait! We've made a design error. Thedirectorfield should be a simple string, not a text area. In a production environment, this kind of mistake could impact user experience and data validation. Fortunately, Rails provides an elegant solution: migration rollbacks.Roll back the migration:
rails db:rollbackNotice how Terminal reports it's
revertingwith aremove_columnaction—the exact opposite of our originaladd_column. This reversibility is what makes Rails migrations so powerful in team environments and production deployments.Now let's correct our migration file. Switch to #
_add_director_to_movies.rb in your code editor.Make this crucial correction, changing
texttostring:def change add_column :movies, :director, :string endThis change ensures our director field will be rendered as a standard text input rather than a textarea, providing a better user experience for single-line data entry.
Save the file.
Switch to Terminal.
Apply the corrected migration:
rails db:migratePerfect! The corrected migration is now applied. This rollback-and-fix workflow is standard practice in professional Rails development, allowing teams to iterate quickly while maintaining database integrity.
Migration Generation vs Model Generation
| Feature | rails generate migration | rails generate model |
|---|---|---|
| Purpose | Modify existing models | Create new models |
| Database Impact | Adds/modifies columns | Creates new tables |
| When to Use | Model already exists | Creating new model |
| File Generation | Migration file only | Model, migration, tests |
Rails automatically parses migration names like 'add_director_to_movies' to understand which table to modify and what operation to perform. This convention saves significant development time.
Updating Views & Controllers to Match an Updated Model
Adding database columns is only the first step. To complete the feature implementation, we need to update the application's views and controllers—a process that demonstrates Rails' MVC architecture in action. This synchronization between model, view, and controller is critical for maintaining data flow throughout your application.
Switch to your code editor.
Open flix > app > views > movies >
_form.html.erbAdd the director input field after the
has_subtitlessection (around line 14):<%= f.label :has_subtitles %> <%= f.check_box :has_subtitles %> </p> <p> <%= f.label :director %> <%= f.text_field :director %> </p>This Rails form helper automatically generates the appropriate HTML input with proper naming conventions for Rails' parameter handling.
Save the file.
Open flix > app > controllers > movies_controller.rb
Navigate to the bottom of the file and locate the private
movie_paramsmethod. This method implements Rails' strong parameters feature—a security measure that prevents mass assignment vulnerabilities. Add:directorto the permitted parameters:movie_params=params.require(:movie).permit(:title,:description,:has_subtitles,:placement,:mpaa_rating,:release_date,:ticket_price,:runtime,:poster_image,:director)Critical Note: Forgetting to update
movie_paramsis one of the most common mistakes when adding new fields. Without this change, Rails will silently ignore the new field data for security reasons, leading to frustrating debugging sessions. Always remember: new model field → update strong parameters.Save the file.
Now let's ensure the director information displays properly in the movie details view.
Open flix > app > views > movies > show.html.erb
Around line 15, add the container div for the director information:
<div class="details">
   <h4>Movie Details</h4>
   <div>
      <span></span>
   </div><div>
      <span>Subtitles:</span>
Complete the director display section:
<div class="details">
   <h4>Movie Details</h4>
   <div>
      <span>Director:</span>
      <%= @movie.director %>
   </div>
   <div>
      <span>Subtitles:</span>
The
<%= @movie.director %>erb tag will output the director's name, with Rails automatically handling nil values gracefully.Save the file.
Launch the Rails development server:
rails serverOpen your browser and navigate to localhost:3000/movies/1/edit to see the new director field in action.
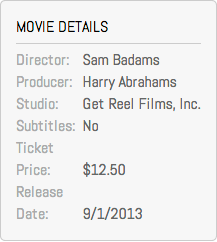
Test the functionality by entering a director name:
Director: Sam Badams Click Update Movie to save your changes.
The director information should now appear in the Movie Details sidebar, demonstrating the complete data flow from form input through controller processing to database storage and view display. This end-to-end functionality showcases Rails' elegant MVC implementation.
You've successfully implemented a complete feature addition workflow: generating and refining a migration, updating the form interface, configuring controller security parameters, and displaying the new data in views. This process mirrors the daily reality of professional Rails development, where evolving requirements demand both technical skill and systematic thinking.
Complete Model Update Checklist
Add form elements in _form.html.erb for user input
Add new field to strong parameters in movie_params method
Show new field data in show.html.erb template
Verify field saves and displays correctly in browser
Forgetting to add new fields to the strong parameters in the controller will cause form submissions to silently fail. The field won't save even though everything else appears to work correctly.