Special Characters & the Glyphs Panel
Professional typography demands precision, and InCopy's robust special character system gives you complete control over every typographic element. Whether you're working on corporate communications, editorial content, or marketing materials, mastering these tools will elevate your typography from basic to professional-grade.
Inserting Special Characters
Access essential typographic symbols—copyright marks, trademark symbols, em dashes, ellipses, and more—through Type > Insert Special Character. These professionally crafted characters ensure consistency across your documents and maintain proper typographic standards that readers expect from quality publications.
Control spacing with precision using Type > Insert White Space. This menu provides nonbreaking spaces (essential for preventing awkward line breaks), em spaces, en spaces, thin spaces, and other specialized spacing characters that give you granular control over your text flow and visual hierarchy.
Manage document flow and layout structure through Type > Insert Break Character. Column breaks, frame breaks, page breaks, and other structural elements help you control exactly how content flows across pages and frames—critical for maintaining professional layouts in complex documents.
When standard menus don't contain the character you need, the Glyphs panel becomes your comprehensive character library. This powerful tool gives you access to every character available in any font, including specialized symbols, international characters, and OpenType alternates that can transform ordinary text into sophisticated typography.
For characters not found in the standard menus—or when you need to explore a font's complete character set—the Glyphs panel provides comprehensive access to every available glyph.
Quick Access to Special Characters
Navigate to Type Menu
Access the Type menu in your application's main menu bar to reveal character insertion options.
Select Character Category
Choose between Insert Special Character, Insert White Space, or Insert Break Character based on your needs.
Choose Your Character
Browse the submenu options to find the specific character you need for your design project.
When standard menu options don't have the character you need, the Glyphs panel provides access to every character in any font, making it an essential tool for advanced typography work.
Inserting Characters Using the Glyphs Panel
Position your text cursor
 precisely where you want to insert the special character. The character will appear exactly at this insertion point, maintaining your text flow and formatting.
Open the Glyphs panel by navigating to Type > Glyphs. This comprehensive character browser displays every available glyph in your selected font, organized in an intuitive grid format.
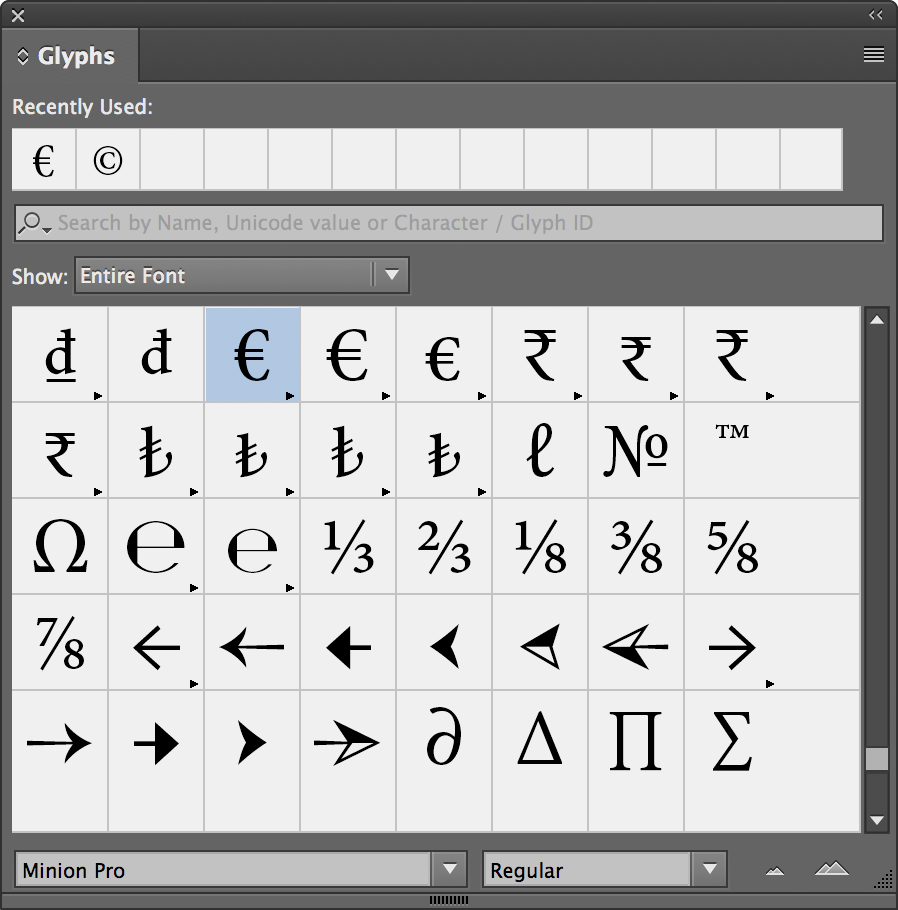
The panel automatically displays characters from the font currently active at your cursor position. To explore different typefaces, use the font dropdown menu at the bottom left of the panel. This feature is particularly valuable when you need to compare how different fonts render specific characters or when searching for fonts that include specialized symbols.
Optimize your character selection process using the Zoom In
 and Zoom Out buttons
  located at the bottom right of the panel. Larger previews help you distinguish between similar characters and ensure you're selecting exactly the right glyph—especially important when working with mathematical symbols, accented characters, or decorative elements.
Double-click your desired character to insert it instantly at the cursor position. The character adopts the formatting of the surrounding text, maintaining consistency with your document's typography while adding the precise special character you need.
Glyphs Panel Workflow
Position Text Cursor
Place your cursor exactly where you want the special character to appear in your text.
Open Glyphs Panel
Navigate to Type menu and select Glyphs to open the comprehensive character panel.
Select Font if Needed
The panel defaults to your current font, but you can change it using the dropdown at the bottom left.
Adjust Preview Size
Use Zoom In and Zoom Out buttons at bottom right to get the perfect view of character details.
Insert Character
Double-click your desired character to instantly insert it at the cursor position.
The Glyphs panel automatically matches the font of your current text selection, ensuring typographic consistency throughout your document without manual font switching.
Glyphs Panel Best Practices
Ensures precise character placement without repositioning
Different fonts have unique character designs and availability
Prevents selecting similar-looking but incorrect characters
Ensures special characters display correctly in final output