Topics Covered in This AutoCAD Tutorial:
Hatch Tool Palettes
Exercise Preview
Exercise Overview
In this exercise, you'll master the efficiency of Tool Palettes to apply pre-configured Hatches to your architectural drawings. This workflow technique significantly accelerates the drafting process by allowing you to reuse standardized hatch patterns with consistent properties across multiple projects. Tool Palettes represent one of AutoCAD's most powerful productivity features, enabling design professionals to maintain consistency while reducing repetitive tasks.
Building on the foundation from the previous exercise, you'll learn to leverage saved hatch configurations to create professional flooring patterns that maintain their original settings, including critical parameters like Gap Tolerance.
Tutorial Workflow Overview
Prepare Drawing Environment
Open Hatch-Ranch.dwg file and freeze the A-Doors layer to clear the workspace for hatch application
Apply Saved Hatches
Use Tool Pallets to apply previously saved ANSI31 hardwood flooring hatch to bedroom areas
Handle Complex Areas
Address bathroom areas that require boundary closure before hatch application can succeed
Refine Hatch Alignment
Use Set Origin to properly align tile patterns with room geometry for professional appearance
Hatch Flooring
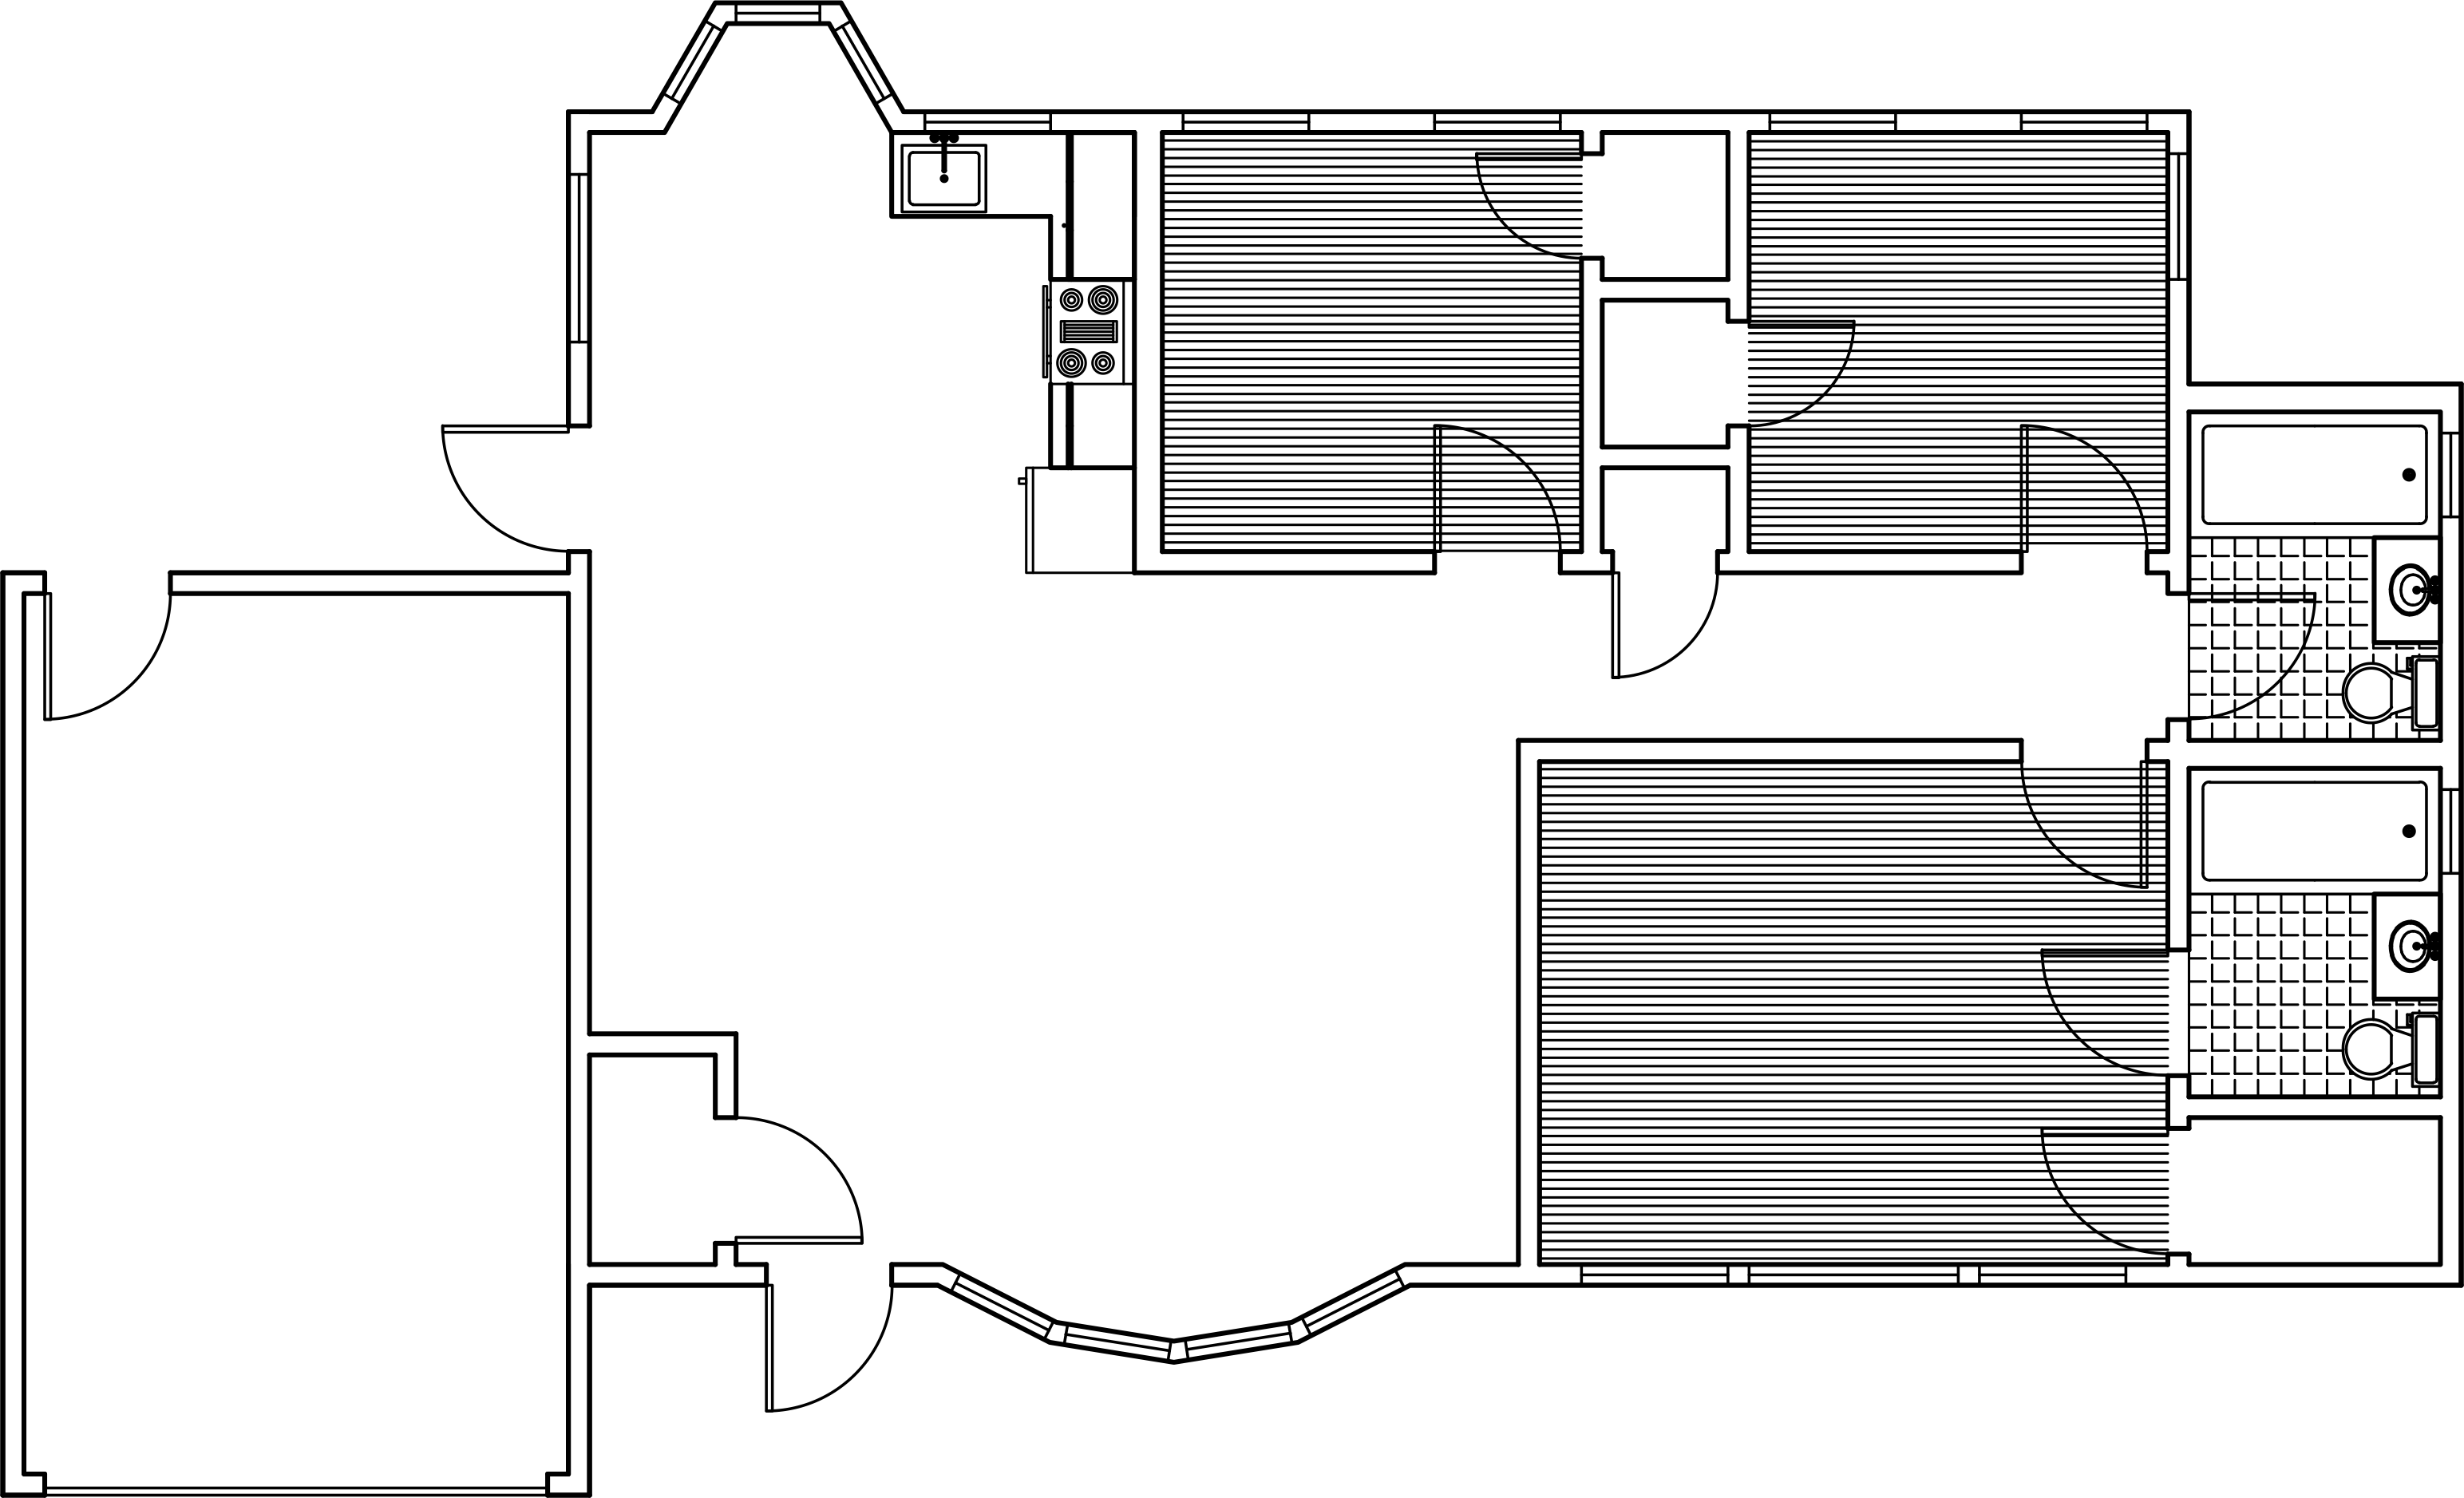
Open the file Hatch-Ranch.dwg to begin working with the residential floor plan.
Launch the Layer Freeze (LAYFRZ) tool and click on any of the doors to freeze the A-Doors layer. This technique temporarily hides door elements, providing cleaner visual access to room boundaries while you work on flooring patterns.
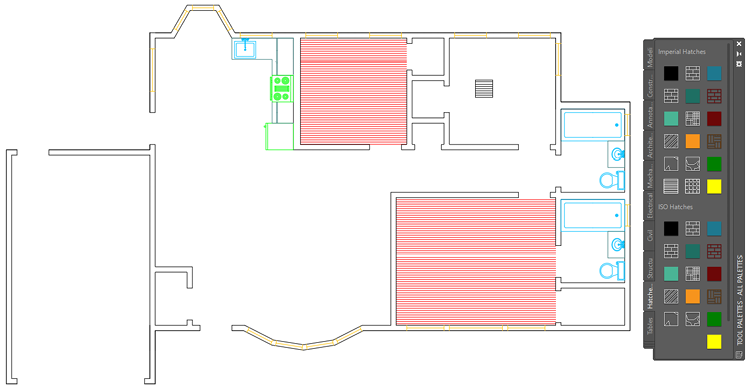
Navigate to the Hatch tab in the Tool Palettes Window. Select the ANSI31 hatch pattern that you configured for hardwood flooring in the previous exercise. Click inside one of the empty square bedrooms to place the hatch, then repeat this process for the other two bedrooms as illustrated below. The beauty of Tool Palettes becomes apparent here—your saved hatches retain all previously configured settings, including Gap Tolerance values, enabling you to efficiently fill open areas even when minor gaps exist in the boundary geometry.
From the Hatch Tool Palette tab, select the ANGLE hatch pattern you previously configured for tile flooring and attempt to place it in the master bathroom located in the bottom right corner. You'll notice that despite the Gap Tolerance setting, the complex geometry of bathroom fixtures creates an irregular boundary that confuses the hatch algorithm, resulting in incorrect pattern placement. Delete this unsuccessful hatch—this demonstrates why understanding boundary conditions is crucial for professional drafting.
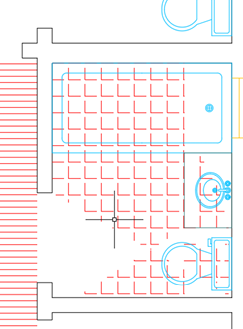
To resolve the boundary issue, you'll need to create closed areas for proper hatch placement. Start the Make Objects Layer Current (LAYMCUR) command and click on one of the successfully placed hatches to set the Hatch layer as current. This ensures your temporary boundary lines will be organized on the appropriate layer. Launch the Line tool and draw two strategic lines across the bathroom doorway openings as shown below, effectively creating enclosed areas suitable for hatch application.

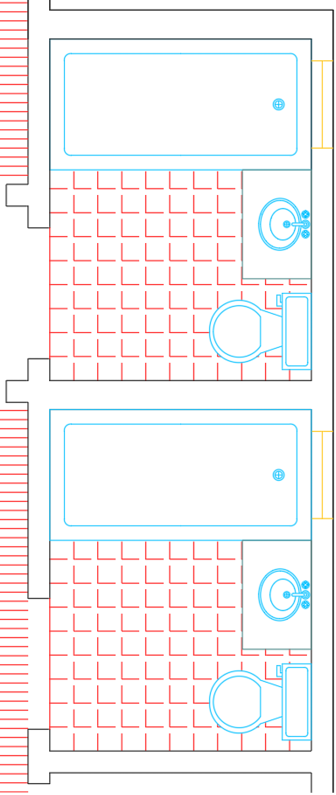
With the boundaries properly closed, return to the Hatch Tool Palette and place the tile hatch pattern into both bathroom spaces. The enclosed geometry now allows the hatch algorithm to function correctly, producing clean, professional results.
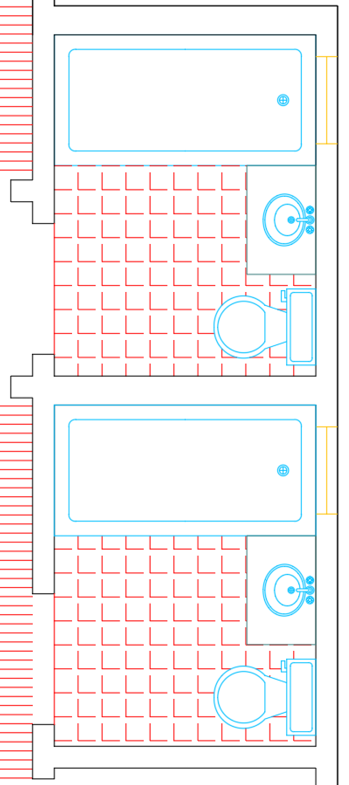
To achieve optimal visual results, use the Set Origin function and click in the lower left corner of each bathroom. This repositions the hatch pattern origin point, creating better alignment between the tile pattern and the room's geometry—a critical detail that distinguishes professional drafting work from amateur attempts.
Save and close the file to preserve your work.
Hatch Application Scenarios
| Feature | Simple Rooms (Bedrooms) | Complex Rooms (Bathrooms) |
|---|---|---|
| Boundary Condition | Closed boundaries | Open doorways |
| Gap Tolerance Effectiveness | Works automatically | Insufficient for complex geometry |
| Required Preparation | None - direct application | Manual boundary closure with Line tool |
| Success Rate | High | Requires troubleshooting |
Saved hatches retain their Gap Tolerance settings from previous exercises, allowing placement in areas with small openings. However, irregular room geometry may still require manual boundary closure.
Bathroom Hatch Application Checklist
Test if existing gap tolerance handles the room geometry
Look for doorway openings that prevent proper hatch boundaries
Use LAYMCUR tool on existing hatch to switch layers efficiently
Draw temporary lines across openings to create closed boundaries
Use saved ANGLE hatch from Tool Pallets for consistent results
Click lower left corner of each room to align patterns with walls
Tool Pallets vs Manual Hatch Creation
When hatch placement fails in bathrooms due to irregular boundaries, always delete the incorrect hatch before attempting boundary closure. Leaving failed hatches can cause confusion and drawing file bloat.