Exercise Preview

Exercise Overview
You've perfected your WordPress site locally—now it's time to deploy it to production. This exercise demonstrates the professional workflow for migrating a complete WordPress installation from your development environment to a live web server. We're assuming your hosting provider has already configured WordPress through their one-click installation (standard practice for most quality hosts in 2026), meaning your database and core WordPress files are already in place. Your task is to seamlessly transfer your custom database and wp-content directory to replace the default installation.
This exercise is designed for Noble's instructor-led training environment. Independent learners should refer to Exercise B4 in the Bonus section for adapted instructions suitable for personal development environments.
This process assumes WordPress is already installed on your remote server via one-click installation, with database and core files ready for replacement.
If You Did Not Do the Previous Exercise
- Launch your web browser and navigate to localhost:8888/mrp/wp-admin (Mac) or localhost/mrp/wp-admin (Windows). Log in when prompted.
- In the WordPress Dashboard sidebar, hover over Appearance and select Themes.
- Click the Add New button to access the theme installer.
- Select the Upload option, then click Browse (or Choose File depending on your browser).
- Navigate to Desktop > Class Files > WordPress.org Class and select mrpTheme-ready-for-uploading.zip.
- Click Install Now, then Activate to apply the theme to your development site.
Getting Started
Before beginning the deployment process, you'll need access credentials for your target server. Your instructor will provide these essential connection details.
Record the following credentials from your instructor (you'll need these throughout the deployment process):
- WordPress URL - Your live site's web address
- PhpMyAdmin URL - Database management interface
- FTP Username - File transfer protocol access
- FTP Password - Secure authentication for file uploads
Open your browser and visit the WordPress URL assigned to you. You'll see a fresh WordPress installation courtesy of your host's automated setup. This default installation will be completely replaced with your custom MRP site, preserving all your development work while transitioning to the live environment.
Required Credentials Checklist
The live website address where your WordPress site will be accessible
Database management interface for importing your local database
File transfer credentials for uploading wp-content folder and files
Exporting the Database
WordPress stores all dynamic content—posts, pages, comments, user data, and configuration settings—in a MySQL database. The most efficient way to migrate your site is to export this database from your local environment and import it to your live server. This process ensures perfect content fidelity and preserves all your customizations.
Access phpMyAdmin through your local development environment:
MAMP vs XAMPP Database Access
Feature Mac (MAMP) Windows (XAMPP) Application MAMP XAMPP Access Method WebStart page → Tools Control panel → localhost Required Services Auto-start servers Apache + MySQL running Recommended: Both platforms provide phpMyAdmin access through different paths but identical functionality
Mac (MAMP)
- Launch the MAMP application from your Applications folder.
- Ensure servers start automatically, or click Start Servers if they don't.
- Click Open WebStart page to launch the MAMP control panel in your browser.
- Navigate to Tools > phpMyAdmin from the main menu.
Windows (XAMPP)
- Open the XAMPP Control Panel from your installation directory.
- Verify that both Apache and MySQL services are running (green status indicators).
- Open your browser and navigate to localhost to access the XAMPP dashboard.
- In the left sidebar under Tools, click phpMyAdmin.
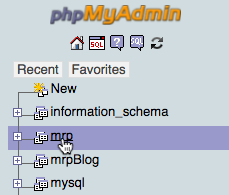
Select the mrp database from the left sidebar. This database contains your entire WordPress installation, including all content, settings, and user data.
Click the Export tab to begin the database extraction process:

Configure your export settings using the appropriate options for your operating system:
Database Export Process
Select Database
Click the mrp database from the left sidebar list containing all WordPress content
Configure Export
Choose Custom method, select all tables, enable file output, and add DROP TABLE statements
Download File
Click Go to generate mrp.SQL file and save to Downloads folder
Mac Export Configuration
- Under Export Method, select Custom for advanced control options.
- Under Table(s), click Select All to ensure complete data migration.
- Under Output, choose Save output to a file to download the database locally.
- Under Object creation options, enable Add DROP TABLE / VIEW / PROCEDURE / FUNCTION / EVENT / TRIGGER statement to ensure clean imports.
- Click Go to begin the export process.
Windows Export Configuration
- Under Export Method, select Custom for detailed export options.
- Under Object creation options, enable Add DROP TABLE / VIEW / PROCEDURE / FUNCTION / EVENT / TRIGGER statement for optimal compatibility.
- Click Go to initiate the database export.
Save the exported file to your Downloads folder when prompted. Modern browsers like Chrome and Safari will automatically download the file without additional prompts, while others may display a save dialog.
Important: The exported mrp.sql file will be saved to your default download location. If you've customized your browser's download preferences, check your specified download directory.
Database Export Process
Select Database
Click the mrp database from the left sidebar list containing all WordPress content
Configure Export
Choose Custom method, select all tables, enable file output, and add DROP TABLE statements
Download File
Click Go to generate mrp.SQL file and save to Downloads folder
Replacing the Local URLs
WordPress stores URLs as absolute links throughout the database, creating a critical migration challenge. Your local database contains references to localhost URLs that won't function on your live server. This step replaces all local references with your live server URLs, ensuring seamless functionality after deployment.
Launch your preferred code editor (Sublime Text, Visual Studio Code, or Dreamweaver).
Open the exported database file by selecting File > Open from the menu.
- Navigate to your download location:
- Mac: [username] > Downloads
- Windows: C: > Users > [username] > Downloads
Open the mrp.sql file in your editor.
Access the Find and Replace function:
- Sublime Text: Find > Replace or Ctrl/Cmd+H
- Dreamweaver: Edit > Find and Replace
- Visual Studio Code: Edit > Replace or Ctrl/Cmd+H
Configure the replacement parameters exactly as shown:
Find: http://localhost:8888/mrp (Mac) or http://localhost/mrp (Windows) Replace: Enter the exact WordPress URL provided by your instructor (case-sensitive). Execute Replace All to update all URL references throughout the database file.
Save the modified file, preserving all changes for the import process.
With your URLs properly configured, you're ready to import the database to your live server environment.
WordPress stores absolute URLs in the database. Failing to replace localhost paths with production URLs will break all internal links and functionality.
Platform-Specific Local URLs
| Feature | Mac | Windows |
|---|---|---|
| Find Pattern | http://localhost:8888/mrp | http://localhost/mrp |
| Replace With | Your production WordPress URL | Your production WordPress URL |
Importing the Database
Navigate to the phpMyAdmin URL provided by your instructor. Pay careful attention to case sensitivity—these URLs must be entered exactly as provided.
Authenticate using the Username and Password credentials from your instructor.
Select your target database from the left sidebar. The database name will match your FTP Username, creating a consistent naming convention for easy identification.

Navigate to the Import tab to begin the database restoration process.

Click Choose File (or Browse in older browsers) to select your modified database file.
Navigate to your Downloads folder and locate the mrp.sql file you edited earlier.
Double-click mrp.sql to select it for import.
Click the Go button to execute the import. A successful import will display a confirmation message such as: "Import has been successfully finished, 396 queries executed."
Performance Note: Database imports typically complete within seconds for sites of this size. If you experience stalling (particularly in Safari), try using Chrome or Firefox for more reliable performance during large file operations.
Remote Database Import
Access phpMyAdmin
Navigate to provided phpMyAdmin URL and login with assigned credentials
Select Target Database
Click your database name from left sidebar (matches FTP username)
Import SQL File
Use Import tab, choose mrp.SQL file, and execute to transfer all content
FTP Clients
Professional WordPress deployment requires reliable file transfer capabilities. While numerous excellent FTP clients exist—including FileZilla, WinSCP, and Transmit—we recommend Cyberduck for this exercise due to its robust cross-platform compatibility, intuitive interface, and zero cost. The principles and steps demonstrated here translate seamlessly to any FTP client you might prefer in your professional workflow.
For Noble Desktop students, Cyberduck comes pre-installed in your classroom environment, ensuring consistent results across all workstations.
Cyberduck is recommended for its free, cross-platform compatibility, but any FTP client follows the same upload process outlined in this tutorial.
Uploading Your WordPress Site
The final deployment step involves transferring your custom files to the live server, replacing the default WordPress installation with your carefully crafted site.
Launch Cyberduck from your applications folder or desktop shortcut.
Click the Open Connection button located at the top-left of the main interface.
Configure your server connection with the provided credentials:
- Server: noble.local
- Username: Enter your assigned or selected username
- Password: Enter your assigned or selected password
Expand the advanced options by clicking the triangle
 next to More Options if not already visible.
Set the Path to: public_html/WordPress/ to direct uploads to your WordPress installation directory.
Click Connect to establish the FTP connection. If you receive an Unsecured FTP connection warning, click Continue—this is expected for classroom environments.
Troubleshooting: Connection failures typically result from credential errors or extra spaces in the input fields. Double-check your entries for accuracy.
Pro Tip: Once successfully connected, use Bookmark > New Bookmark to save these settings for future deployments.
Position the Cyberduck window to occupy half your screen, leaving space for your local file browser.
- Open a new Finder (Mac) or File Explorer (Windows) window and navigate to your local WordPress installation:
- Mac: Applications > MAMP > htdocs > mrp
- Windows: C: > xampp > htdocs > mrp
Arrange both windows side-by-side for efficient drag-and-drop operations.
Drag the wp-content folder from your local directory directly onto the Cyberduck window. Ensure you're dropping into the main directory, not into an existing subfolder. Click Continue if you receive another security warning.
Monitor the upload progress in the Transfers window that appears automatically. If prompted about overwriting existing files, click Continue to replace the default installation files with your customized versions.
Close the Transfers window once the upload completes successfully.
Test your deployment by visiting the WordPress URL provided at the beginning of class. Your MRP website should load completely, demonstrating successful migration from development to production environment.
Congratulations! You've successfully completed a professional WordPress deployment, mastering the essential skills needed for client work and production environments.
FTP Connection Setup
Configure Connection
Enter server (noble.local), username, password, and path (public_html/WordPress/)
Locate Local Files
Navigate to MAMP/htdocs/mrp (Mac) or xampp/htdocs/mrp (Windows) folder
Upload wp-content
Drag wp-content folder to Cyberduck window and confirm overwrite of existing files
Once file upload completes, visit your assigned WordPress URL to see your MRP website live on the remote server.