Topics Covered in This Ruby on Rails Tutorial:
Creating a Model for Cast Members, Adding Objects to the Cast Members Model in Rails Console, Updating Views to Include the Cast Members Model, Creating a Genre Model, Adding a Genre Field to the Edit Form
Exercise Preview
Exercise Overview
The Editorial Department at Flix has requested two critical enhancements to our movie database: cast member listings and genre categorization for every film. This isn't just about displaying data—it's about creating meaningful relationships between our models that reflect real-world content management needs.
For cast members, we need a flexible system that can accommodate any number of actors per film, from intimate character studies to ensemble blockbusters. The genre requirement is more sophisticated: each genre must be clickable, leading to dedicated pages that aggregate all films within that category. This creates a powerful content discovery system that mirrors how users naturally browse entertainment platforms.
While this seems like a complex undertaking, our deep understanding of Rails models and relationships makes it entirely manageable. We'll leverage Rails' built-in association patterns to create a robust, scalable solution.
If you completed the previous exercises, you can skip the following sidebar. We strongly recommend completing the previous exercises before starting this one, as they build essential foundational knowledge. If you haven't finished them, follow the setup process below.
Data Requirements AnalysisCast members require a one-to-many relationship (multiple cast per film), while genres need clickable navigation to filtered movie lists. This drives the database design decisions throughout the tutorial.
If You Did Not Do the Previous Exercises (3A–5A)
- Close any files you may have open.
- Open the Finder and navigate to Class Files > yourname-Rails Class
- Open Terminal.
- Type
cdand a single space (do NOT press Return yet). - Drag the yourname-Rails Class folder from the Finder to the Terminal window and press ENTER.
- Run
rm -rf flixto delete your copy of the Flix site. - Run
Git clone https://bitbucket.org/Noble Desktop/flix.Gitto copy the Flix Git repository. - Type
cd flixto enter the new directory. - Type
Git checkout 5Ato bring the site up to the end of the previous exercise. - Run
bundleto install any necessary gems. - Run
yarn install—check-filesto install JavaScript dependencies.
Getting Started
Let's establish our development environment and verify our Rails application is functioning properly before implementing our new features.
Open the Finder and navigate to Class Files > yourname-Rails Class
Open Terminal.
Type
cdand a single space (do NOT press Return yet).Drag the flix folder from the Finder to the Terminal window.
Make sure you're in Terminal and hit Return to change into the new folder.
Type the following in Terminal:
rails serverLet's verify everything is working properly on the site. Switch to a browser and navigate to localhost:3000 to confirm the application is running smoothly.
Back in Terminal hit CTRL–C to shut down the server.
Environment Setup Checklist
Ensures you're working in the correct directory structure
Verifies your Rails environment is properly configured
Confirms the application is running and accessible
Creating a Model for Cast Members
When dealing with variable-length data like cast members, creating a dedicated model is often the most elegant solution. This approach gives us maximum flexibility and maintains clean data relationships.
The challenge of storing an unknown number of cast members per film requires careful architectural consideration. While we could store this as a text field or JSON array, creating a dedicated model provides the best long-term scalability and query flexibility. Switch to the Terminal.
Type the following, making sure to double-check the code before hitting Return:
rails generate model cast_member name:string movie:referencesThis command creates our new
cast_membermodel with all necessary fields. Thereferencesfield type is Rails' way of establishing foreign key relationships—it automatically creates the database constraints and ActiveRecord associations we need for proper data integrity.We suggest opening the flix folder in your code editor if it allows you to (like Sublime Text does).
In your code editor, open flix > db > migrate > #
_create_cast_members.rb (the # stands for the unique 14-digit timestamp in the filename).Examine line 5 in this automatically generated file:
t.references :movie, null: false, foreign_key: trueWhile we specified the
referencestype, Rails intelligently addedforeign_key: trueautomatically. This line establishes the critical relationship between our movies and cast_members models. The foreign key constraint ensures referential integrity—preventing orphaned cast member records and maintaining consistent data relationships even as our database scales to thousands of records.The
null: falseconstraint is equally important, ensuring that every cast member must be associated with a specific movie. This business rule makes logical sense and prevents data anomalies.Close the file, as we're done reviewing the migration structure.
Switch to the Terminal and type the following to apply the migration:
rails db:migrateSwitch to your code editor.
Open app > models > cast_member.rb
Notice that this file contains more content than our original movie model did. Rails has automatically added
belongs_to :movie, demonstrating how the framework leverages naming conventions to generate intelligent defaults.To complete the model relationship and unlock Rails' full ActiveRecord magic, we need to establish the reciprocal association in our existing movie model. Open app > models > movie.rb
Add the following bold code around line 5, above the scope:
validates :runtime, numericality: true

has_many :cast_members

scope :with_placement, -> (placement) { where(placement: placement) }
This declaration tells the movie model that it can have multiple associated cast members, satisfying our business requirement for unlimited cast members per film. This bidirectional relationship enables powerful query capabilities and elegant data manipulation.
Save the file.
The 'references' field type automatically creates foreign key relationships and adds 'foreign_key: true' to maintain database consistency between related models.
Model Generation Process
Generate Model
Use 'rails generate model cast_member name:string movie:references' to create the model with proper associations
Review Migration
Check the generated migration file for the foreign key constraint and null: false validation
Apply Migration
Run 'rails db:migrate' to create the database table with proper relationships
Update Models
Add 'has_many :cast_members' to the Movie model to complete the bidirectional relationship
Adding Records to the Cast Members Model in Rails Console
The Rails console provides a powerful interface for database manipulation and testing. While production applications would typically use web forms for data entry, the console is invaluable for rapid prototyping and data seeding.
Switch to the Terminal.
Type the following to start up the Rails console:
rails consoleWe could build forms for cast member management, but the Rails console offers immediate database access and serves as excellent practice for understanding ActiveRecord relationships. Let's start by retrieving a movie record.
Type the following:
movie = Movie.find(1)This will return
Text M for Murder. Now let's populate it with cast members using Rails' association methods.Type:
movie.cast_members.new(name: "John Jones")
movie.cast_members.new(name: "Susan Shine")
movie.cast_members.new(name: "Ed Kovac")
movie.save
Terminal will display SQL output confirming that three records have been inserted into
cast_members, each properly associated with"movie_id": 1. This demonstrates Rails' relationship management in action.Type the following to verify which cast members belong to Text M for Murder:
movie.cast_membersThis returns detailed ActiveRecord output for all three cast member records. For a cleaner view, let's count them.
Type:
movie.cast_members.countTerminal will print
3. We can also access individual cast members through the association.Type the following:
movie.cast_members.first.nameTerminal will print
John Jones. Note that this retrieves the full name of the first cast member, not just the first name field. Array-style access also works seamlessly.Type:
movie.cast_members[1].nameSince array indexing starts at zero, this returns
Susan Shine, our second cast member.NOTE: Rails' naming conventions can initially seem inconsistent, but they follow logical patterns. Capitalized class names like
CastMemberreference the model class directly, while lowercase, underscored versions likecast_membersrepresent association methods and database tables. This duality becomes intuitive with practice and enables Rails' powerful convention-over-configuration philosophy.Try typing the following:
susan = CastMember.find_by(name: "Susan Shine")Terminal will display Susan's complete record. This demonstrates Rails' flexible query methods—particularly useful when you don't know the specific ID.
Type the following:
susan.movie.titleTerminal will print
Text M for Murder. This illustrates the bidirectional nature of our association—we can navigate from cast member to movie just as easily as from movie to cast member.The diagram below illustrates how Rails determines relationship directions. The model containing the reference field (shown in italic) uses
belongs_to, while the referenced model useshas_many. Therefore, cast_member with its foreign keymovie_idbelongs to movie. Meanwhile, movie has many cast members. Understanding this pattern is crucial for designing scalable database relationships.
The foreign key originates from our model generation command:
rails generate model cast_member name:string movie:referencesThis created the
movie_idfield, which serves as our foreign key. It's "foreign" because it references another table's data, and a "key" because it points to that table's primary identifier (id).Rails enables bulk record creation through arrays of hashes, significantly streamlining data entry. Let's add cast members to Planet of the Apps (movie ID 2) using this more efficient approach:
Movie.find(2).cast_members.create([{name: "Mark Wallburg"}, {name: "Hellova Carter"}, {name: "Tim Rath"}])The
createmethod combinesnewandsaveinto a single operation, and accepting an array of hashes allows multiple records to be created atomically.To expedite the remaining data entry, we've prepared cast member data for all movies. Switch to the Finder.
Navigate to and open the following file, which will probably open in TextEdit: Class Files > yourname-Rails Class > flix snippets > cast_members.txt
Hit Cmd–A to select all the contents of the file and copy them (Cmd–C).
Close the file and switch to the Terminal.
Paste (Cmd–V) the text, then press Return once to apply the command.
Excellent! All cast members have been added successfully. Since we used
create(), all records are automatically saved to the database.Type the following to exit Rails console:
exit
Rails Console Data Creation Methods
| Feature | new() + save() | create() |
|---|---|---|
| Steps Required | Two steps | One step |
| Memory Usage | Objects in memory | Direct to database |
| Batch Operations | Manual iteration | Array of hashes |
| Error Handling | Before save | Immediate |
Rails uses CastMember (capitalized) for class names and cast_members (lowercase, underscored) for method names. This convention switching is automatic and consistent throughout Rails.
Updating Views to Include the Cast Members Model
Now we'll integrate cast member display into our views using a custom model method. This approach keeps our view logic clean while providing reusable formatting functionality.
Let's create a presentation method in our model to format cast member names consistently across all views. Switch to your code editor.
Open app > models > movie.rb
Add the following bold code at the bottom of your code:
def cast
   cast_members.map { }
end

end
This method framework will transform our cast member collection into a displayable format. Complete the implementation with the following bold code:
cast_members.map { |c| c.name }.join(", ")This elegant one-liner extracts each cast member's name and joins them with commas, creating professional-looking cast lists regardless of the number of actors.
To ensure robust error handling when cast members might be nil, add defensive coding with an
unlesscondition:cast_members.map { |c| c.name }.join(", ")unless cast_members.nil?Save the file.
Open app > views > movies > index.html.erb
Find the following code, which should start around line 21:
<h3><%= movie.title %></h3>
<div><%= movie.mpaa_rating %>, <%= movie.runtime_hours %></div>
Add the following bold code:
<h3><%= movie.title %></h3>
<div><%= movie.cast %></div>
<div><%= movie.mpaa_rating %>, <%= movie.runtime_hours %></div>
Save the file.
Open app > views > movies > show.html.erb
Add the following code around line 7:
<h2><%= @movie.title %></h2>
<p>Cast: <%= @movie.cast %></p>
<p class="mpaa-rating">Rating: <%= @movie.mpaa_rating %></p>
Save the file.
Type the following in Terminal:
rails serverSwitch to a browser and navigate to localhost:3000/movies
Notice that cast members now appear beneath the movie posters, providing immediate context for each film. Click on any movie to view its detail page—cast information displays there as well, creating a consistent user experience.
Switch back to Terminal and hit CTRL–C to shut down the server.
cast_members.map { |c| c.name }.join(', ') unless cast_members.nil?Always include nil checks when working with associations to prevent errors when records have no associated data.
Creating a Genre Model
The genre model presents a different relationship pattern: one-to-many rather than many-to-one. Understanding where to place foreign keys is crucial for proper database design and optimal query performance.
For genres, each category (Horror, Action, Drama) appears once in our genre table but applies to multiple movies. Conversely, each movie belongs to exactly one genre. This means the movie model should contain the foreign key reference to genre—following the principle that the "many" side of a one-to-many relationship holds the foreign key.
In Terminal, create the genre model by typing the following:
rails generate model genre name:stringThis model contains only the name field because the foreign key relationship will be established in the movies model. Let's add that reference now.
Generate a migration to add the genre reference to movies:
rails generate migration add_genre_id_to_movies genre:referencesBefore applying this migration, we need to make a critical adjustment for our existing data. Open the newly-created migration file and modify this line:
add_reference :movies, :genre, null: false, foreign_key: trueRemove
null: false,so it becomes:add_reference :movies, :genre, foreign_key: trueThis modification is essential because we have existing movie records that would violate the null constraint. In production systems, you'd typically populate these fields with default values, but for our development environment, allowing null values provides the necessary flexibility.
Save the file.
Type the following to apply the migration:
rails db:migrateNow we need to establish the ActiveRecord associations in both models to enable Rails' relationship magic.
Switch to your code editor.
Open app > models > genre.rb
Add the following bold code:
class Genre < ActiveRecord::Base
   has_many :movies
end
Save the file.
Open app > models > movie.rb
Add the following code around line 7:
has_many :cast_members
belongs_to :genre, optional: true
The
optional: trueparameter is crucial here—it allows existing movies without assigned genres to remain valid, preventing validation errors during the transition period.
The belongs_to relationship might seem counterintuitive—after all, genres don't "own" movies in any meaningful business sense. However, in Rails terminology, belongs_to simply identifies which model contains the foreign key. It's a technical relationship indicator rather than a semantic one, and this distinction becomes natural with experience.
Save the file.
Switch to Terminal.
Let's populate our genre table using Rails console for speed and efficiency. Type the following:
rails consoleType the following to create our initial genre categories:
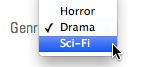
Genre.create(name: "Horror")
Genre.create(name: "Drama")
Genre.create(name: "Sci-Fi")
This basic genre set covers our current film collection. In a production system, you'd likely have a more comprehensive taxonomy, potentially with subcategories and multiple genre assignments per film.
Type the following to exit the Rails console:
exit
Foreign Key Placement Decision
| Feature | Cast Members | Genres |
|---|---|---|
| Relationship Type | Many cast per movie | One genre per movie |
| Foreign Key Location | cast_members table | movies table |
| Database Efficiency | Multiple records | Single reference |
Genre Implementation Steps
Create Genre Model
Generate model with only name field since foreign key goes in movies table
Add Foreign Key Migration
Use add_reference migration to add genre_id to existing movies table
Remove Null Constraint
Allow existing movies to have null genre_id to prevent migration errors
Update Model Associations
Add has_many to Genre and belongs_to with optional: true to Movie
Re-purposing the Play Trailer Button As an Edit Button
With our genre model established, we need an efficient way to assign genres to movies. Rather than manually navigating to each movie's edit URL, let's streamline the workflow by converting the existing trailer button into an edit button.
This modification demonstrates a common development pattern: repurposing UI elements as application requirements evolve, maintaining user familiarity while adding new functionality.
Switch to your code editor.
Open app > views > movies > show.html.erb
Find the followi