
Getting the Project Files
- Download the project files.
- After the download completes, extract the archive if your system hasn't done so automatically. You'll find a Premiere Pro Masking Technique folder containing all necessary assets for this tutorial.
Setup Requirements
Ensures you have the Premiere Pro Masking Technique folder ready
Confirm all River footage and Beach footage files are accessible
Load the timeline with both video layers properly arranged
Project Overview
Masking is one of Premiere Pro's most versatile compositing techniques, essential for professional video editors working in 2026's content-driven landscape. In this tutorial, we'll demonstrate advanced masking workflows by seamlessly blending two distinct video clips—transforming a beach scene into a mountain backdrop through precise mask creation and color correction.
Our approach involves creating a custom mask shape on the primary footage layer, followed by strategic color grading using an adjustment layer with its own targeted mask. This dual-masking technique gives you granular control over both the composite's visual boundaries and its color harmony—skills that are invaluable whether you're working on corporate videos, social content, or narrative projects.
Workflow Overview
Rectangle Mask Creation
Draw rectangular mask on river footage using indicated points to define the composite area
Mask Refinement
Perform precise tweaking of mask boundaries and feathering for seamless integration
Adjustment Layer Setup
Create identical rectangle on adjustment layer for isolated color correction effects
Color Balance Application
Apply targeted color effects with specific settings to achieve proper color matching
Footage Mask
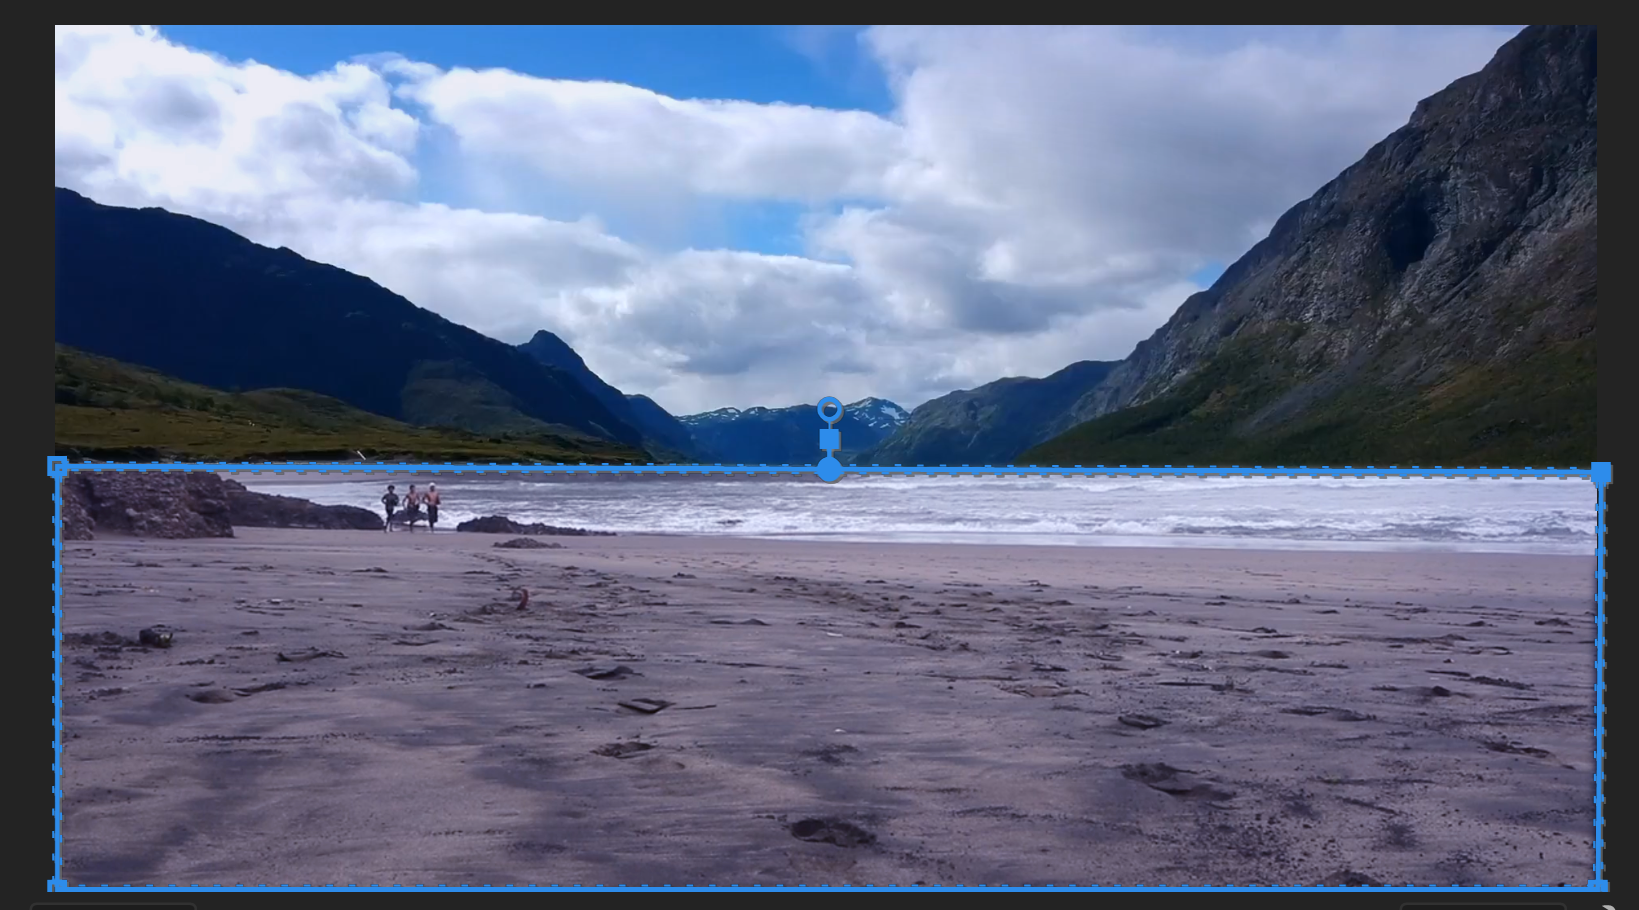
- Begin by selecting the River footage in your timeline.
- In the Timeline, toggle the visibility of the River footage on and off to observe how it layers over the Beach footage beneath. This preview helps you understand the composite relationship before creating your mask.
- With the River footage selected, navigate to the Effect Controls panel in the upper-left workspace area.
- Scroll down to locate the Opacity settings section.
- Click the pen icon labeled Free Bezier Tool located beneath the opacity controls.
- Professional tip: Don't confuse this with the Pen Tool in the main toolbar, which creates vector shapes. The Free Bezier Tool under Opacity is specifically designed for mask creation and only appears in this context, though both share similar iconography.
- With the Free Bezier Tool active, create a rectangular mask by clicking on the four corners of the river area within your footage. Complete the shape by clicking your initial point to close the path. Your mask should look like this:
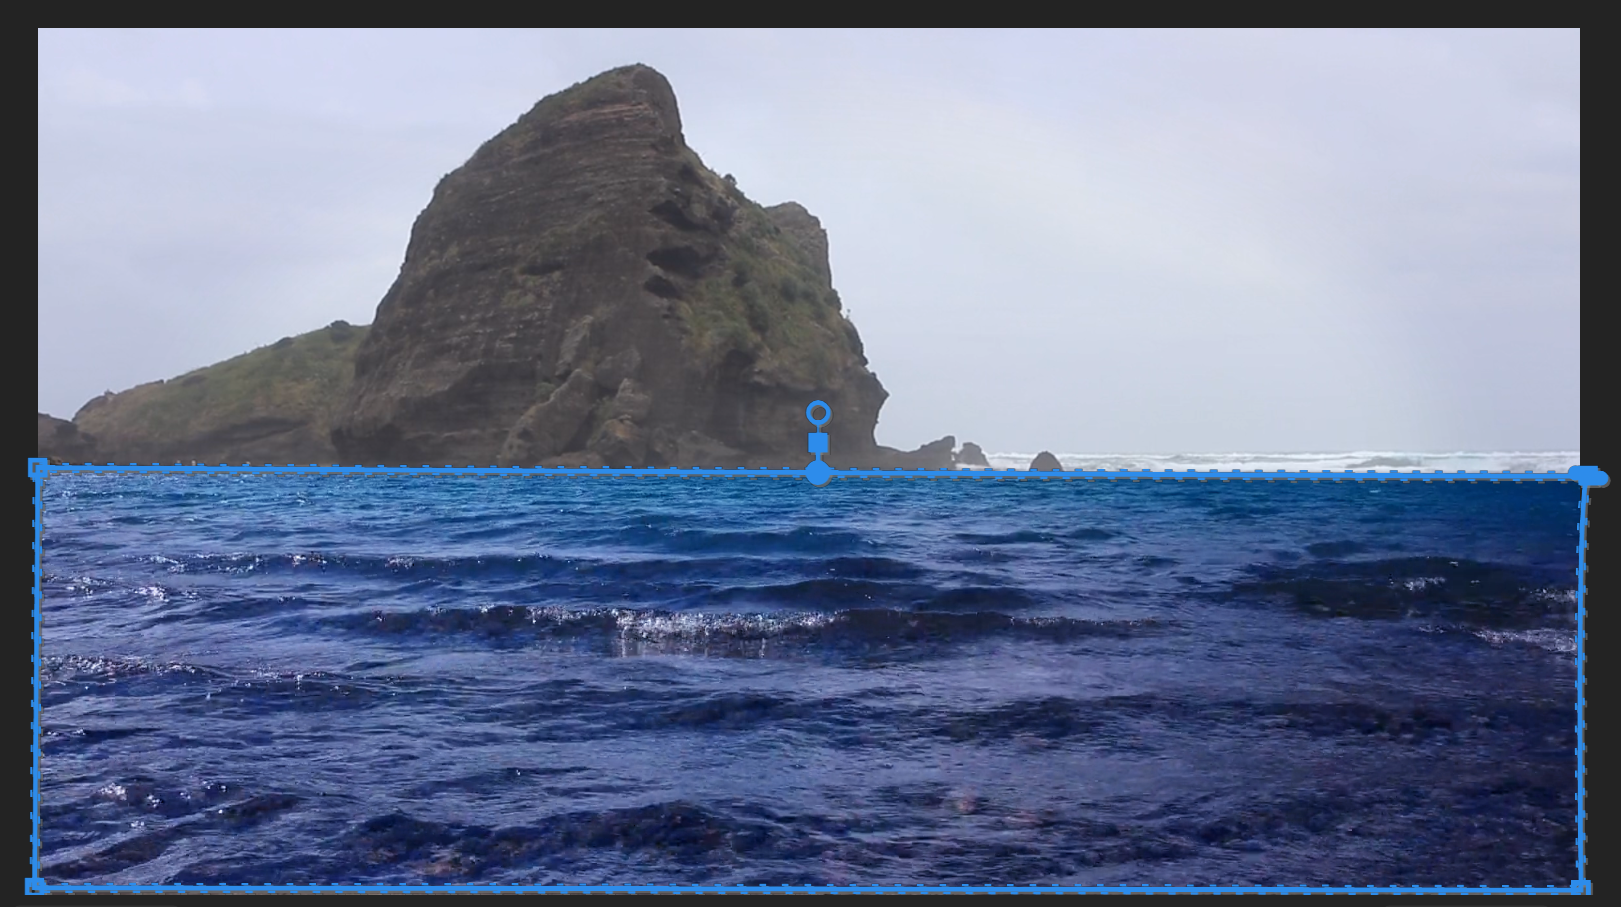
- To ensure complete coverage at the bottom edge, select the lower-left mask point.
- Drag this point downward beyond the footage frame into the gray border area.
- Repeat this process with the lower-right point, positioning both bottom anchors below the visible footage area. This technique prevents edge artifacts and ensures clean compositing:
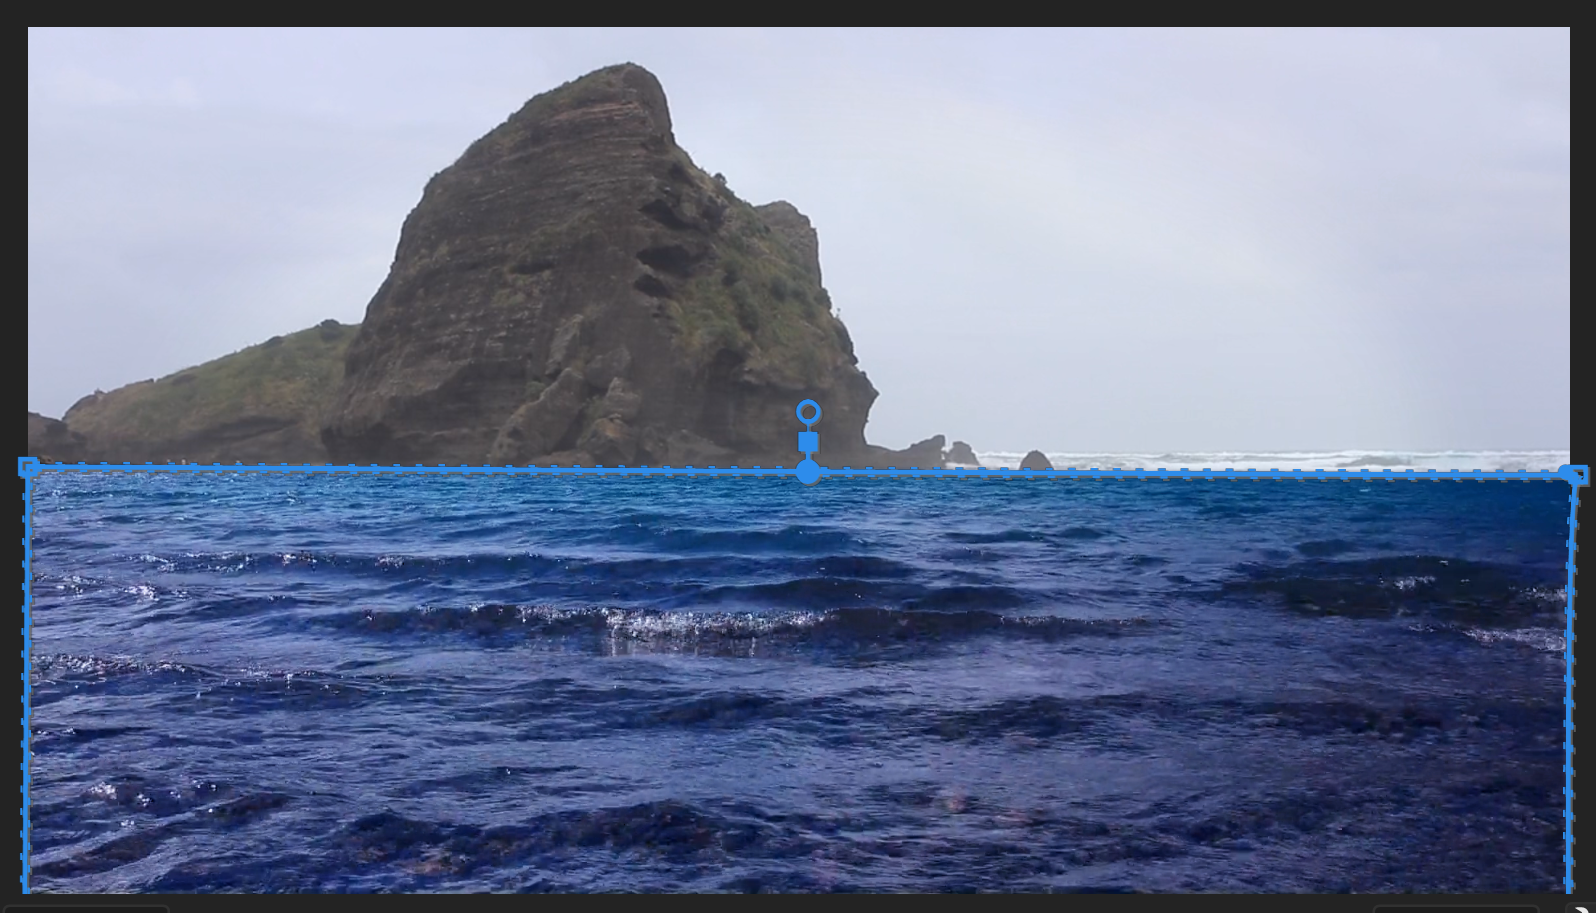
- In the Effect Controls panel, locate the newly generated Mask parameters and check the Invert option. This reverses the mask's effect, revealing the background layer within your defined area.
- Set the Mask Feather value to 15 pixels. This creates a natural edge transition that's crucial for believable composites.
- Position your playhead at 00;00;00;00 to start from the beginning.
- Press Spacebar to preview your composite. You should now see the joggers against the mountain backdrop—a successful blend of both video sources through strategic masking.
Now that we have our basic composite working, we need to address color matching between the two sources to create a cohesive final image.
Use the Free Bezier tool under Opacity settings, not the regular Pen tool from the toolbar. Both share the same fountain pen icon but serve different functions - one creates shapes while the other creates masks.
Mask Creation Process
Select River Footage
Toggle visibility to see Beach footage underneath and understand the layering
Access Free Bezier Tool
Navigate to Effect Controls panel and locate the pen icon under Opacity settings
Draw Rectangle Mask
Click on river corners to create rectangle, ensuring to close the shape by clicking the first point
Extend Mask Coverage
Drag lower points below footage window into grey border space for complete coverage
Configure Mask Settings
Enable Invert option and set Mask Feather to 15 for softened edges
Color Balance
- The Beach footage exhibits warmer color temperatures that clash with the cooler mountain environment. Select the Adjustment Layer positioned above the River footage in your timeline stack.
- In the Effects panel, search for Color Balance using the search field.
- Drag the Color Balance effect onto your Adjustment Layer (not directly onto the Beach footage).
- Navigate to the Effect Controls panel and locate your newly applied Color Balance effect parameters.
- Adjust Shadow Blue Balance to 5 to add subtle coolness to the darker areas.
- Set Midtone Blue Balance to 25 for the most noticeable color shift in the mid-range tones.
- Configure Highlight Blue Balance to 15 to maintain natural-looking bright areas while cooling the overall tone.
- Access the Opacity settings for this adjustment layer and select the Free Bezier Tool.
- Create a second rectangular mask on the adjustment layer, carefully aligning it with your original footage mask. Fine-tune the anchor points as needed to ensure precise coverage:
- Set the Mask Feather to 10 pixels for smooth edge blending that won't draw attention to the effect boundaries.
Color Balance Adjustments
Beach footage appears too warm compared to the mountain background. Blue balance adjustments counteract the warm tones, with midtones receiving the highest correction at 25 to achieve natural color matching.
Conclusion
Congratulations—you've mastered one of Premiere Pro's most essential compositing techniques. This masking workflow represents fundamental skills that professional editors rely on daily, from removing unwanted objects to creating complex visual narratives that would be impossible with single-source footage.
The dual-masking approach you've learned here—combining shape masks with targeted color correction—opens up countless creative possibilities. Consider experimenting with different mask shapes for organic objects, animated mask paths for moving elements, or multiple adjustment layers for complex color grading scenarios. These techniques scale beautifully whether you're working on social media content, corporate presentations, or high-end commercial projects.
Happy editing!
Advanced Applications
Complex Shape Masking
Apply masking techniques to irregularly shaped objects for sophisticated compositing. Create layered footage with multiple masked elements.
Object Removal
Use masks to clip out unwanted items from footage. Combine with replacement footage for seamless content editing.
Targeted Effects
Mask adjustment layers with specific effects to isolate color correction or stylistic changes to portions of your footage.
Go Beyond Premiere Pro
Ready to elevate your video editing expertise? Our comprehensive motion graphics programs in NYC combine industry-standard techniques with real-world project experience. Our veteran instructors bring decades of professional experience from top-tier production companies and are committed to accelerating your career trajectory in motion graphics and video editing.
Choose from flexible learning options including live online sessions and in-person classes at our state-of-the-art Midtown facility. Explore our current course offerings:
Professional Training Options
NYC Premiere Pro Classes
Comprehensive video editing training with industry-standard workflows. Learn advanced compositing and color correction techniques from expert instructors.
NYC After Effects Classes
Master motion graphics and visual effects for professional video production. Complement your Premiere Pro skills with advanced animation capabilities.
NYC Video Editing Classes
Complete video production training covering multiple software platforms. Build a comprehensive skill set for professional video editing careers.
Classes available both live online and in-person at the Midtown office location. Expert instructors provide years of industry experience to help launch your motion graphics career.