Getting the Project Files
- Download the project files.
- After the download completes, unzip the file if it hasn't been done automatically. You should have a Premiere Pro Black & White Effect folder containing all the necessary assets and footage for this tutorial.
Project Overview
This tutorial demonstrates a professional technique for creating dynamic black-and-white transitions that's become increasingly popular in contemporary video production. The effect consists of three key components: your primary footage, a sophisticated black-and-white conversion using the Calculations effect, and an authentic film grain overlay that enhances the vintage aesthetic.
We're specifically using the Calculations effect rather than simpler desaturation methods because it offers superior control over luminance values and channel blending—critical for achieving that distinctive, high-contrast look you see in premium productions. The keyframing technique we'll explore allows for seamless transitions between color and monochrome, perfect for narrative emphasis or stylistic flourishes.
This technique is particularly valuable for documentary work, music videos, and narrative projects where visual storytelling benefits from dramatic tonal shifts. Let's dive into the implementation.
Project Components Breakdown
The Calculations effect offers superior versatility and adjustment capabilities compared to simple desaturation effects, providing professional-grade control over color channel blending.
Getting Started
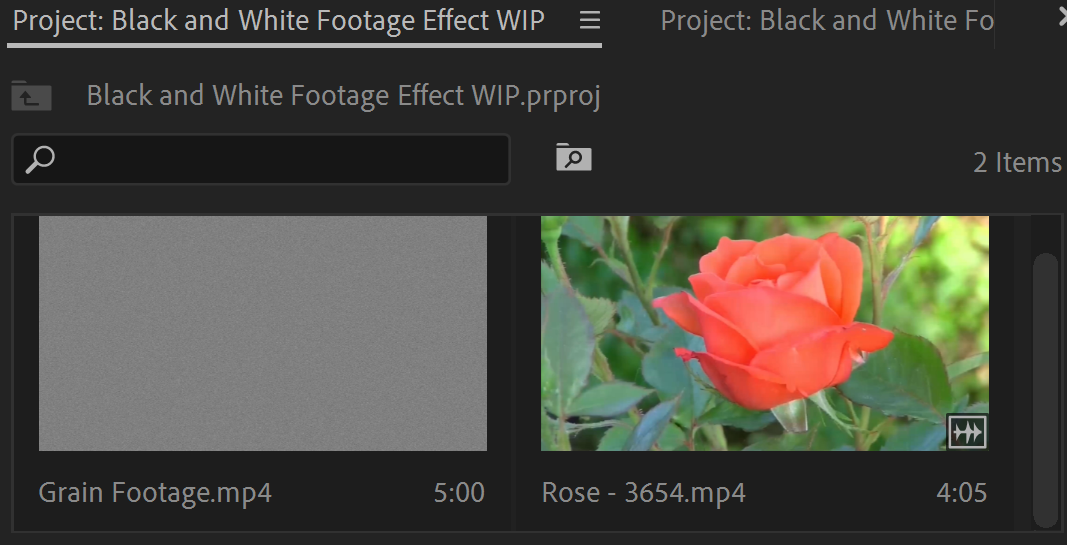
1. In the lower-left corner, you should see footage already loaded into the Project Bin. This pre-organized workspace streamlines your workflow from the start.
2. Verify that your program is in Editing mode by checking the top workspace bar. This ensures all the necessary panels are visible for this tutorial.

3. Drag and drop the Rose footage into the Source window to begin the editing process.
4. In the Source window, position the Playhead  to 00;00;04;00. This timing allows for a natural introduction before the effect begins.
5. Press I to set your in-point, marking where your edited clip will begin.
6. Move the Playhead to 00;00;07;00. This three-second duration provides sufficient time to showcase the transition effect.
7. Press O to set your out-point, completing your clip selection.
8. Drag the trimmed Rose footage clip to the Timeline to automatically create a new sequence with optimal settings.
9. In the Project Bin, right-click on the newly created sequence that appears.
10. Select Rename from the context menu.
11. Name the sequence Rose Edited to maintain organized project structure.
12. Delete the audio layer from the Timeline, as this tutorial focuses purely on visual effects and the audio isn't necessary for our demonstration.

Timeline Setup Process
Load and Preview Footage
Import Rose footage into Project Bin and drag to Source window for preview and trimming
Set In and Out Points
Use I and O keys to mark precise start (00;00;04;00) and end points (00;00;07;00) for your clip
Create Sequence
Drag footage to Timeline to automatically create a sequence with matching settings
Clean Up Timeline
Remove unnecessary audio layer and rename sequence to Rose Edited for organization
Adding Authentic Film Grain
Before applying the black-and-white effect, we'll establish our film grain foundation. This order ensures the grain interacts naturally with both the color and monochrome portions of our footage, creating a cohesive vintage aesthetic throughout the transition.
1. Locate the Grain footage in your Project Bin. This specialized overlay footage simulates the organic texture of analog film stock.
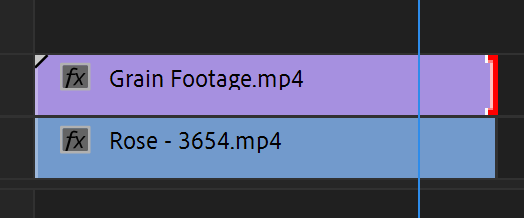
2. Drag the grain footage to the timeline layer above your Rose footage. Layer order is crucial here—the grain must sit on top to blend properly.
3. Extend the Grain footage duration to match your Rose footage by dragging its endpoint. This ensures consistent texture throughout your clip.
4. Select the Grain footage layer to access its properties.
5. Navigate to Effect Controls in the top panel area.

6. Change the Blend Mode to Hard Light. This blend mode preserves the underlying image's contrast while adding the grain's texture, creating that authentic film look without overwhelming the original footage.
Hard Light blend mode combines multiply and screen blending, creating realistic grain texture that enhances highlights and deepens shadows for an authentic film look.
Grain Application Checklist
Ensures proper layering for blend mode effect
Prevents inconsistent texture across the timeline
Creates realistic film grain integration
Fine-tune grain intensity for desired aesthetic
Implementing the Black and White Effect
Now we'll create the sophisticated black-and-white conversion that forms the heart of this effect. The Calculations effect gives us precise control over how different color channels contribute to our monochrome image, resulting in superior tonal quality compared to basic desaturation.
1. Select  the Rose footage layer in your timeline.
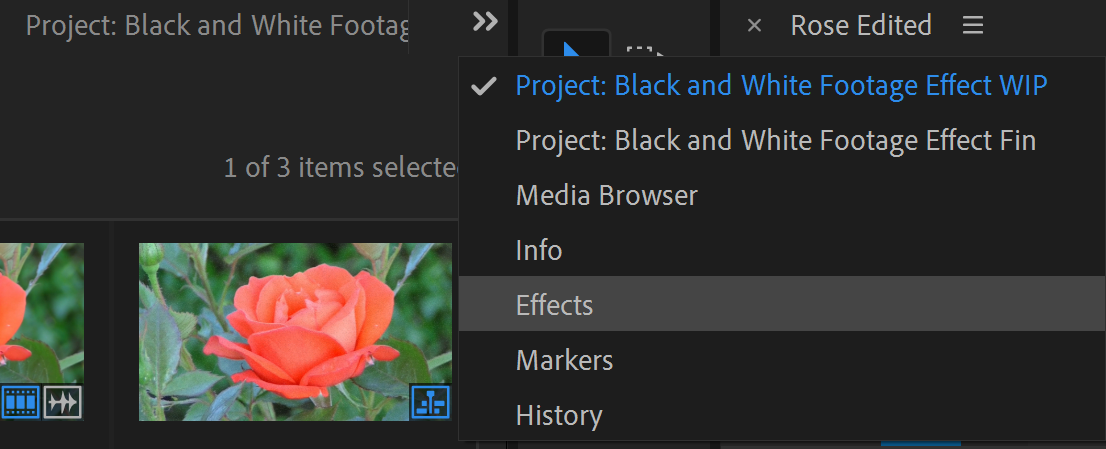
2. Open the Effects panel by clicking the panel tabs or using the arrows near the Project Bin in the lower-left area.
3. Type Calculations in the search field to quickly locate this powerful compositing effect.
4. Drag the Calculations effect directly onto your Rose footage layer.
5. In the Effect Controls panel, change the Input Channel to Gray. This setting converts the color information to grayscale values while maintaining optimal contrast and detail.
6. Position your Playhead to 00;00;01;10. This timing allows viewers to see the original color footage before the transition begins.
7. Click the stopwatch icon next to Second Layer Opacity to enable keyframing. This creates your first keyframe at the current playhead position.
8. Move the Playhead to 00;00;02;08. This creates a smooth, natural transition duration.
9. Increase the Second Layer Opacity to 100%. This second keyframe completes your transition, gradually revealing the full black-and-white effect over time. The result is a sophisticated fade from color to monochrome that feels both intentional and cinematic.
Effect Animation Timeline
Initial State
Full color footage with applied Calculations effect
Keyframe Start
Set first keyframe for Second Layer Opacity transition
Full Effect
Complete transition to black and white at 100% opacity
Calculations vs Other B&W Methods
Conclusion
You've successfully mastered a professional-grade black-and-white transition technique that's widely used in contemporary video production. This effect works particularly well in documentary storytelling, music videos, and narrative projects where visual transitions support emotional or thematic shifts.
For advanced applications, consider experimenting with different color channels in the Calculations effect—red channels often provide dramatic contrast for skin tones, while blue channels can enhance architectural details. You can also vary your grain footage sources or create custom grain using procedural noise for unique textures.
Try creating selective black-and-white effects by masking the Calculations layer and adding feathered edges—this technique is excellent for drawing attention to specific subjects while maintaining color in the surrounding area. For complex color grading workflows, layer multiple Calculations effects with different blend modes to create custom color-to-monochrome transitions that match your project's unique aesthetic requirements.
Advanced Techniques to Explore
Color Channel Experiments
Modify input channels in Calculations for different monochrome looks. Each channel creates unique contrast and mood.
Selective Masking
Create black and white windows with soft edges using masks. Combine with blur for cinematic focus effects.
Multi-Effect Layering
Stack multiple color effects with keyframes for complex transitions through different color schemes and moods.
Advance Your Motion Graphics Career
Ready to master professional video production techniques? We offer industry-leading motion graphics training programs designed for serious creatives and career-focused professionals. Our expert instructors bring decades of experience from major studios and production houses, providing real-world insights that go beyond basic tutorials.
Our small class sizes ensure personalized feedback and hands-on mentoring, while our curriculum stays current with industry standards and emerging technologies. Whether you're transitioning into motion graphics or advancing your existing skills, our comprehensive programs provide the foundation for sustained career growth in this competitive field.