Topics Covered in This Photoshop Tutorial:
Spot Healing Brush, Healing Brush, Clone Stamp, Content-Aware Fill
Exercise Preview

Photo by Vladimir Kudinov
Exercise Overview
In this exercise, you'll master the art of removing unwanted elements—one of the most fundamental and frequently requested retouching tasks in professional photography. Whether you're cleaning up distracting background elements for a client shoot or perfecting images for commercial use, these techniques form the backbone of professional image editing.
In Photoshop, go to File > Open.
Navigate to Desktop > Class Files > Photoshop Class and double–click on deer.jpg to open it.
As shown below, in the Layers panel, click and drag the Background layer down to the New layer icon
 at the bottom right. This creates a duplicate layer that preserves your original image—a critical practice in professional workflows that ensures you can always revert to the untouched source material.
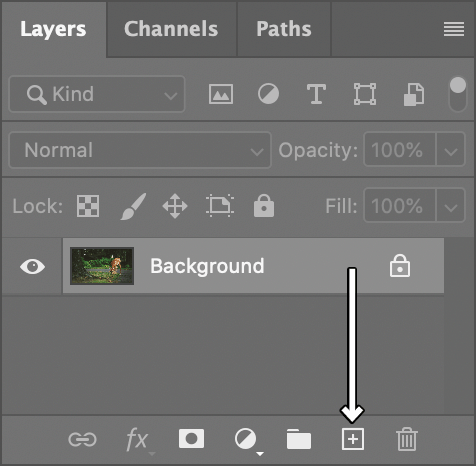
Photo Retouching Workflow Setup
Open Source Image
Navigate to File > Open and locate your image file in the designated class folder
Create Duplicate Layer
Drag Background layer to New Layer icon to preserve original image data
Set Working View
Choose View > 100% for accurate pixel-level retouching work
The Clone Stamp Tool
We'll begin by addressing the bright spots in the dark background that draw the viewer's eye away from the main subject. These distracting elements are common in natural photography and learning to remove them seamlessly is essential for creating polished, professional images. Let's start with the light blobs in the top left near the tree.
- Choose View > 100% to work at actual pixels for precise editing.
- Hold your Spacebar to activate the Hand tool and drag anywhere on the image to navigate to the top left of the photo where the light blobs are located.
- In the Tools panel on the left side of the Photoshop window, select the Clone Stamp tool
 .
. Configure your brush settings in the Options bar at the top of the screen. Click on the Brush Preset picker, then in the General Brushes folder, select the first brush labeled Soft Round.

- Set Size to 200 px for broad coverage of the light areas.
- Hit Return (Mac) or Enter (Windows) to close the brush picker.
- In the Options bar, ensure Opacity is set to 100% for complete coverage.
Hold Option (Mac) or Alt (Windows) and click on a section of clean, dark green background that would naturally blend with the area you're fixing. This establishes your "source point" for cloning.
Drag over one of the light areas to paint the sampled background texture over the unwanted element.
If the result doesn't match seamlessly, refine your approach:
- Choose Edit > Undo Clone Stamp to reverse the edit.
- Hold Option (Mac) or Alt (Windows) and click on a different area of background that better matches the lighting and texture.
- Drag over the light area again with this new source sample.
The Clone Stamp's precision comes with a learning curve—success depends entirely on selecting source material that perfectly matches your target area in terms of lighting, texture, and color temperature.
Always sample from areas with similar lighting and texture. Use Option-click (Mac) or ALT-click (Windows) to set your source point before painting over unwanted elements.
Clone Stamp Configuration Steps
Provides natural blending edges for seamless retouching
Appropriate size for covering larger unwanted areas efficiently
Ensures complete coverage of problematic areas in single pass
Choose areas that match target location in color and texture
The Spot Healing Brush
While the Clone Stamp offers complete control, it requires careful sampling to achieve convincing results. The Spot Healing Brush takes a different approach, leveraging Adobe's algorithms to intelligently analyze surrounding pixels and generate appropriate fill content automatically.
- Execute Edit > Undo Clone Stamp to remove your previous work (you may need to repeat this command several times to fully revert all Clone Stamp edits).
- In the Tools panel, select the Spot Healing Brush tool
 .
. Configure your brush in the Options bar by clicking the Brush Preset picker:
- Set Size to 100 px for more precise control.
- Set Hardness to 100%—a hard-edged brush ensures complete coverage of the unwanted elements.
- Hit Return (Mac) or Enter (Windows) to close the brush picker.
- This intelligent tool analyzes surrounding pixels to determine appropriate fill content, eliminating the need for manual sampling. Drag over the entire light area, ensuring complete coverage. Release your mouse button and watch as Photoshop processes the edit—the result should integrate seamlessly with the surrounding background.
- Hold the Spacebar and drag to navigate down to the base of the tree where you'll find your next challenge.
At the base of the tree, near the image center, you'll notice a light tan blob—likely an out-of-focus leaf. Apply the Spot Healing Brush
to remove this distraction.The results should be quite good, though you may notice the algorithm's interpretation doesn't always align perfectly with your creative vision. This limitation leads us to our next tool, which bridges the gap between automated convenience and manual control.
Execute Edit > Undo Spot Healing Brush to revert this edit (repeat if necessary to remove all previous retouching).
Clone Stamp vs Spot Healing Brush
| Feature | Clone Stamp | Spot Healing Brush |
|---|---|---|
| User Control | Manual source selection | Automatic analysis |
| Speed | Requires sampling step | Instant application |
| Accuracy | Exact replication | Intelligent blending |
| Best Use Case | Complex textures | Simple spot removal |
The Healing Brush
The Healing Brush  represents the best of both worlds, combining the Clone Stamp's precise source control with the Spot Healing Brush's intelligent blending capabilities. This hybrid approach gives you creative control over source material while automating the complex task of seamless integration.
- In the Tools panel, click and hold on the Spot Healing Brush tool to reveal the tool group, then select the Healing Brush tool .
- Hold Option (Mac) or Alt (Windows) and click on an area that offers appropriate texture and color for replacing the leaf area—look for similar lighting conditions and surface characteristics.
Position your cursor over the blurry tan leaf and evaluate your source selection:
- If the sampled area appears to be a good match for texture and general tone, drag over the leaf to heal it.
- If the match seems inadequate, hold Option (Mac) or Alt (Windows) and click on a different area before attempting the heal again.
PROFESSIONAL INSIGHT: The key difference between these tools lies in their approach to blending. The Healing Brush
and Clone Stamp use identical sampling workflows, but the Clone Stamp performs literal pixel copying—like a sophisticated copy-and-paste operation. The Healing Brush takes your sampled texture and intelligently blends it with the target area's existing color and luminosity values, creating more natural-looking results. Think of the Clone Stamp as "copy and paste" and the Healing Brush as "copy, paste, and intelligently blend."
The Clone Stamp clones an area exactly like copying and pasting, whereas the Healing Brush heals an area by melding textures from the source and color brightness from the destinationThe Healing Brush provides the perfect balance between manual control and automatic blending, making it ideal for areas where exact cloning would look unnatural.
Content-Aware Fill
For larger areas or complex backgrounds, painting over unwanted elements can be time-intensive and challenging to execute uniformly. Content-Aware Fill offers a selection-based approach that leverages Adobe's advanced algorithms to analyze extensive surrounding areas and generate contextually appropriate fill content—particularly effective for organic backgrounds like foliage, sky, or water.
- Hold the Spacebar and drag to navigate upward, positioning the area above the deer in your view.
- Select the Lasso tool
 from the Tools panel.
 Create a selection around the larger light blob above the deer, ensuring you capture the entire unwanted element plus a margin of surrounding background for context. This border area helps the algorithm understand the desired fill pattern.
If your selection needs refinement, choose Selection > Deselect and create a new selection.
Navigate to Edit > Fill to access the streamlined Content-Aware Fill option.
NOTE: While Edit > Content-Aware Fill provides advanced controls for complex retouching scenarios, the standard Edit > Fill offers the same core functionality with a more efficient workflow for straightforward removals.
- Set Contents to Content-Aware to enable algorithmic fill generation.
- Click OK to process the fill operation.
- Choose Selection > Deselect to remove the selection marquee and evaluate the final result clearly.
The algorithm should produce convincing results that blend naturally with the surrounding environment.
PRO TIP: Content-Aware Fill incorporates randomization in its processing. If you're not satisfied with the initial result, you can undo the deselect command, reapply the fill, and Photoshop will generate a slightly different solution using the same source analysis.
Content-Aware Fill Process
Create Selection
Use Lasso tool to select unwanted element plus small surrounding area for context
Access Fill Dialog
Navigate to Edit > Fill for standard content-aware functionality
Apply Content-Aware
Set Contents to Content-Aware and click OK for automatic intelligent filling
Evaluate Results
Deselect to view results; can undo and refill for different algorithmic outcomes
Saving the File
Proper file management is crucial for professional workflows. Always save your working files in Photoshop's native format to preserve layers, adjustment capabilities, and maximum image quality for future revisions.
- When you're satisfied with your retouching results, execute File > Save As.
If Photoshop prompts about cloud storage versus local storage:
- Check Don't show again to streamline future saves.
- Click Save on your computer for local file management.
Configure your save settings for optimal workflow compatibility:
- Set Format (Mac) or Save as type (Windows) to Photoshop to preserve all editing capabilities.
- Navigate to the Photoshop Class folder if not already there.
- Name the file yourname-deer.psd and click Save.
- If prompted about Maximize Compatibility, keep this option checked and click OK—this ensures your file remains accessible across different Photoshop versions and third-party applications.
PROFESSIONAL NOTE: While JPEG remains the standard delivery format for most photography due to its widespread compatibility and efficient compression, always maintain your master files as Photoshop Documents (.psd). PSD format preserves your complete layer structure, adjustment layers, and maintains pixel-perfect image quality without the generational loss inherent in JPEG compression. This approach ensures your work remains fully editable for client revisions or future enhancement requests.
Congratulations—you've successfully completed your first professional retouching project using industry-standard techniques!
File Format Considerations
Always save retouched work as PSD files to maintain layers and avoid JPEG compression artifacts that degrade image quality over time.
Optional Bonus Challenge (If You Complete Early)
Ready to test your newly acquired skills on a more complex scenario? This advanced exercise will challenge you to remove a larger, more detailed subject while maintaining natural-looking results.
- From the Photoshop Class folder, open surfer.jpg.
Apply the techniques you've mastered to remove the surfer from the scene entirely, creating a clean seascape.
ADVANCED TIP: When removing complex subjects with the Healing Brushes or Content-Aware Fill, achieve the most convincing results by tackling the entire unwanted element in a single operation rather than attempting piecemeal removal. This approach provides the algorithms with maximum surrounding context for generating cohesive, natural-looking fill content.