Topics Covered in This Lightroom Tutorial:
Removing One Kayak from the Photo, Changing the Source Area
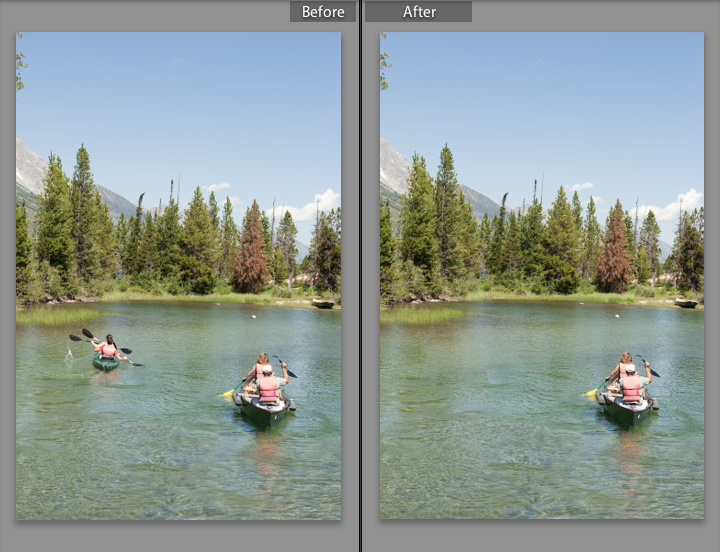
Exercise Preview
Exercise Overview
In this exercise, you'll master the Spot Removal tool to seamlessly eliminate complex shapes from your images—a technique that's become increasingly essential in professional workflows. Whether you're removing unwanted tourists from architectural shots or cleaning up distracting elements in commercial photography, this tool delivers results that once required extensive Photoshop work.
This exercise demonstrates removing a large, complex shape - specifically kayakers with their paddles, splash, wake, and reflections - showcasing the Spot Removal tool's capabilities beyond simple blemish removal.
Removing One Kayak from the Photo
We'll continue working with the images you imported in the first exercise, applying professional-grade object removal techniques that can save hours in post-production workflows.
In the Library module, select the kayaks photo (20110822_YourName_022).
Press the D key to switch to the Develop module.
Below the Histogram panel on the right, click the Spot Removal tool
 .
.At the top of the Navigator panel, click on 1:1 to view the image at 100% magnification. This pixel-level view is crucial for precision work. Move the preview box over the image until you can clearly see the leftmost kayak.
Press the right bracket key
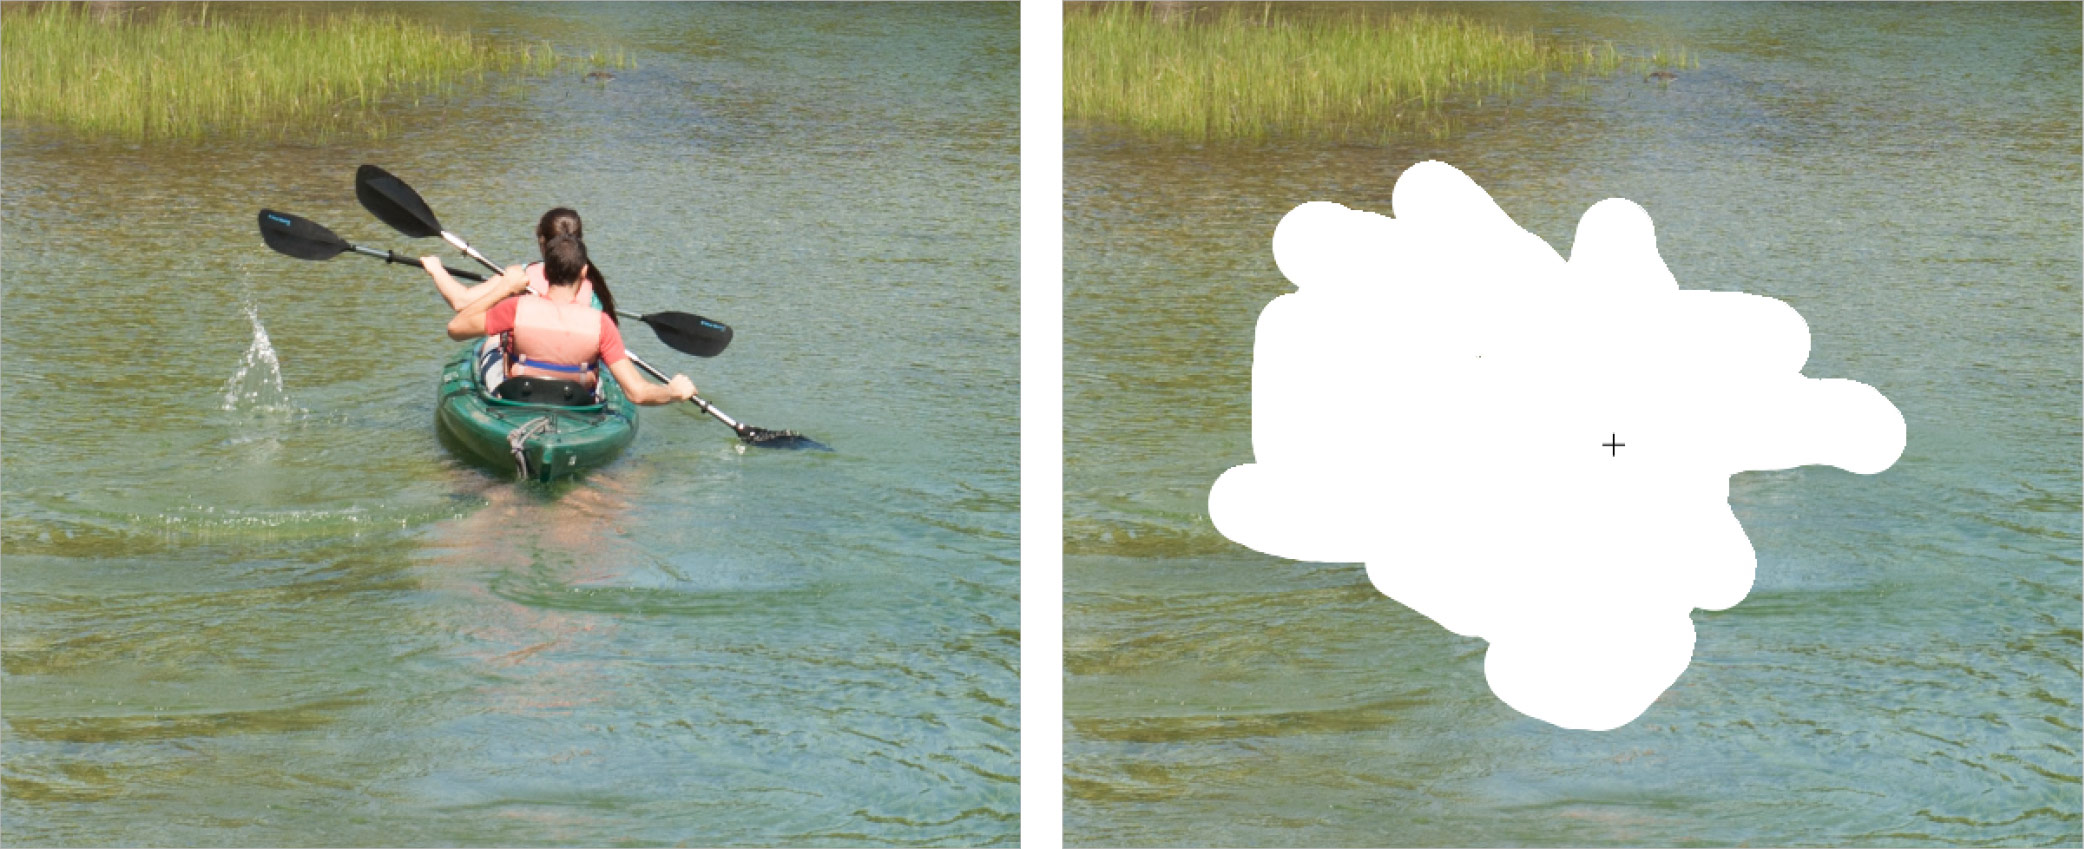
]several times to increase the brush size. We recommend sizing the brush to approximately match the width of the kayakers' paddle blades—this provides optimal coverage without unnecessarily large selections that could complicate the healing process.Click and drag to paint comprehensively over the kayakers, their splash patterns, the wake disturbance, and the kayakers' reflection in the water (as demonstrated in the left screenshot below). Don't obsess over precision during this initial selection phase; while you're actively painting, the selected area appears as an irregular white overlay (shown in the right-hand image). Focus on complete coverage rather than clean edges:
When you release the mouse, Lightroom automatically analyzes the surrounding area and samples a water section that it calculates will provide the most seamless replacement. The AI-driven content-aware technology has improved significantly since Lightroom's early versions, making this automatic selection remarkably accurate in most scenarios.
Press the Z key to zoom out and assess the full effect. Notice how Lightroom displays the outline of the source area it has chosen to replace the leftmost kayak—this visual feedback helps you understand the tool's decision-making process.
Click the Spot Removal tool
again to deactivate it and hide the selection borders, allowing you to evaluate the result without visual distractions.
Spot Removal Process
Setup and Navigation
Select the kayaks photo in Library module, press D key for Develop module, click Spot Removal tool, and set view to 1:1 for 100% zoom
Brush Size Adjustment
Position over leftmost kayak, press right bracket key to increase brush size to match the width of the kayakers' paddles
Selection Process
Click and drag to paint over kayakers, splash, wake, and reflection - don't worry about precision as it appears as a white blob while selecting
Automatic Processing
Release mouse to let Lightroom automatically sample a matching water portion, then press Z to zoom out and view the result
Use the right bracket key to increase brush size to approximately match the width of the black part of the kayakers' paddles for optimal coverage.
Changing the Source Area
While Lightroom's automatic source selection is sophisticated, professional results often require manual refinement. Here's how to fine-tune the replacement for optimal results:
Even with Lightroom's advanced algorithms, manual adjustment often yields superior results, particularly when working with complex textures like moving water or when the automatic selection includes unwanted elements.
Click the Spot Removal tool
again to reactivate it and display the selection overlays.Activate the target area (where the kayakers were removed) by clicking its circle
 . When activated, a black dot appears inside the circle
  , and a corresponding black dot marks the source area that Lightroom is sampling from.
Click on the source area's circle
and drag it to a more suitable location—in this case, closer to the shoreline where the water characteristics better match the original kayak area. As you drag, Lightroom provides real-time preview feedback, allowing you to see exactly how different source areas will affect the final result. Take time to experiment with multiple positions; the difference between good and exceptional results often lies in this fine-tuning phase. Our optimal choice is shown below: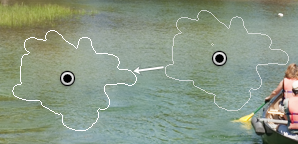
Examine the final result critically. While the replacement may not achieve the pixel-perfect invisibility possible with extensive Photoshop work using multiple layers, masks, and clone stamping, Lightroom's Spot Removal tool delivers remarkably professional results for rapid workflow integration.
Water presents one of the most challenging scenarios for any cloning or healing tool due to its complex interplay of reflections, ripples, and light patterns. The fact that Lightroom's Spot Removal tool handles this complexity so effectively makes it invaluable for photographers working with tight deadlines. For materials with uniform textures or regular patterns—such as skies, walls, or fabrics—this tool produces even more seamless results, making it an indispensable component of any professional retoucher's arsenal.
Fine-tuning Source Selection
Reactivate Tool
Click the Spot Removal tool again to select it and reveal the sampling areas for adjustment
Select Target Area
Click the circle where the kayakers used to be - a black dot appears inside to show it's activated
Adjust Source Location
Click and drag the source area's circle to a better location, using the live preview to find the most seamless replacement
Lightroom vs Photoshop for Complex Removal
Water is one of the most difficult materials to clone or replace in photography, yet Lightroom's Spot Removal tool handles it remarkably well. It performs even better with smooth areas or regular patterns.