Topics Covered in This JavaScript & JQuery Tutorial:
Getting Input from the Menu, Anonymous Functions, Adding Event Handlers in JavaScript
Exercise Preview
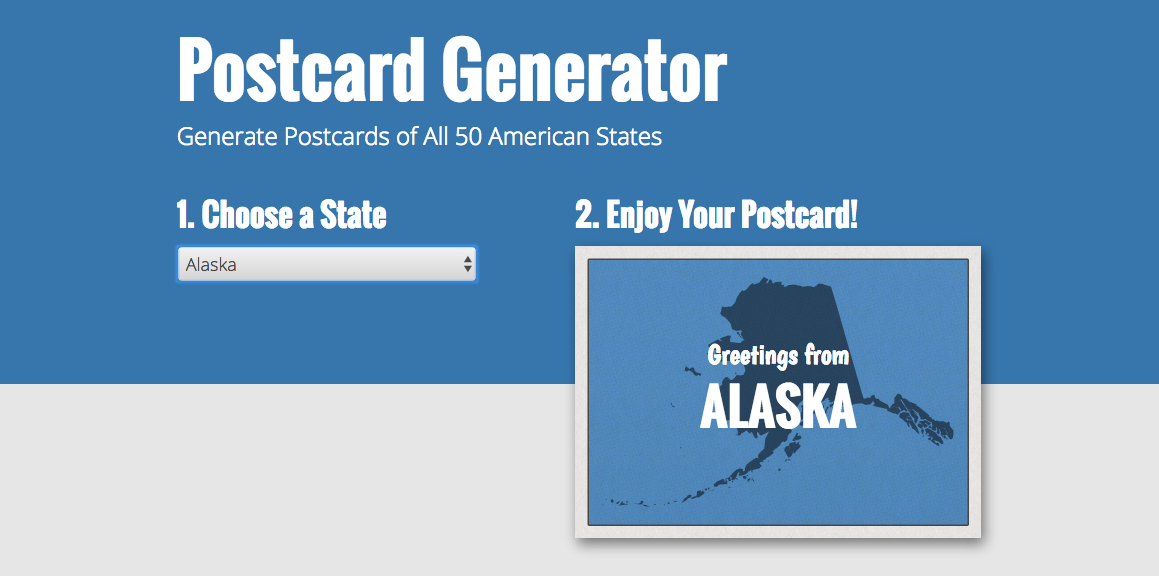
This exercise includes 52 pre-organized images (50 states plus D.C. and default) with standardized naming conventions that match the option values in your HTML select menu.
Exercise Overview
In this hands-on exercise, you'll build a dynamic postcard generator that demonstrates core JavaScript concepts in action. This single-page application allows users to select from a dropdown list of U.S. states, then dynamically generates a custom postcard featuring that state's name and geographic outline. You'll master essential skills including extracting values from HTML form elements, manipulating the DOM in real-time, and implementing event-driven programming patterns that form the backbone of modern web applications.
Tutorial Learning Path
Setup and File Structure
Navigate the provided files and understand how images are organized with 2-letter state abbreviations matching select menu values.
Menu Input Handling
Learn to capture user selections from dropdown menus using JavaScript event handlers and anonymous functions.
Dynamic Content Updates
Implement real-time postcard generation by updating background images and text content based on user selections.
Code Optimization
Apply unobtrusive JavaScript principles and clean up debugging code for production-ready implementation.
Getting Started
Before diving into the code, let's set up your development environment and examine the project structure that makes this postcard generator possible.
- Launch your preferred code editor if it isn't already running.
- Close any files you currently have open to maintain focus on this exercise.
- Navigate to the Postcard-Generator folder located in Desktop > Class Files > yourname-JavaScript jQuery Class. For optimal workflow, open this entire folder in your code editor if it supports folder-based projects (modern editors like Visual Studio Code, Sublime Text, or Atom all offer this functionality).
- Open index.html from the Postcard-Generator folder.
Preview index.html in Chrome (we'll leverage its powerful DevTools throughout this exercise).
Take note of the Choose a State dropdown menu positioned on the left side. When users select a state, our JavaScript code will dynamically generate a personalized postcard displaying that state's name alongside a distinctive silhouette image. This interaction pattern—responding to user input with immediate visual feedback—is fundamental to creating engaging web experiences.
- Keep this browser tab open for easy testing as we build the functionality.
- Let's examine the project assets that power our postcard generator. On your Desktop, navigate to Class Files > yourname-JavaScript jQuery Class > Postcard-Generator folder.
Open the img folder within the Postcard-Generator directory.
You'll find 52 carefully curated images: one for each of the 50 states, plus Washington D.C., and a default "empty-state" placeholder. Each state image uses the standardized 2-letter postal abbreviation as its filename—a naming convention that will prove crucial for our dynamic image loading system.
- Return to index.html in your code editor.
Locate the select tag on line 21.
This select element creates our interactive Choose a State dropdown menu. Notice it's assigned an ID of states—this identifier will serve as our JavaScript hook for capturing user selections.
Examine the option tags nested within the select element.
Each option tag contains a value attribute populated with the corresponding 2-letter state abbreviation. This deliberate structure creates a direct mapping between user selections and our image filenames, enabling seamless dynamic content loading. When users make a selection, we'll capture this value and use it to determine which image to display.
- Find the div tag with ID postcard around line 78. This container will receive the selected state's image as a CSS background-image property.
Locate the p tag with ID state-heading on line 80. This element will display the full state name corresponding to the user's selection.
Setup Verification Checklist
Locate files in Desktop > Class Files > yourname-JavaScript jQuery Class
You'll need Chrome DevTools for testing and debugging later
Each image uses 2-letter abbreviation matching select option values
These elements will be dynamically updated by your JavaScript code
The image filenames use standardized 2-letter state abbreviations that directly correspond to the value attributes in your HTML select options, enabling seamless dynamic image loading.
Getting Input from the Menu
Now that you understand the HTML structure, let's implement the JavaScript logic that captures user selections and transforms them into dynamic content. This section introduces key concepts including DOM manipulation, event handling, and anonymous functions.
Insert the following code before the closing
</body>tag (approximately line 90):</footer> <script> </script> </body>Create a reference to the states dropdown menu by storing it in a variable. Add this code within your script tags:
<script>
   var states = document.getElementById('states');
</script>
Implement an event listener that responds to user selections. When users change their state selection, the dropdown fires an onchange event that we can capture and handle. Add the following code:
var states = document.getElementById('states');
states.onchange = function() {

}
This approach demonstrates modern JavaScript event handling directly in code, eliminating the need for inline HTML event attributes. Notice we're using an anonymous function—a function without a name that executes automatically when the onchange event fires. Anonymous functions are particularly useful for event handlers because they keep related code organized and don't pollute the global namespace.
“Anonymous functions don't need names because they're automatically executed when specific events occur
This concept is fundamental to modern JavaScript event handling and makes code more efficient and organized.Key JavaScript Concepts Introduced
Anonymous Functions
Functions without names that execute automatically when events fire. More efficient than named functions for simple event handlers.
selectedIndex Property
Returns the position of the selected option in a select menu's options array, starting from 0 for the first option.
Console Debugging
Use console.log() statements to verify your code is working correctly before implementing final functionality.
Array Index Important NoteAlabama returns index 1 because the default 'United States of America' option occupies index 0. Always account for default options when working with selectedIndex.
Unobtrusive JavaScript
In earlier web development practices, developers often mixed JavaScript directly into HTML using attributes like onclick. Modern Unobtrusive JavaScript principles advocate for complete separation between HTML structure and JavaScript behavior.
This separation offers significant advantages: your code becomes more maintainable, debugging is simpler, and you can modify functionality without touching HTML markup. Professional development teams universally adopt this approach for scalable, maintainable codebases.
The dropdown menu's options exist as an array-like structure within JavaScript. We can determine which option the user selected by accessing its index position within this array. Add this logging statement to track user selections:
states.onchange = function() {
   console.log('state index: ' + states.selectedIndex);
}Select Alabama from the dropdown menu.
The console should display state index: 1. Alabama shows index 1 because arrays are zero-indexed, and the default "Choose a State" option occupies position 0.
Let's extract the actual state name from the selected option. Add this additional logging statement:
states.onchange = function() {
   console.log('state index: ' + states.selectedIndex);
   console.log('state name: ' + states.options[0].text);
}You'll notice that while the state index updates correctly, state name always shows United States of America. This occurs because we're hardcoding index 0, which always references the first option regardless of user selection.
Replace the hardcoded 0 with the dynamic states.selectedIndex value:
states.onchange = function() {
   console.log('state index: ' + states.selectedIndex);
   console.log('state name: ' + states.options[states.selectedIndex].text);
}Add this line to construct the image file path based on the selected state's value:
states.onchange = function() {
   console.log('state index: ' + states.selectedIndex);
   console.log('state name: ' + states.options[states.selectedIndex].text);
   console.log('img/' + states.value + '@2x.jpg');
}img/al@2x.jpg in the console, confirming our dynamic path generation works perfectly.Add this line to dynamically update the postcard's background image (keep this as a single line for readability):
states.onchange = function() {
   console.log('state index: ' + states.selectedIndex);
   console.log('state name: ' + states.options[states.selectedIndex].text);
   console.log('img/' + states.value + '@2x.jpg');
   document.getElementById('postcard').style.backgroundImage = 'url(img/' + states.value + '@2x.jpg)';
}Add this line to update the heading text with the selected state's name:
document.getElementById('postcard').style.backgroundImage = 'url(img/' + states.value + '.jpg)';
   document.getElementById('state-heading').innerHTML = states.options[states.selectedIndex].text;
}
The innerHTML property allows us to modify the text content within HTML elements dynamically—a fundamental technique for creating interactive web applications.
Add this line to update the greeting text, creating the classic postcard format:
document.getElementById('postcard').style.backgroundImage = 'url(img/' + states.value + '.jpg)';
document.getElementById('greeting').innerHTML = 'Greetings from';
document.getElementById('state-heading').innerHTML = states.options[states.selectedIndex].text;Comment out the three console.log() debugging statements by adding // at the beginning of each line:
Most professional code editors support bulk commenting with Cmd–/ (Mac) or CTRL–/ (Windows) when you select multiple lines. Removing or commenting debug code is a standard practice in production-ready applications—it keeps console output clean and prevents potential performance impacts.
Save your final version.
For reference, you can compare your work with our completed solution located in Desktop > Class Files > yourname-JavaScript jQuery Class > Done-Files > Postcard-Generator.
JavaScript Approaches: Obtrusive vs Unobtrusive
| Feature | Obtrusive JavaScript | Unobtrusive JavaScript |
|---|---|---|
| Code Location | Mixed in HTML attributes | Separated in script tags |
| Maintainability | Scattered and hard to find | Centralized and organized |
| Event Handling | onclick='functionName()' | element.onchange = function() |
| Best Practice | Legacy approach | Modern standard |
Dynamic Postcard Generation Process
Capture Menu Selection
Use states.selectedIndex to get the position and states.options[index].text to get the state name from the selected menu option.
Generate Image Path
Construct the image file path using states.value (the 2-letter abbreviation) combined with the img/ directory path and @2x.jpg extension.
Update Postcard Elements
Dynamically change the background image using style.backgroundImage and update text content using innerHTML property.
Clean Up Debug Code
Comment out or remove console.log() statements after testing to create production-ready code.
Always comment out or remove console.log() statements when your code is working correctly. Debug output can slow down production applications and expose unnecessary information.