Topics Covered in This Illustrator Tutorial:
Master drawing curves with the Pen Tool, understand the relationship between anchor points and direction points, and configure default fill and stroke settings for precision work.
This tutorial continues the Pen tool mastery series. Ensure you have Adobe Illustrator installed and access to the Illustrator Class folder with the required template files.
Getting Started Checklist
File Setup
Open Curves Template.ai from the Illustrator Class folder to begin the exercise
Save Your Work
Use Save As to create yourname-Curves.ai with default options selected
Tool Configuration
Set up Default Fill and Stroke, then configure Fill to None for proper visibility
Exercise Preview
Pen Tool Mastery Journey
Foundation Skills
Previous exercises covered basic pen tool operations and straight line creation
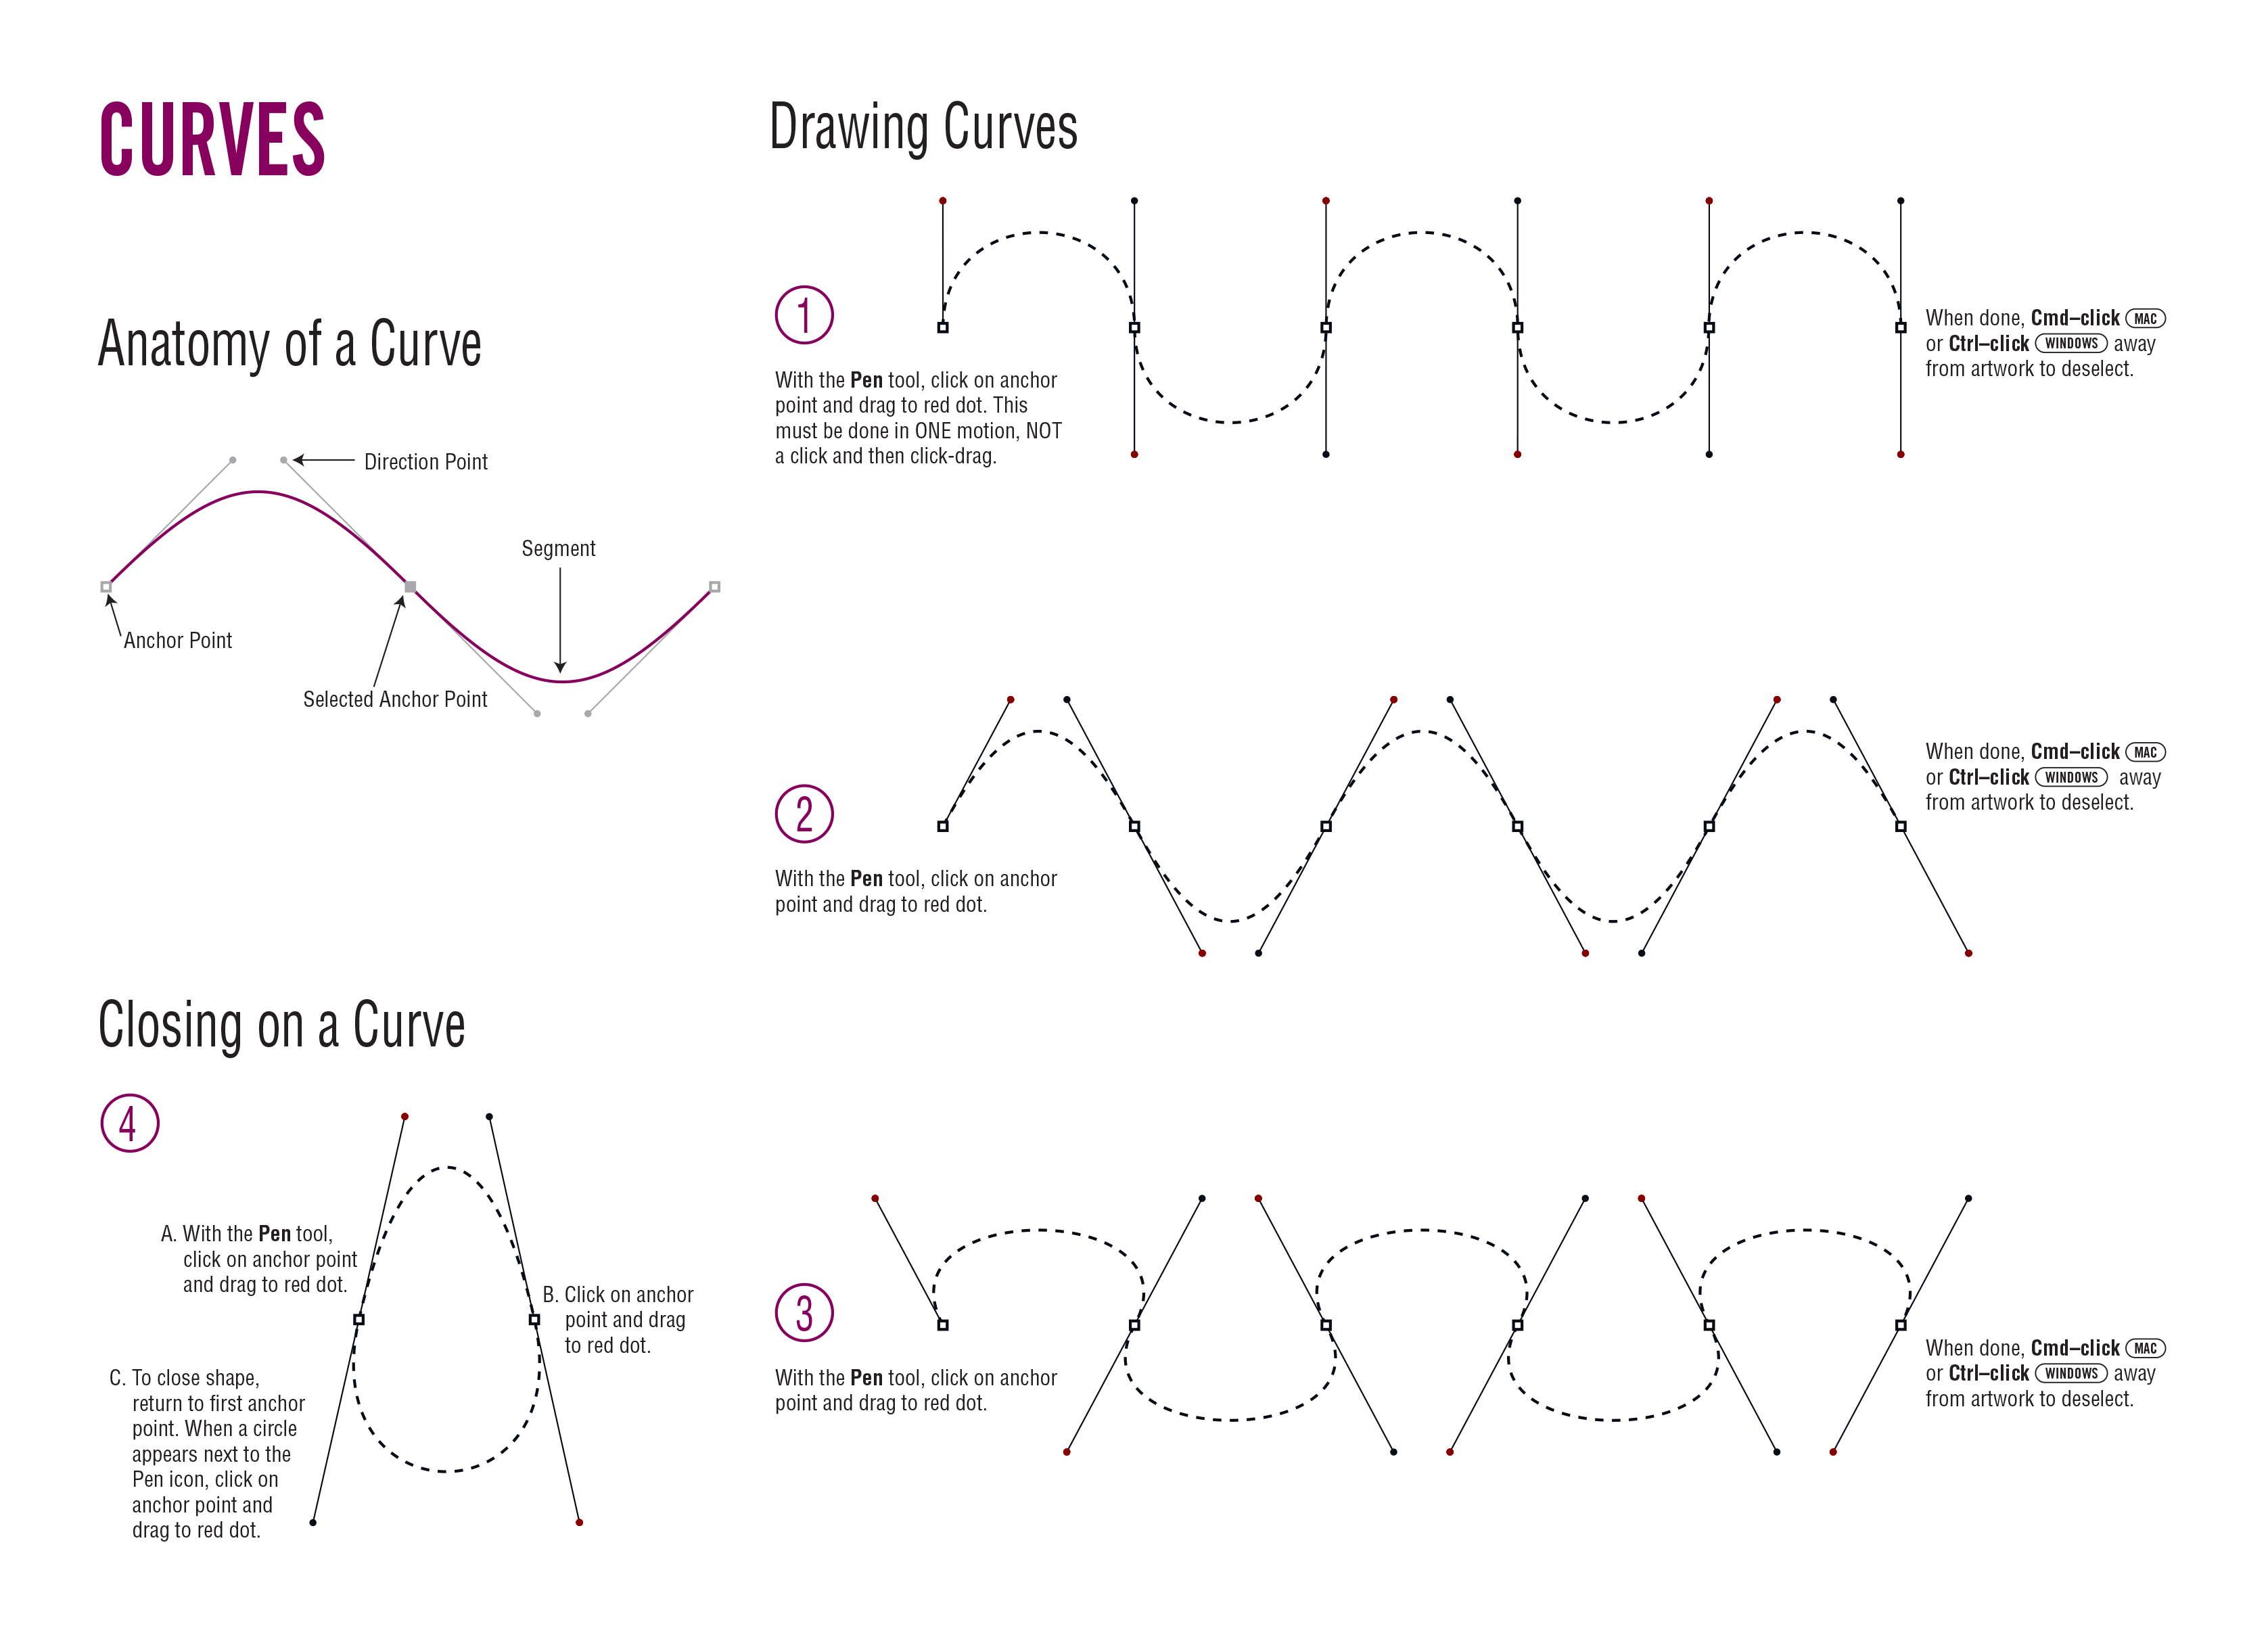
Current Focus
Learning curved lines and shapes with anchor and direction points
Advanced Applications
Complex vector illustrations and professional design work
Exercise Overview
Building on your foundational Pen tool skills  , this exercise focuses on the critical skill of creating smooth, professional curves—a technique that separates novice designers from seasoned professionals. Curved paths form the backbone of logo design, illustration work, and complex vector graphics. The ability to create clean, precise curves will dramatically improve the quality and sophistication of your vector artwork.
This hands-on exercise provides structured practice with real-world applications, ensuring you develop the muscle memory and technical understanding needed for professional-grade curve creation.
From the Illustrator Class folder, open the file Curves Template.ai.
Select File > Save As, naming the file yourname-Curves.ai to create your working copy.
Click Save. In the dialog that appears, leave the default options checked and click OK to maintain file compatibility.
In the Tools panel, click the Default Fill and Stroke button
 to reset your color settings to Illustrator's standard configuration.
In the Tools panel, click the Fill icon and then click the None button
 . This removes the fill color, allowing you to focus purely on path construction without visual distractions.
Follow the on-screen directions in the template file carefully. Take your time with each curve—precision at this stage builds the foundation for advanced techniques. When you have completed all directions and feel confident with your curve work, select File > Save to preserve your progress.
Tutorial Completion Steps
Ensures you have the correct starting file with guided instructions
Preserves your work and maintains proper file format settings
Proper visibility settings are essential for seeing your curve work clearly
Removes fill color to better visualize the curved paths you create
Step-by-step guidance ensures proper technique development
Preserves your progress and completed curve exercises for future reference
Always save your work with descriptive filenames and use the default Illustrator options to maintain compatibility across different versions and systems.