Excel Protection
Here's a counterintuitive Excel fact that surprises many users: in every new Excel file, all cells are automatically locked. However, this default locking remains dormant until you actively protect the worksheet. This design allows you to strategically control which cells users can modify while safeguarding your formulas, formatting, and critical data.
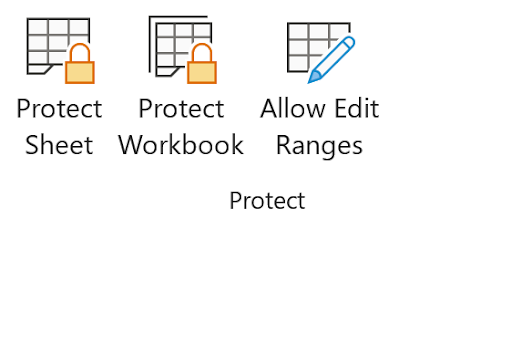
To activate worksheet protection, navigate to the Review tab on the ribbon. In the right section of this tab, you'll find the protection controls:
When you click "Protect Sheet," Excel presents a comprehensive dialog box with multiple configuration options:
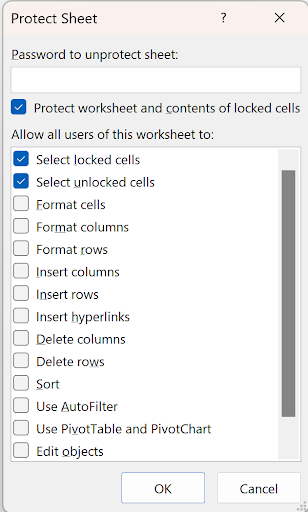
This dialog contains numerous permission settings, with additional options available by scrolling down. With the default selections allowing users to select both locked and unlocked cells, the protection might seem ineffective at first glance. The real impact becomes apparent when users attempt to edit any cell—they'll encounter Excel's protection barrier:

The key to effective worksheet protection lies in strategic preparation. Before enabling protection, you must unlock any cells that users should be able to modify. This is particularly crucial when designing forms, data entry templates, or collaborative worksheets. Consider this practical example:
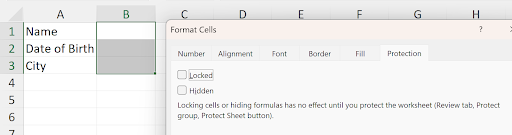
To unlock specific cells, select your target range and press Ctrl+1 to open the Format Cells dialog. Navigate to the Protection tab and uncheck the "Locked" checkbox. Once you apply worksheet protection, users will only be able to enter data in these designated cells (B1:B3 in our example). This approach ensures that your labels, formulas, and formatting remain intact while providing controlled input areas.
For an enhanced user experience, consider unchecking "Select Locked Cells" in the protection dialog:
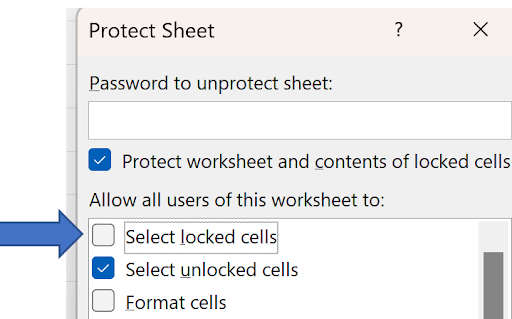
This configuration restricts user interaction to only the editable areas, creating a more intuitive and focused data entry experience. Users won't accidentally click on protected cells, reducing confusion and improving workflow efficiency.
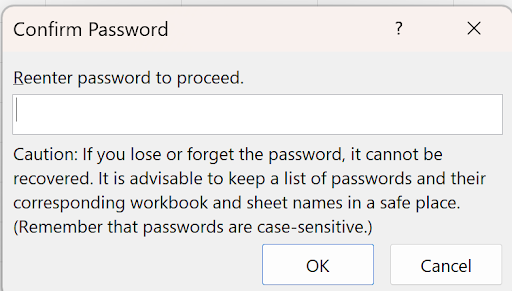
While basic protection prevents accidental changes, any determined user can easily bypass worksheet protection by right-clicking and selecting "Unprotect Sheet." To create meaningful security, you must implement password protection. Choose a password you'll remember—Excel will prompt you to confirm it for accuracy:
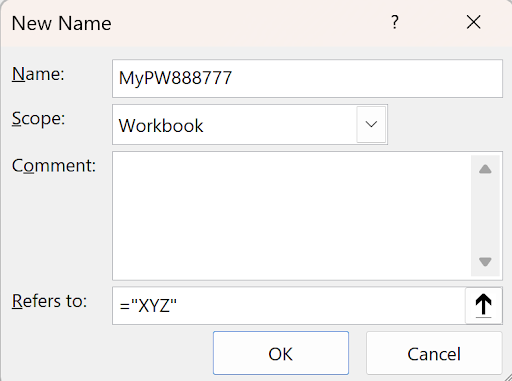
Here's a professional technique for password management that eliminates the risk of forgotten passwords while maintaining security. Create a defined name in every password-protected workbook—something memorable like "MyPW" or a more cryptic variation like "MyPW888777." This named range will store your password as its value:
To enhance security, you can hide this named range from casual view. Access the VBA immediate window (press Ctrl+G within the VBA editor) and execute this command:
Names("Mypw888777").Visible=False
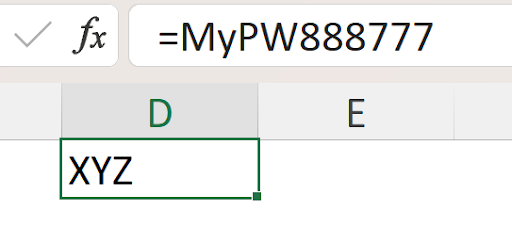
Once hidden, the name won't appear in Excel's name dropdown or defined names list. However, you can still retrieve your password by typing the name directly into any cell:
The protection dialog offers granular control over user permissions. When you scroll through the complete list of available options, you'll discover extensive customization possibilities:
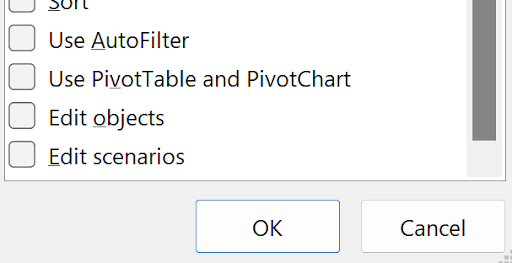
Notably, the expanded list reveals only one additional option: "Edit scenarios." This seems like an oversight in Microsoft's interface design—this option could easily fit in the main dialog. Each checked item in this list remains available to users even when the sheet is protected, allowing you to balance security with functionality based on your specific requirements.
Professional best practice dictates that all formulas should remain protected to prevent accidental corruption of calculations. Excel provides an additional layer of protection through the "Hidden" checkbox in the Format Cells dialog:

When a cell is marked as hidden and the worksheet is protected, its formula or contents become invisible in the formula bar when selected. This is particularly valuable for protecting proprietary calculations or sensitive formulas. Here's an example of a hidden cell containing the formula =1+1:

Users can see the calculated result but cannot view or reverse-engineer the underlying formula. This feature proves invaluable when distributing templates containing proprietary business logic or complex calculations that represent competitive advantages.
Workbook protection operates at a higher level than worksheet protection and serves different purposes. When you select "Protect Workbook," you'll encounter this streamlined dialog:
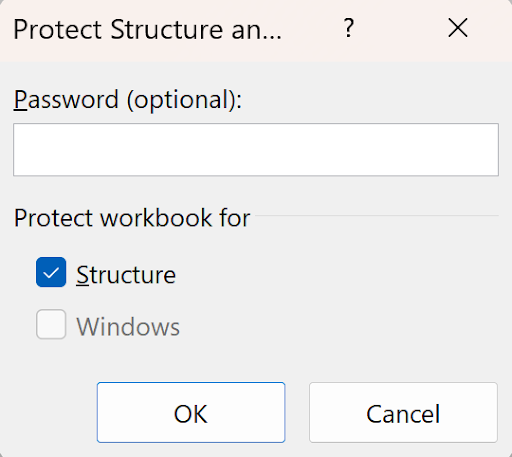
The "Structure" checkbox is the primary control here—the "Windows" option remains from earlier Excel versions and is no longer functional in modern Excel. When structure protection is active, users cannot add, delete, rename, move, hide, or unhide worksheets. This becomes evident when examining the disabled options in the worksheet tab's right-click menu:
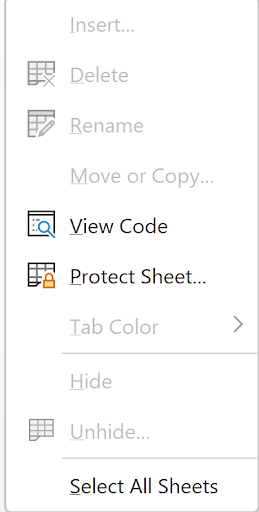
Workbook protection proves essential in several scenarios: when your VBA macros reference specific sheet names and cannot tolerate user modifications, when you've created a carefully designed multi-sheet application, or when you need to maintain a consistent structure for reporting or analysis purposes. This level of protection ensures that your workbook's architecture remains intact while still allowing data entry and manipulation within individual worksheets.
Setting Up Cell Protection
Unlock Input Cells
Select cells where users need to enter data, press Ctrl+1, go to Protection tab, and uncheck the Locked checkbox before protecting the worksheet.
Access Protection Settings
Navigate to the Review tab on the ribbon and locate the Protect Sheet option in the right section to configure protection settings.
Configure User Permissions
Choose which actions users can perform, such as selecting locked/unlocked cells, formatting cells, or inserting rows and columns.
Set Password Protection
Add a password to prevent unauthorized users from unprotecting the worksheet and modifying your protection settings.
Allowing Selection of Locked Cells
Create a hidden named range like MyPW888777 containing your password. Use VBA to hide it with Names("MyPW888777").Visible=False, then reference it when needed without forgetting your password.
Cell Visibility Options
| Feature | Locked Only | Locked + Hidden |
|---|---|---|
| Cell Content Display | Shows formulas in formula bar | Hides formulas completely |
| Result Visibility | Shows calculated results | Shows calculated results |
| Security Level | Basic protection | Enhanced protection |
| User Experience | Transparent formulas | Clean interface |
Worksheet Protection Checklist
Prevents user frustration and ensures proper form functionality
Guides users to appropriate input areas only
Balance between functionality and security based on user needs
Prevents unauthorized removal of protection settings
Protects intellectual property and calculation logic
Ensures protection doesn't interfere with intended workflow
When protecting workbook structure, users cannot add, delete, rename, hide, or modify worksheets. This is essential for VBA applications that depend on specific sheet names and structures.