Topics Covered in This AutoCAD Tutorial:
Mastering Block Insertion with Tool Palettes and Dynamic Blocks
This exercise continues with an existing Blocks-Studio.dwg file. Ensure you have the file open and are familiar with basic AutoCAD navigation before proceeding.
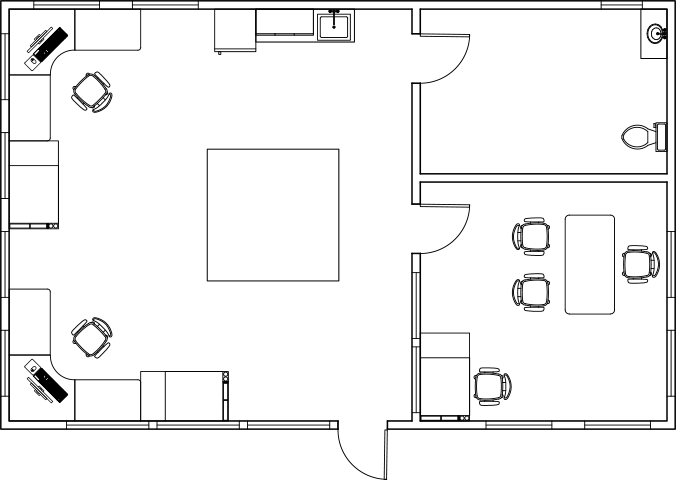
Exercise Preview
Exercise Overview
This exercise builds upon your existing knowledge by introducing advanced block insertion techniques that will significantly streamline your CAD workflow. You'll master the Tool Palettes interface for efficient block management and explore the powerful capabilities of Dynamic Blocks—a feature that transforms static symbols into intelligent, adaptable design elements. These skills are essential for professional drafters who need to work efficiently while maintaining precision and consistency across projects.
Opening Tool Palettes Window
Keyboard Shortcut
Press CTRL+3 to quickly open the Tool Palettes Window
Standard Toolbar
Access through the Standard Toolbar interface
Ribbon Access
Navigate to View tab and select from the Pallets Panel
Right-click on the small square of overlapping tabs under tab names to see all available tabs including tools, tables, hatches, 3D materials, lights, cameras, visual styles and blocks.
Inserting Blocks with Tool Palettes & Dynamic Blocks
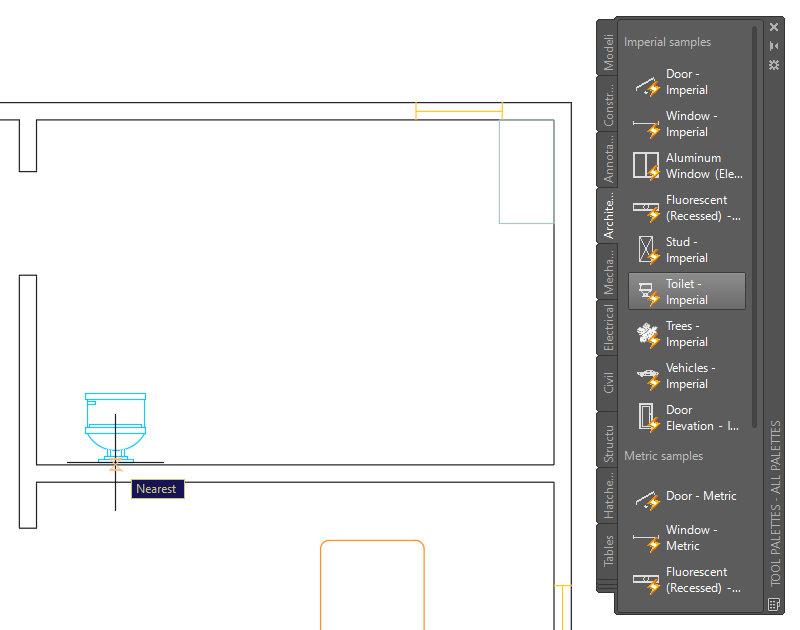
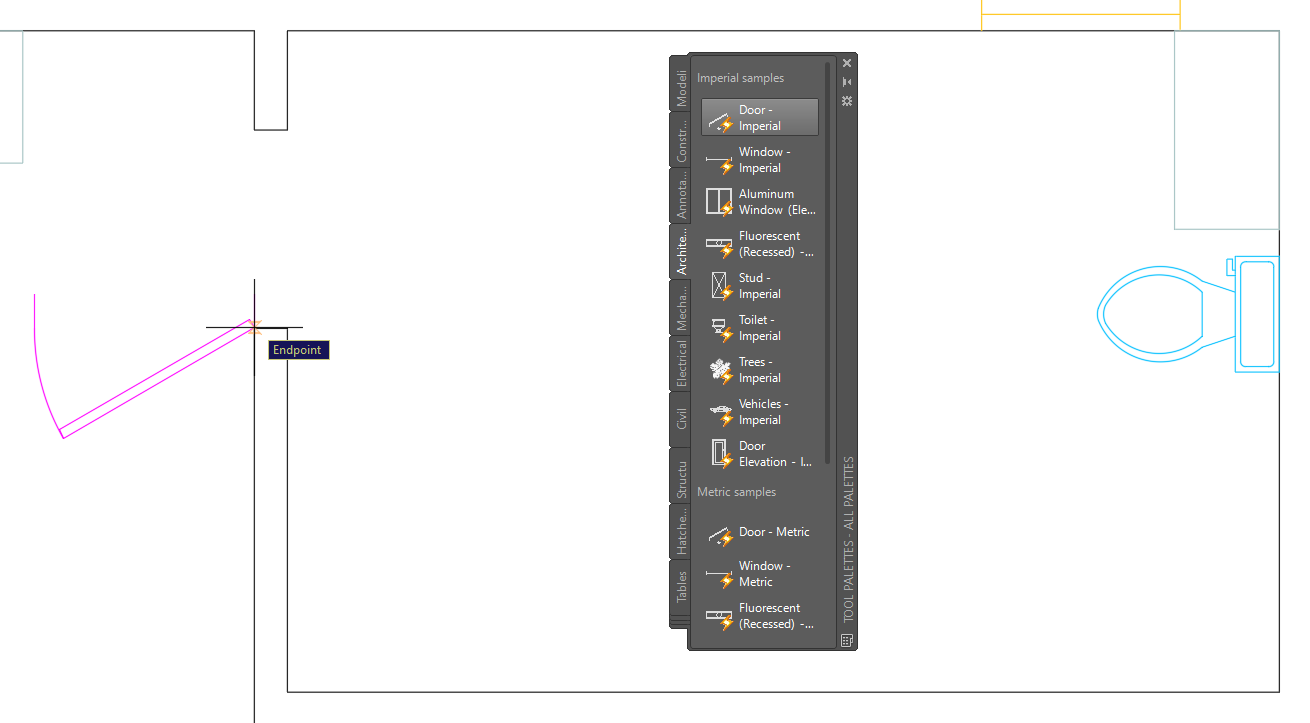
Keep the Blocks-Studio.dwg file open and prepare to access one of AutoCAD's most powerful organizational tools. Press CTRL+3 to open the Tool Palettes window, or alternatively, navigate to the Palettes Panel in the View tab of the Ribbon (shown below). The Tool Palettes window serves as your command center for accessing tools, tables, hatches, 3D materials, lights, cameras, visual styles, and blocks—all organized in intuitive, customizable tabs.

The interface displays only the most commonly used tabs by default. To access the full library of available palettes, right-click on the small overlapping tabs icon beneath the tab names. Select the Architectural tab to reveal a comprehensive collection of architectural blocks.

Here's where Tool Palettes truly shine: unlike the traditional Insert command, which only accesses blocks already attached to your current drawing, Tool Palettes draw from blocks stored directly on your hard drive. This means you can insert standardized elements into any drawing without bloating file sizes with unused blocks—a crucial advantage for maintaining lean, efficient project files. The default library includes professionally designed blocks that ship with AutoCAD, and advanced users can create custom palettes with company-specific blocks for consistent branding and standards across teams.
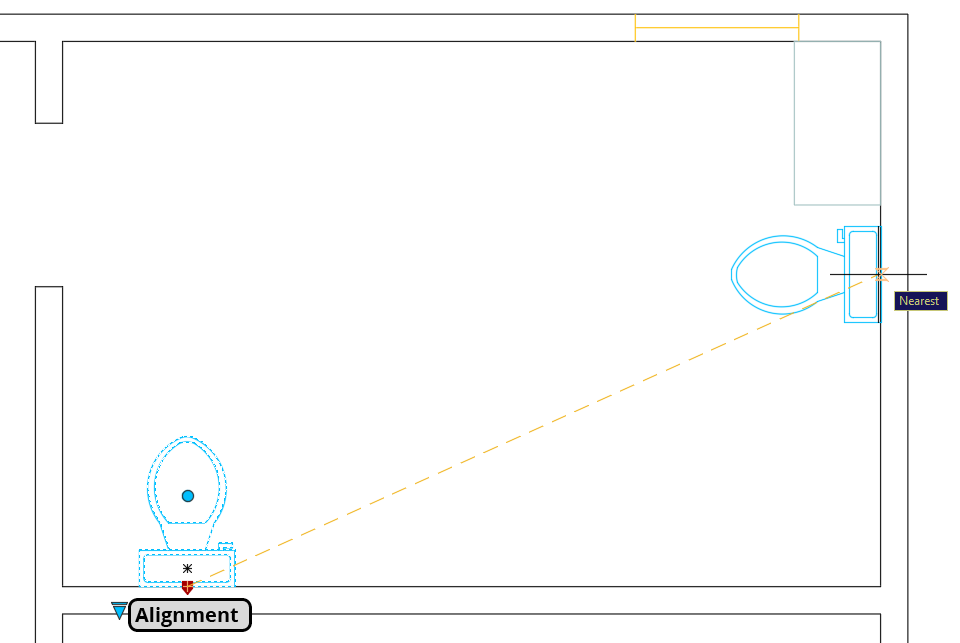
Begin creating your bathroom layout by changing the Current Layer to A-Plumbing—this organization ensures proper layer management from the start. In the Architectural tab of the Tool Palette window, locate and click the Toilet-Imperial block. Move your cursor into the drawing area and right-click to access the context menu. Select Nearest from the Snap Overrides menu for precise placement. Position the block against the bottom wall toward the left, as shown below.
You'll immediately notice an issue: the block appears as an elevation (front) view when you need a plan (top-down) view for your floor plan. This is where Dynamic Blocks demonstrate their value. Dynamic Blocks represent a significant evolution in CAD efficiency—they feature intelligent grips that provide multiple configuration options based on actions programmed during block creation. While creating Dynamic Blocks requires advanced skills covered in Level 3 training, using them effectively is essential for any professional drafter.
Click on the block to reveal two dynamic grips: Flip and List. The Flip grip toggles the handle orientation, while the List grip provides access to multiple block variations and viewing angles. First, experiment with the Flip grip to observe its effect, then click the List grip and select Elongated (Plan). Watch as the block intelligently transforms to the appropriate plan view—this single block effectively replaces multiple static blocks.

The block now displays the correct view, but positioning requires adjustment. Notice how the plan view reveals additional dynamic grips: a Rotate grip (the circular grip at the seat center) and an Alignment grip at the block's rear. These context-sensitive grips appear only when relevant, keeping the interface clean while providing powerful functionality.
Click the Rotate grip and rotate the toilet 180° so it faces into the bathroom space. This precise control over orientation ensures your fixtures are positioned logically within the room layout.
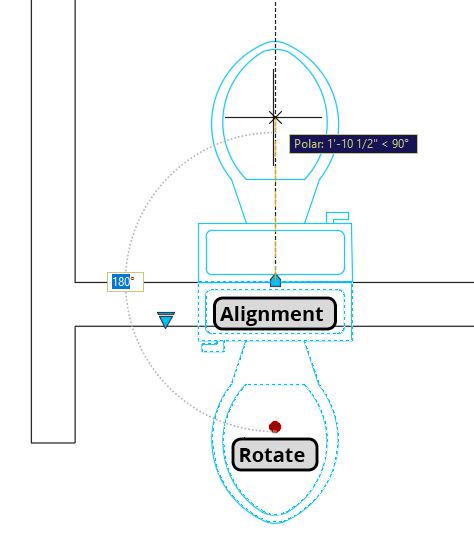
Now you'll experience one of Dynamic Blocks' most sophisticated features: intelligent alignment. The Alignment grip automatically rotates block edges to align with adjacent objects—a time-saving feature that eliminates manual rotation calculations. Click the Alignment grip and move the toilet toward the bathroom's back wall. Watch as the block automatically orients itself with the wall edge while the Nearest snap activates temporarily for precise positioning. This intelligent behavior streamlines placement while maintaining accuracy.
Door placement introduces additional complexity due to alignment grip positioning. The default Door-Imperial block requires the traditional Rotate tool
 for proper initial placement. This workflow demonstrates how Dynamic Blocks work alongside traditional AutoCAD tools rather than replacing them entirely.
Select the Door-Imperial block from the Architectural tab and place its base point at the lower-left corner of the bathroom door opening. The initial orientation will be incorrect—this is expected and part of the standard door placement workflow.
Activate the Rotate tool
and select the door block. Proper door placement requires understanding the block's geometry and hinge behavior.- Establish the base point by clicking on the door hinge—this coincides with the block's insertion point and ensures the door rotates around its natural pivot.
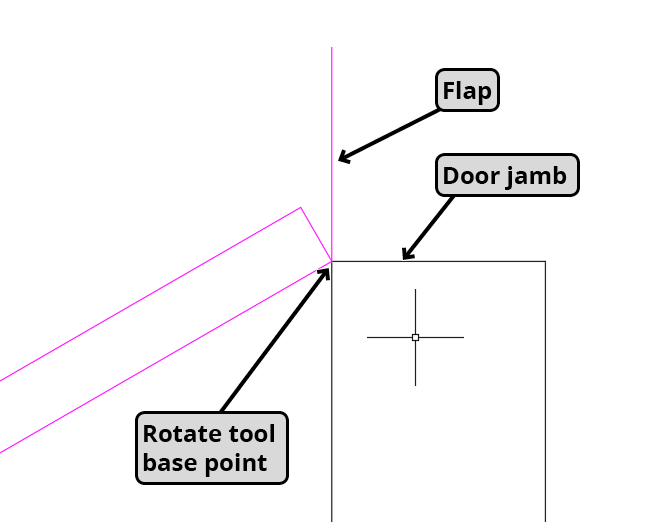
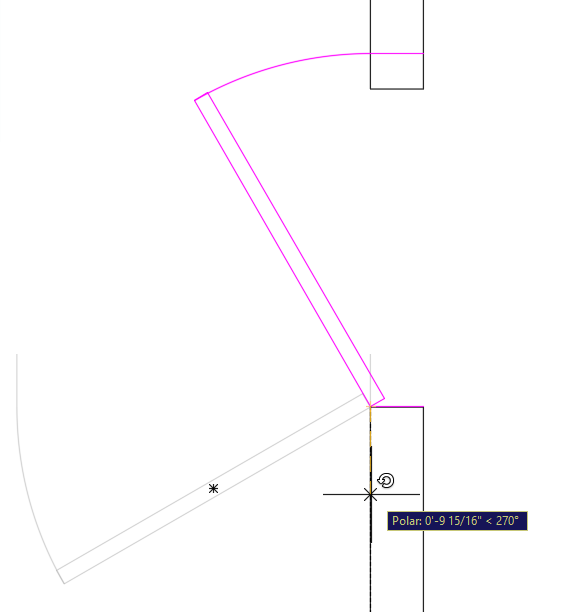
- The critical technique for door placement: rotate the door swing so it aligns flush against the door jamb. This creates the proper relationship between the door block and the wall opening, establishing a foundation for further adjustments.
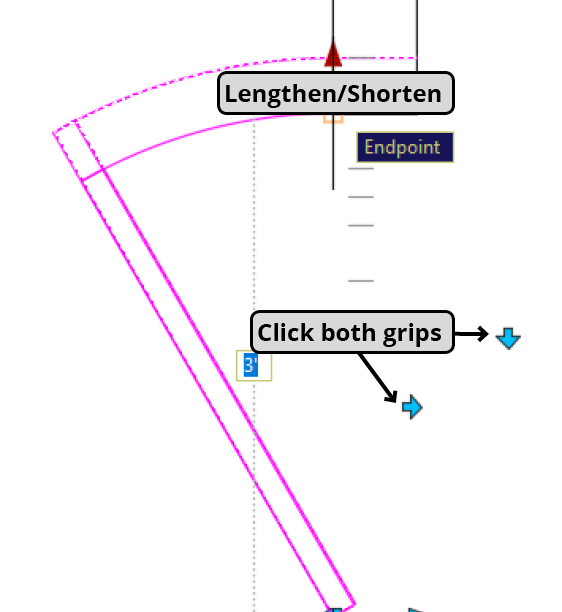
With the door properly positioned, activate its Dynamic Block capabilities by clicking to select it. The door block reveals multiple intelligent grips that transform it into a highly customizable element. Click the Lengthen/Shorten grip and adjust the door width to 3' to match your opening dimensions—notice how the block maintains proper proportions and swing geometry during this adjustment.
- Fine-tune the door's orientation using both the Horizontal and Vertical Flip grips. Configure the door to swing into the bathroom with the handle positioned on the left when exiting—this follows standard architectural conventions for bathroom door placement and ensures logical traffic flow.
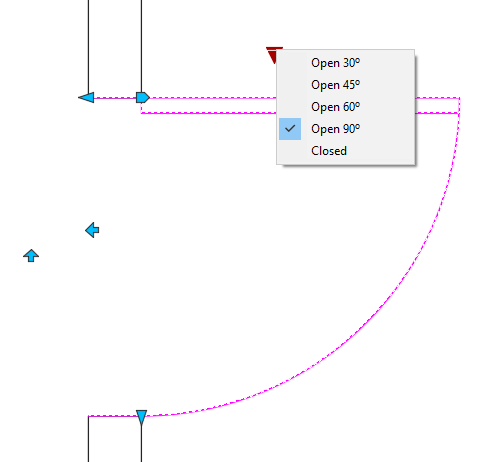
- Complete the door configuration by clicking the List grip and selecting Open 90°. This displays the door in its open position, clearly communicating swing direction and clearance requirements—essential information for space planning and code compliance. Press Escape to finalize your selections and deselect the block.