Topics Covered in This After Effects Tutorial:
Master the fundamentals of rotoscoping with in-depth coverage of: What is Rotoscoping?, Using the Roto Brush Tool, and Refining the Roto Brush Properties for professional results.
Exercise Preview

Exercise Overview
This comprehensive exercise will teach you advanced rotoscoping techniques to create precise masks around complex elements in live-action footage. You'll learn industry-standard workflows that professional VFX artists use daily to isolate subjects from their backgrounds, enabling seamless compositing and visual effects integration.
You'll learn to mask out parts of live-action video using rotoscoping techniques, creating animated graphics that appear to interact naturally with video elements by matching movement and appearing from behind objects.
Previewing the Final Video
- First, let's examine the final result you'll achieve. If you're currently in After Effects, keep it open but switch to your Desktop.
- On the Desktop, navigate to Class Files > After Effects Advanced Class> Rotoscoping > Preview Movie and double-click Flying Over Donuts.mp4.
Observe these key elements that demonstrate professional rotoscoping technique:
- Animated graphics seamlessly integrated on top of live-action video footage.
- Graphics that precisely match the camera movement and appear to pass behind foreground elements in the original video—this is the power of accurate rotoscoping.
Watch the preview multiple times to understand the spatial relationships between elements, then close the file when you're ready to proceed.
Now that you've seen the end goal, let's set up your workspace for optimal rotoscoping efficiency.
Setting up the Workspace
In After Effects, go to Window > Workspace > Standard.
Choose Window > Workspace > Reset "Standard" to Saved Layout to ensure you're working with the default panel arrangement.
Maximize your After Effects window for the best working experience:
Mac: At the top left of the window, click the green button (the third button). Windows: At the top right of the window, click the Maximize button (the middle button).
Workspace Setup Checklist
Provides optimal panel layout for rotoscoping workflow
Ensures consistent interface configuration
Maximizes workspace real estate for detailed work
Getting Started
In After Effects, if you have a project open, choose File > Save to preserve your current work.
Choose File > Open Project and:
- Navigate to Desktop > Class Files > After Effects Advanced Class > Rotoscoping.
- Double-click on Rotoscoping—Started.aep to open the starter project.
Immediately save your working version by choosing File > Save As > Save As and:
- Name the file Your Name—Rotoscoping.aep and
- Save it into Desktop > Class Files > After Effects Advanced Class> Rotoscoping.
With your project properly set up, let's dive into the theory behind rotoscoping before we begin the practical work.
Project Setup Process
Save Current Work
Save any existing project to prevent data loss before opening the tutorial project file.
Open Tutorial Project
Navigate to the Rotoscoping folder and open the Rotoscoping-Started.aep file provided for the exercise.
Save Personal Copy
Use Save As to create your own version with your name, maintaining the original tutorial files intact.
What is Rotoscoping?
Rotoscoping is a fundamental technique in animation and visual effects with applications spanning from stylistic animation to precise compositing work. In animation, rotoscoping involves tracing over live-action footage frame by frame, famously used in films like Richard Linklater's A Scanner Darkly (2006) and Ralph Bakshi's Fire and Ice (1983) to achieve distinctive visual styles.
In the visual effects and compositing realm—which is our focus—rotoscoping describes the meticulous process of creating mattes or masks around specific elements in video footage. This isolation technique allows VFX artists to separate subjects from their backgrounds, enabling advanced compositing workflows, selective color correction, and complex visual effects integration. Modern productions rely heavily on rotoscoping for everything from simple background replacements to complex creature work where practical and digital elements must seamlessly blend.
Understanding proper rotoscoping technique is essential for any serious motion graphics or VFX professional, as it forms the foundation for countless advanced compositing operations.
Rotoscoping Applications
| Feature | Animation Rotoscoping | VFX Rotoscoping |
|---|---|---|
| Primary Use | Stylized animation from footage | Element isolation and compositing |
| Output | Artistic animated sequences | Precise mattes and masks |
| Examples | A Scanner Darkly, Fire and Ice | Green screen replacements, compositing |
| Technical Focus | Visual style and aesthetics | Precision and technical accuracy |
Setting up for Rotoscoping
While we've provided a pre-configured project for this exercise, understanding proper project setup is crucial for real-world rotoscoping work. Dimension matching between your footage and composition is critical—mismatched settings can cause quality degradation and tracking issues that will plague your entire project.
When creating rotoscoping projects from scratch, follow this professional workflow:
Import your primary footage, then drag it into the empty Timeline panel or onto the Create a New Composition
 button at the bottom of the Project panel.
This method automatically creates a composition that matches your footage's exact specifications—frame rate, resolution, pixel aspect ratio, and duration. While not strictly necessary for basic rotoscoping, this precision becomes essential when using advanced tracking tools like the 3D Camera Tracker or MochaAE effects.
Immediately rename your layer with a descriptive name that identifies it as your rotoscoping source—clear naming conventions prevent confusion in complex projects.
If your project requires motion tracking or camera matching (common in screen replacements or match-moving scenarios), complete this work before beginning rotoscoping to establish your spatial references.
Now let's explore the two primary approaches to rotoscoping: manual and tool-assisted methods.
Always ensure your composition dimensions match your video footage dimensions. This is critical for 3D Camera Tracker and MochaAE effects to function properly in your rotoscoping workflow.
Manual Rotoscoping
Manual rotoscoping represents the traditional approach—precise but labor-intensive. This method involves hand-tracing your subject using the Pen tool, often requiring frame-by-frame adjustments. While time-consuming, manual rotoscoping offers unmatched precision and complete artistic control, making it the preferred choice for high-end VFX work where quality trumps efficiency.
The professional approach uses shape layers or masked solids as track mattes, providing maximum flexibility and reusability across different compositions.
Add your source footage to the composition and position your timeline at a frame where your subject is clearly visible and well-defined.
Navigate to a frame that provides the clearest view of your rotoscoping subject—this will serve as your reference frame for initial path creation.
In the Tools panel, select the Pen
 tool.
tool.IMPORTANT: Ensure no layers are selected when activating the Pen tool—this forces After Effects to create a new shape layer rather than adding a mask to existing footage.
In the tool options bar, configure your shape with a visible fill color and disable the stroke for cleaner visualization during the tracing process.
Begin tracing your subject's outline with the Pen
tool. The fill color will immediately cover the underlying footage, providing visual feedback.Temporarily disable the shape layer's visibility to see your path outline clearly while continuing your trace work—the vector path remains visible even when the layer is hidden.
Complete your outline for this frame, ensuring clean closure of your path for proper matte generation.
Expand the shape layer properties in the Timeline until you locate the Path property, then enable its stopwatch to activate keyframe animation—this is what allows your rotoscope to follow your subject through time.
Move the playhead to either the first or last frame where your subject is visible, then use the Selection tool to adjust anchor points and reshape your path to match the new position.
Navigate to the temporal midpoint between your existing keyframes and refine the path shape again, creating a new keyframe.
Continue this subdivision process—moving to the halfway point between keyframes and adjusting—until your entire sequence is rotoscoped.
PRO TIP: This halving method is remarkably efficient because After Effects' path interpolation handles gradual movements automatically. You'll typically need far fewer keyframes than the total frame count, as the software smoothly interpolates between your manual adjustments.
While manual rotoscoping provides ultimate control, After Effects offers powerful automated tools that can dramatically speed up the process while maintaining professional quality.
Manual Rotoscoping Trade-offs
Use the halfway method between keyframes rather than creating keyframes for every frame. Path interpolation will handle small movements automatically, significantly reducing your workload.
Applying the Roto Brush Tool
The Roto Brush tool represents a significant leap forward in rotoscoping efficiency, using advanced edge-detection algorithms to identify and track subject boundaries based on color and contrast differences. This intelligent tool learns from your initial selections and propagates that understanding across your entire timeline, dramatically reducing the manual work required for complex rotoscoping tasks.
This workflow creates a sophisticated matte by analyzing pixel relationships and edge information, making it particularly effective for subjects with well-defined edges and consistent lighting.
Create a duplicate of your source footage layer—this copy will become your dedicated rotoscoping layer while preserving your original footage.
Rename this duplicate with a clear identifier (like "Roto Source") and position it above the layer you intend to matte out.
If you've applied any tracking effects to the original layer, remove them from this duplicate to avoid processing conflicts.
Switch to the optimized Paint workspace: Window > Workspace > Paint. This arrangement provides ideal panel positioning for rotoscoping workflows.
Double-click your rotoscoping layer to open it in its dedicated Layer panel—the Roto Brush tool functions exclusively within Layer panels, not in the main Composition view.
Activate the Roto Brush
 tool from the Tools panel.
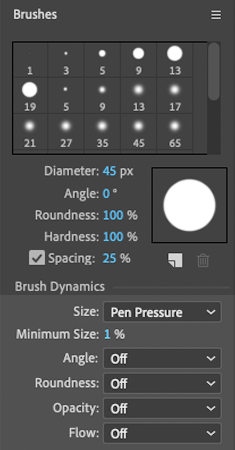
Configure your brush size appropriately for your subject detail level using the Brushes panel settings.
EFFICIENCY TIP: Hold Cmd (Mac) or Ctrl (Windows) while dragging to dynamically adjust brush size without interrupting your workflow.
In the Layer panel, the Roto Brush displays as a green circle in additive mode.
Paint over areas you want to include in your selection, keeping your brush strokes well within your subject's boundaries for optimal edge detection accuracy.
To remove incorrectly selected areas, hold Option (Mac) or Alt (Windows) while painting—the brush turns red to indicate subtractive mode.
This subtractive capability allows for precise refinement of your selection boundaries.
The Roto Brush's propagation engine activates automatically after a brief idle period, or whenever you scrub the timeline playhead.
This propagation process applies your selection criteria across time, analyzing frame-to-frame changes and maintaining your rotoscoping boundaries throughout the sequence.
The Paint workspace's dual-panel layout lets you monitor both your detailed edge work in the Layer panel and the final composite result in the Composition panel simultaneously—essential for quality control.
Scrub through your timeline and refine the Roto Brush selection as needed. The tool learns from each correction, improving its automatic tracking over time.
Once satisfied with your rotoscoping coverage, freeze the propagation using the Freeze
 button at the bottom of the Layer panel. This locks in your work and prevents unwanted changes.
Save your project to preserve this significant milestone in your rotoscoping work.
With your basic rotoscoping complete, the final step involves refining the matte edges to achieve professional, seamless integration.
Roto Brush Workflow
Layer Preparation
Create a duplicate of your background layer, rename it, and position it above the layer you want to matte.
Tool Activation
Switch to Paint workspace, double-click the layer to open Layer panel, and activate the Roto Brush tool.
Initial Selection
Drag the green brush over elements to select, use Alt/Option for red removal brush, keeping strokes inside desired areas.
Propagation Process
Allow automatic propagation or move playhead to spread the effect across all frames of your video.
Refining the Roto Brush Matte
Raw rotoscoping output rarely achieves final-quality results without refinement. Professional workflows always include a polishing phase where edge quality, softness, and precision are fine-tuned to match the specific requirements of your composite. After Effects provides comprehensive controls for this refinement process, allowing you to achieve broadcast-quality results.
The Roto Brush Matte properties offer both corrective and creative control over your edge quality, enabling everything from subtle improvements to dramatic stylistic effects.
Return to the Standard workspace for optimal access to the Effect Controls panel: Window > Workspace > Standard.
In the Effect Controls panel, expand the Roto Brush Matte properties to access the refinement controls.
Dual Panel AdvantageThe Paint workspace allows side-by-side viewing of Composition and Layer panels, enabling real-time comparison between your roto edge and the final composite result.
Roto Brush Matte Properties
Feather: Controls edge softness similar to traditional mask feathering. Higher values create more gradual transparency transitions, essential for natural-looking composites where hard edges would appear artificial.
Contrast: Sharpens or softens the matte edge definition. Increase to counteract excessive feathering or to enhance edge precision. Decrease for more organic, film-like integration.
Shift Edge: Expands or contracts your matte boundary without redrawing. Negative values pull edges inward (useful for eliminating edge artifacts), while positive values expand outward (helpful for ensuring complete subject coverage). This property is invaluable for fine-tuning matte size without reprocessing.
Reduce Chatter: Minimizes frame-to-frame edge flickering that can occur with detailed or noisy footage. Essential for maintaining temporal stability in your final composite.
For comprehensive technical documentation on advanced Roto Brush techniques, consult the current Adobe Help documentation, which is regularly updated with new features and workflow improvements.
Systematically adjust these properties while monitoring your composite in real-time to achieve optimal integration quality.
NOTE: Some properties remain inactive (grayed out) unless you're using the advanced Roto Brush and Refine Edge workflow. The Refine Edge tool specializes in handling complex semi-transparent elements like hair, fur, smoke, or other difficult-to-rotoscope materials that require sophisticated edge analysis.
Save your project to preserve your refinement settings and complete the rotoscoping process.
Essential Matte Properties
Feather
Controls edge softness similar to mask feather. Adjusts the matte edge by fading it out for smoother integration.
Contrast
Increases edge sharpness and can counteract feathering effects. Essential for maintaining crisp boundaries when needed.
Shift Edge
Expands or contracts the matte boundary. Negative values pull edges inward, positive values push them outward without recreating paths.
Reduce Chatter
Minimizes edge flickering and instability across frames. Critical for maintaining consistent matte quality in motion.
Some properties remain grayed out until you use the Roto Brush and Refine Edge tools together. The Refine Edge tool becomes essential when working with semi-transparent elements like hair or feathers.