Topics Covered in This After Effects Tutorial:
Moving Layers in 3D Space, Working with Cameras, Working with Lights
Exercise Preview
The final animation demonstrates camera movement through an underwater environment with depth of field effects and text that wipes on as objects move past it.
Exercise Overview
In this comprehensive exercise, you'll master After Effects' powerful 3D workspace to create cinematic depth and movement. You'll learn to position layers in three-dimensional space, configure professional lighting setups, and animate dynamic camera movements that bring static artwork to life. This foundational skillset is essential for motion graphics professionals working on everything from title sequences to architectural visualizations.
Previewing the Final Video
Let's examine the finished result to understand our creative objectives. If you're currently in After Effects, keep it open but switch to your Desktop.
On the Desktop, navigate to Class Files > After Effects Class > Working with 3D > Preview Movie and double–click underwater world.mp4.
Study these key technical and creative elements:
- The animation simulates a camera flying through a layered underwater environment, creating genuine parallax motion.
- Notice how layers dynamically shift in and out of focus as the camera moves—this demonstrates depth of field principles.
- The message at the end appears to wipe on as the whale moves past it, showing advanced masking and timing techniques.
Review the video multiple times to analyze the timing and spatial relationships, then close it when you're ready to begin.
Now that you've seen the final result, let's build this 3D scene step by step, starting with workspace optimization.
Setting up the Workspace
In After Effects, go to Window > Workspace > Standard.
Choose Window > Workspace > Reset "Standard" to Saved Layout.
Ensure your After Effects window is maximized for optimal 3D workflow visualization:
Mac: At the top left of the window, click the green button (the third button). Windows: At the top right of the window, click the Maximize button (the middle button).
Workspace Setup Process
Reset Standard Workspace
Go to Window > Workspace > Standard, then reset to saved layout for consistent interface
Maximize Window
Click green button (Mac) or maximize button (Windows) to fill entire screen
Verify Panel Layout
Ensure all necessary panels are visible and properly arranged for 3D workflow
Creating a Dummy Comp & Importing
When importing Illustrator and Photoshop files as compositions, After Effects inherits dimensions from the source file but requires composition settings from your current project context. These settings—including duration, frame rate, and color space—are pulled from the last active composition. Creating a dummy composition ensures we establish the correct parameters before import, preventing downstream technical issues.
In After Effects, if you have a project currently open:
- Choose File > Save to preserve your work.
- Choose File > Close Project to start fresh.
Choose Composition > New Composition, press Cmd–N (Mac) or CTRL–N (Windows), or click the New Composition button in the Composition panel.
Configure these settings carefully before clicking OK:
- From the Preset menu choose HDTV 1080 29.97 (this ensures broadcast-standard specifications)
- Verify Resolution is set to Full for maximum quality during development.
- For Duration type 30,00 and press Tab to set it to 0;00;30;00 (30 seconds provides ample time for complex animations).
- Confirm the background color is black: click the Background Color box, set the hex code to #000000 and click OK.
- Click OK to create the template composition.
In the Project panel, select Comp 1 and press Delete (Mac) or Backspace (Windows) to remove the dummy composition—its job is complete.
Choose File > Import > File or press Cmd–I (Mac) or CTRL–I (Windows).
Navigate to Desktop > After Effects Class > Working with 3D > Media > images.
Select Underwater World.ai and configure the import settings:
Change the Import As menu to Composition—Retain Layer Sizes to preserve individual layer dimensions.
Ensure both Create Composition and Illustrator/PDF/EPS Sequence remain unchecked.
Click Open (Mac) or Import (Windows).
In the Project panel, double–click the Underwater World composition to open it for editing.
Access composition settings by choosing Composition > Composition Settings or pressing Cmd–K (Mac) or CTRL–K (Windows).
Change both Width and Height to 1080 pixels.
NOTE: When working with 3D layers in After Effects, starting with oversized source layers is crucial. This prevents quality degradation when scaling up layers that move closer to the camera during animation.
Click OK to apply the new composition dimensions.
The composition crop has centered the artwork within the smaller frame. Now we'll scale the artwork proportionally to fit the new dimensions.
Press Cmd–A (Mac) or CTRL–A (Windows) to select all layers simultaneously.
Choose File > Scripts > Scale Selected Layers and configure:
- Check Scale about Center to maintain composition balance.
- Set the scale value to 0.5 (50% reduction)
- Click Scale to apply the transformation.
- Close the panel when complete.
NOTE: This script maintains spatial relationships between layers by scaling from a single center point, unlike individual layer scaling which uses each layer's anchor point.
Save your project by choosing File > Save As > Save As:
- Name the file Your Name—Working with 3D.aep
- Save it to Desktop > Class Files > After Effects Class > Working with 3D
- Click Save.
With our composition properly configured and artwork imported, we're ready to begin the 3D transformation process.
Creating a dummy composition before importing ensures proper duration, framerate, and other settings are applied to imported Illustrator and Photoshop files.
Composition Settings
Moving Layers in 3D Space
All layers in After Effects begin as 2D elements, but any visual layer can be converted to 3D to unlock spatial positioning, camera interaction, and lighting effects. This transformation is fundamental to creating convincing depth and perspective in motion graphics work. The z-axis becomes your primary tool for establishing foreground, midground, and background relationships.
- In the Timeline, locate the switches panel. If you don't see the switches
 , click the Toggle Switches / Modes button at the bottom of the Timeline.
 - With the Timeline active, press Cmd–A (Mac) or CTRL–A (Windows) to select all layers.
- Click the 3D Layer switch
 for any selected layer to enable 3D mode for all selected layers simultaneously.
 Press Cmd–Shift–A (Mac) or CTRL–Shift–A (Windows) to deselect all layers.
Select the Puffer Fish layer to keep it visible during our depth arrangement.
Select the layers we'll temporarily hide: hold Cmd (Mac) or CTRL (Windows), then click Shark, Whale, and text layers:
Hide these layers by clicking the eye icon
 for any selected layer.
Enable the Shy switch
 by clicking it for any selected layer.
Verify all selected layers show the active shy state
 .
.
Activate the shy layer hiding by clicking the Shy button
 at the top of the Timeline:
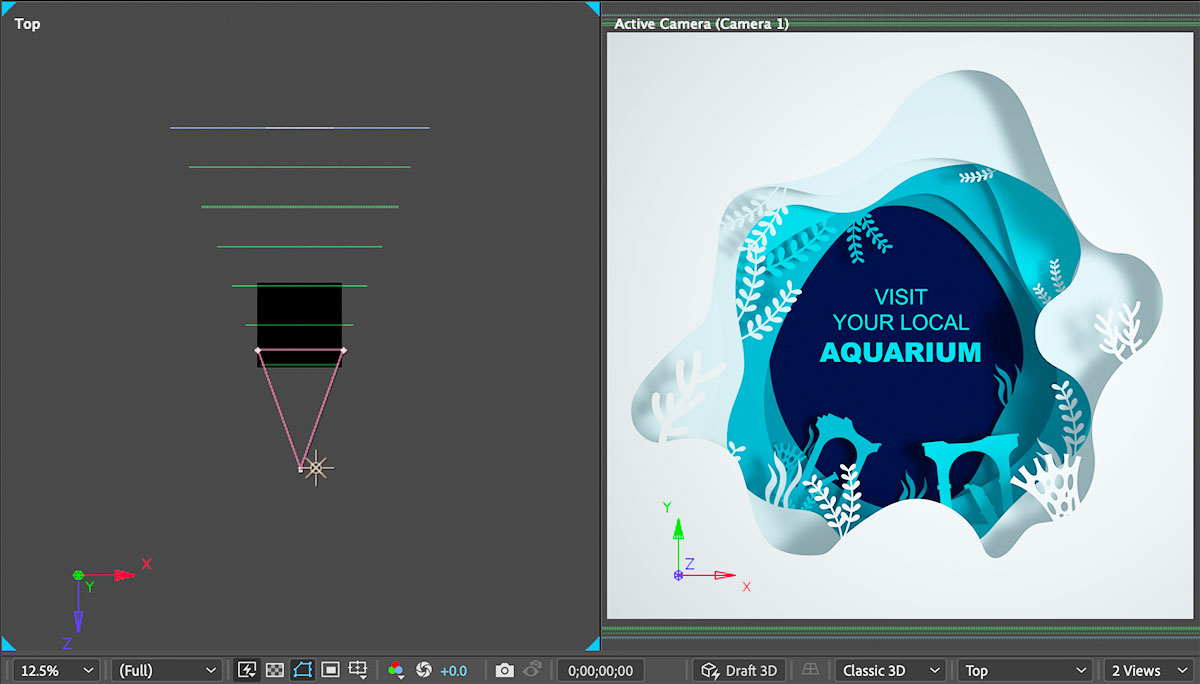
At the bottom right of the Composition panel, click the Select view layout menu
 and choose 2 Views.
NOTE: Multiple viewport layouts are essential for 3D work. The default views show both the Active Camera perspective and a Top orthographic view, giving you precise control over layer positioning while maintaining visual context.
- In the Tools panel, confirm you're using the Selection tool
 .
. - Click in the Top view (left side of the Composition panel) to activate it.
Press , (comma) repeatedly to zoom out until you see extensive space around the black composition boundary.
3D Layer ConversionAny visual layer can be converted to 3D by clicking the 3D Layer switch, enabling z-axis positioning and camera/light interaction.
Layer Z-Position Values
Essential Viewport Navigation Shortcuts
| Command | Shortcut |
|---|---|
| Zoom Out | , (comma) |
| Zoom In | . (period) |
| 100% | / (slash) |
| Fit | Opt–/ (Mac) or ALT–/ (Windows) |
Press Cmd–A (Mac) or Ctrl–A (Windows) to select all visible (non-shy) layers.
NOTE: Timeline selection respects shy layer visibility, while Composition panel selection includes all layers regardless of shy status.
Press P to reveal the Position property for all selected layers.
Press Cmd–Shift–A (Mac) or CTRL–Shift–A (Windows) to deselect all layers.
For the Ring 1 layer, locate the third position value (z-position) and change it to -500.
Continue configuring z-position values to create evenly spaced depth layers:
| Layer Name | Z–Position |
|---|---|
| Ring 2 | 0 |
| Ring 3 | 500 |
| Ring 4 | 1000 |
| Ring 5 | 1500 |
| Ring 6 | 2000 |
| bg | 2500 |
In the Top view, observe how layers now form a progressive depth arrangement from the composition front (bottom edge of the black box) extending backward in 500-unit increments.
This systematic spacing creates the foundation for smooth camera movement and convincing parallax effects when we animate through the scene.
Save your progress with File > Save or Cmd–S (Mac) / CTRL–S (Windows).
The spatial arrangement is now complete. Next, we'll add a camera to control how viewers experience this 3D environment.
Adding a Camera
Select the top layer in the Timeline to position the new camera layer appropriately.
Choose Layer > New > Camera and configure these professional camera settings:
- Type: One–Node Camera (simpler to animate than two-node cameras)
- Preset: 50mm (provides natural perspective similar to human vision)
- Enable Depth of Field: Unchecked (we'll add this effect later if needed)
- Lock to Zoom: Checked (maintains focal length during animation)
- Click OK to create the camera.
- Examine the camera position in the Top view—it's positioned too close to our foreground elements for the desired animation.
With the Camera 1 layer selected, adjust the starting position:
- Press P to reveal the Position property.
- Set the third value (z-position) to -1800 to move the camera further back.
- Press P again to hide the Position property.
NOTE: Adding a camera layer automatically makes it the Active Camera, replacing After Effects' default camera view with your custom perspective.
Now we have a properly positioned camera, but our layers appear incorrectly sized due to 3D perspective. Let's address this scaling challenge.
Camera Settings Configuration
| Feature | Setting | Value |
|---|---|---|
| Camera Type | One-Node Camera | Selected |
| Lens Preset | 50mm | Standard focal length |
| Depth of Field | Unchecked | Disabled for now |
| Z-Position | -1800 | Moved back from art |
Scaling 3D Layers
When layers are repositioned in 3D space, perspective automatically affects their apparent size—closer objects appear larger while distant objects appear smaller. This is realistic but requires compensatory scaling to achieve the visual proportions we need. Professional 3D workflows always account for this relationship between position and perceived scale.
- Press Cmd–A (Mac) or CTRL–A (Windows) to select all visible layers.
- Press S to reveal Scale properties for all layers (this also hides the Position properties for cleaner viewing).
- Press Cmd–Shift–A (Mac) or CTRL–Shift–A (Windows) to deselect all layers.
Select the bg layer and observe its current size:
- In the Active Camera view, locate the blue selection handles to see how small this distant layer appears.
- Change any Scale value to 205% (all three values are linked by default).
- Notice the background now extends slightly beyond the composition boundaries, ensuring complete coverage during camera animation.
Apply compensatory scaling to the remaining layers, working from back to front. These values are calculated to maintain visual hierarchy while accounting for perspective distortion:
Layer Name Scale Ring 1 44% Ring 2 60% Ring 3 91% Ring 4 130% Ring 5 154% Ring 6 175% - Press Cmd–A (Mac) or Ctrl–A (Windows) to select all layers.
- Press S to hide Scale properties and clean up the Timeline view.
- Press Cmd–Shift–A (Mac) or CTRL–Shift–A (Windows) to deselect all layers.
Save your work with File > Save or Cmd–S (Mac) / CTRL–S (Windows).
With proper scaling established, our 3D scene is ready for lighting, which will add realism and visual interest to the composition.
In 3D space, layers closer to the camera appear larger while distant layers appear smaller due to perspective. Scaling compensates for this effect.
Layer Scale Adjustments
Adding a Light
Professional 3D environments require thoughtful lighting design to achieve depth, mood, and visual hierarchy. Lights in After Effects affect only 3D-enabled layers and can cast shadows, create falloff patterns, and establish atmosphere. The interplay between lights, cameras, and 3D layers transforms flat artwork into convincing dimensional spaces.
Select the topmost layer in the Timeline to position the light layer appropriately in the layer stack.
Choose Layer > New > Light and configure these professional lighting settings:
- Light Type: Point (omnidirectional light source, ideal for general illumination)
- Color: White (#FFFFFF) (neutral color maintains artwork integrity)
- Intensity: 100% (full brightness for strong shadow definition)
- Falloff: None (consistent illumination across all distances)
- Cast Shadows: Checked On (essential for 3D depth perception)
- Shadow Darkness: 50% (balanced shadow contrast)
- Shadow Diffusion: 50% (soft, realistic shadow edges)
- Click OK to create the light.
Position the light strategically with the Point Light 1 layer selected:
- Press P to reveal Position controls.
- Enter these coordinates: 740, 542, -1800
(This places the light adjacent to the camera for consistent illumination angle.) - Press P again to hide Position properties.
Check the Active Camera view—you won't see shadows yet because shadow casting requires two-part activation.
Shadows require both light-side enablement (which we've configured) and layer-side permission for each object that should cast shadows.
Select the primary shadow-casting elements:
- Click the Ring 1 layer.
- Hold Shift and click Ring 6 to select all ring layers simultaneously.
Press AA (double-tap the A key) to reveal Material Options for all selected layers.
Enable shadow casting by clicking the word Off next to Cast Shadows on any selected layer (this changes it to On for all selected layers).
Shadows now appear in the Active Camera view, adding dramatic depth and visual interest to your 3D scene!
Clean up the interface by pressing Cmd ~ (Mac) or CTRL ~ (Windows) to hide all visible properties.
Press Cmd–Shift–A (Mac) or CTRL–Shift–A (Windows) to deselect all layers.
The lighting setup is complete and casting beautiful shadows. Now we'll create dynamic movement by animating both the camera and light through the 3D scene.
Light Setup Process
Create Point Light
Add white point light with 100% intensity and shadow casting enabled
Position Light
Set position to 740, 542, -1800 to place it next to the camera
Enable Layer Shadows
Turn on Cast Shadows for Ring layers in Material Options to see shadow effects
Animating Cameras & Lights
Position the playhead at the beginning of the timeline (frame 0).
In the Point Light 1 layer's Parent & Link column, select 2. Camera 1 from the dropdown menu.
Parenting the light to the camera ensures they move as a unified system, maintaining consistent illumination angles while creating dynamic shadow movement as we fly through the scene.
Select the Camera 1 layer and prepare for animation:
- Press P to reveal Position controls.
Click the Position stopwatch
 to enable keyframe animation and set the first keyframe.
Move the playhead to 10;00 (10 seconds) to set the animation endpoint.
Animate the camera into the scene by hovering over the camera's third position value (z-position) and dragging to the right.
NOTE: Hold Shift while dragging for faster value changes, or hold Option (Mac) / ALT (Windows) for more precise control.
Camera Animation Timeline
Start Position
Camera begins at z-position -1800 with light parented to it
End Position
Camera moves to z-position 1020, flying into the blue background
Easing Applied
Easy Ease keyframe assistant creates smooth acceleration and deceleration
Making the camera the parent of the light ensures the light moves with the camera, creating dynamic shadow movement throughout the scene.