Topics Covered in This After Effects Tutorial:
3D Camera Tracker Effect, Match Moving Fundamentals, Advanced 3D Layer Workflows
Exercise Preview
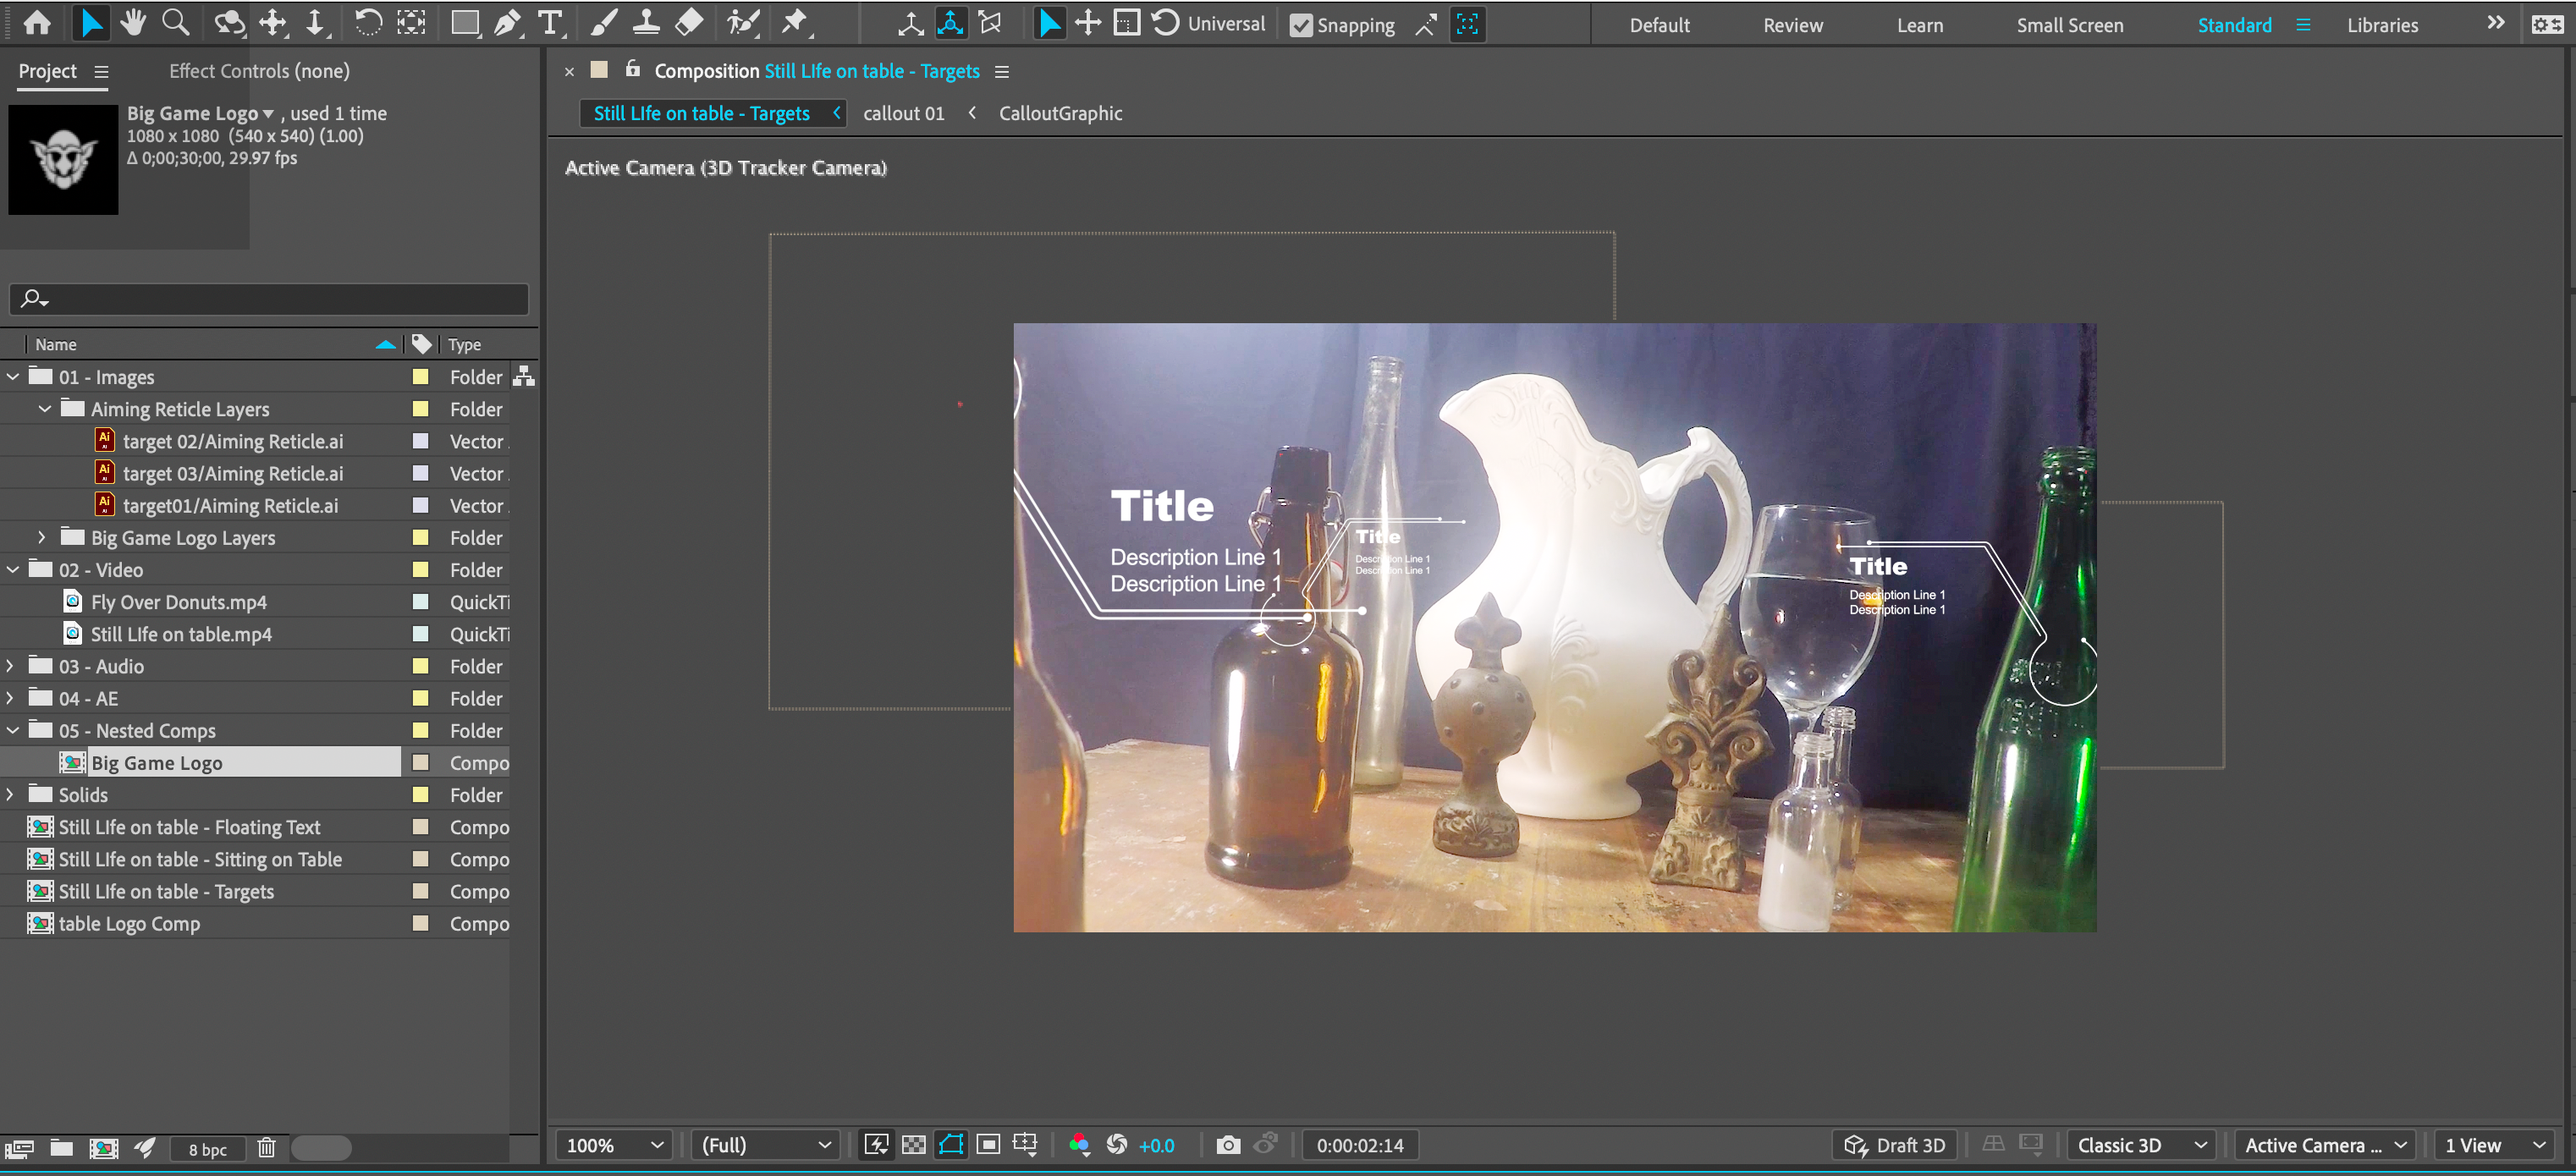
The exercise includes multiple example files: Flying Over Donuts.mp4, Still Life on table—Floating Text.mp4, Still Life on table—Logo on Table.mp4, and Still Life on Table—Targets.mp4. These demonstrate graphics that appear sticky and match video movement perfectly.
Exercise Overview
In this exercise, you'll master the After Effects 3D Camera Tracker to perform professional match moving and seamlessly integrate graphics into live-action footage. This technique is essential for modern motion graphics work, allowing you to create compelling visual narratives that feel naturally embedded in real-world environments.
Previewing the Final Video
- Let's examine the final results before diving into the technique. If you're in After Effects, keep it open but switch to your Desktop.
On the Desktop, navigate to Class Files > After Effects Advanced Class> 3D Camera Tracking > Preview Movie and double–click Flying Over Donuts.mp4.
You can also preview: Still Life on table—Floating Text.mp4, Still Life on table—Logo on Table.mp4, and Still Life on Table—Targets.mp4
Notice the following key elements:
- Graphics are convincingly integrated into the video environment, not simply overlaid on top.
- The graphics maintain perfect spatial relationships with the scene, "sticking" to surfaces and matching camera movement with photorealistic precision.
Study the examples carefully—replay the videos to understand how the graphics respond to camera motion. Close the preview when you're ready to begin.
Setting up the Workspace
Before we begin tracking, let's optimize your workspace for this complex workflow.
In After Effects, go to Window > Workspace > Standard.
Choose Window > Workspace > Reset "Standard" to Saved Layout.
If the After Effects window does not fill the screen, maximize it for optimal viewing:
Mac: At the top left of the window, click the green button (the third button). Windows: At the top right of the window, click the Maximize button (the middle button).
Workspace Setup Requirements
Ensures consistent panel arrangement for following tutorial steps
Removes any custom modifications that might interfere with workflow
Provides optimal screen real estate for working with multiple panels
Getting Started
Now let's prepare your project files and establish proper file management practices.
In After Effects, if you have a project open, choose File > Save to preserve your work.
Choose File > Open Project and:
- Navigate to Desktop > Class Files > After Effects Advanced Class > 3D Camera Tracking.
- Double–click on Camera Tracking—Started.aep to open it.
Choose File > Save As > Save As and:
- Name the file Your Name—Camera Tracking.aep and
- Save it into Desktop > Class Files > After Effects Advanced Class> 3D Camera Tracking.
Project Setup Process
Save Current Work
Save any existing project to avoid losing progress before opening the tutorial files.
Open Tutorial Project
Navigate to the class files folder and open Camera Tracking—Started.aep to begin the exercise.
Save Personal Copy
Save the project with your name to create a personal working copy in the designated folder.
Applying the 3D Camera Tracker Effect
The 3D Camera Tracker represents one of After Effects' most sophisticated analytical tools. Unlike traditional motion tracking that follows specific elements, camera tracking reconstructs the three-dimensional movement of the original camera used during filming. This reverse-engineering process creates a virtual camera that perfectly matches the original camera's motion, enabling you to place graphics that respond naturally to perspective changes, depth, and movement.
Understanding this distinction is crucial: you're not tracking objects in the scene—you're recreating the camera's journey through 3D space.
Choose your source video and create a composition from it using one of the following methods:
Cmd–click (Mac) or Right–click (Windows) on the video in your Project panel and choose New Comp from Selection from the menu.
Drag the video onto the Create a New Composition
 icon located at the bottom of the Project panel.
Drag the video into the empty timeline panel.
Select the layer you want to track and apply the 3D Camera Tracker effect using one of these approaches:
Choose Effect > Perspective > 3D Camera Tracker from the top menu.
Cmd–click (Mac) or Right–click (Windows) on the layer and choose Track & Stabilize > Track Camera from the contextual menu.
In the Effects & Presets panel, search for and apply the 3D Camera Tracker effect.
The effect will execute a sophisticated two-phase analysis: first Analyze (identifying trackable features) then Solve (calculating camera motion). Upon completion, you'll see colorful Track Points overlaid on your footage in the Composition panel.
NOTE: Track points are only visible when both the layer and effect are selected. These points represent features the algorithm identified as reliable for tracking.
In the Effect Controls panel, click the Create Camera button.
NOTE: This creates a specialized camera with pre-calculated keyframes for position and orientation derived from the tracking analysis—far more sophisticated than a manually created camera.
At the bottom of the Composition panel, verify that the 3D Renderer is set to Classic 3D.
To visualize the camera movement, use the Select view layout button at the bottom right of the Composition panel to choose a multiple-view option.
- Set one view to Top and scrub the playhead to observe the calculated camera path through 3D space.
Return the Select view layout to 1 View.
Save your file to preserve this critical tracking data.
Camera Tracker Application Methods
Menu Method
Access through Effect > Perspective > 3D Camera tracker from the main application menu for standard workflow.
Context Menu Method
Right-click on layer and choose Track & Stabilize > Track Camera for quick access during editing.
Effects Panel Method
Search and apply from Effects & Presets panel when working with multiple effects simultaneously.
The 3D Camera Tracker runs a two-step process: Analyze (examines video content) and Solve (calculates camera movement). Track points are only visible when both the layer and effect are selected.
Adding 3D Layers to Match the Movement
With your tracked camera established, any 3D-enabled layer will now automatically inherit the scene's spatial characteristics and perspective changes.
Import or create your graphic element by dragging a layer into your composition or using the text or shape tools. Any visual layer—imported images, videos, graphics, or generated content—can be converted to 3D.
Enable the layer's 3D Layer
 switch in the timeline.
Adjust the transform properties (position, rotation, scale) of your 3D layer relative to the virtual camera. Switch to 2–Views or 4–Views in the Composition panel for better spatial awareness while positioning.
NOTE: Text, shape, and composition layers retain their animation capabilities even with 3D properties enabled, allowing for complex layered animations within the tracked space.
Save your project to preserve your 3D setup.
Creating 3D Layers
Add Layer Content
Import or create new text, shape, image, or video layers that will be converted to 3D elements.
Enable 3D Properties
Click the layer's 3D Layer switch to activate three-dimensional positioning and rotation capabilities.
Adjust Transform Properties
Use multiple view options to position, rotate, and scale the 3D layer relative to the tracked camera movement.
Setting 3D Layers at Track Points
For precise placement that corresponds to specific elements in your scene, you can anchor new layers directly to tracked points. This technique ensures your graphics maintain exact spatial relationships with real-world objects throughout the camera movement.
The three layer options serve different purposes in professional workflows: Null objects store coordinate data that can be transferred to other layers, making them ideal for complex hierarchies. Solid layers work well for surface-based graphics or as containers for nested compositions. Text layers are perfect for typography that needs to maintain specific spatial relationships within the scene.
We'll create a null object layer for maximum flexibility.
In the Timeline, select the layer with the applied 3D Camera Tracker effect.
In the Effect Controls panel, click on the 3D Camera Tracker effect to reveal the track points.
Cmd–click (Mac) or Right–click (Windows) on your chosen track point and select Create Null.
NOTE: When creating multiple nulls, rename each layer descriptively (e.g., "Table Corner," "Wall Mount Point") for efficient project management.
Add your graphic layer to the composition.
If your graphic isn't already a composition:
Pre-compose the graphic layer using Cmd–Shift–C (Mac) or Ctrl–Shift–C (Windows).
Assign a descriptive name, ensure Leave all attributes… is selected, and click OK.
Adjust the pre-comp's anchor point to align properly with the null object's position.
Hold Shift while setting the null object layer as the parent for your graphic layer.
NOTE: The Shift key transfers the parent's transform properties to the child layer, maintaining spatial relationships.
Scale your graphic layer appropriately, considering that objects closer to the camera appear larger while distant objects appear smaller—mimicking real-world perspective.
Repeat this process for multiple track points as needed.
Save your project to preserve these spatial relationships.
Track Point Layer Types
| Feature | Layer Type | Best Use Case |
|---|---|---|
| Null Object | Store coordinates | Transfer to other layers |
| Shape Layer | Create nested comps | Animate later |
| Text Layer | Place text | Relative positioning |
Hold Shift when setting the null object as parent to assign transform properties to child layers. This ensures proper positioning inheritance from track points.
Aligning 3D Layers to a Flat Surface
Beyond point-based positioning, you can align graphics to flat surfaces by selecting multiple track points on the same plane. This technique is invaluable for creating graphics that appear to rest on tables, hang on walls, or integrate with architectural elements.
In the Timeline, select the layer with the applied 3D Camera Tracker effect.
In the Effect Controls panel, click on the 3D Camera Tracker effect to display track points.
Select three or more points on the same flat surface by holding Shift while clicking each point.
NOTE: Watch the target indicator carefully as you select points—ensure it remains aligned with your intended surface. The algorithm calculates the plane based on your point selection.
Cmd–click (Mac) or Right–click (Windows) on one of the selected track points or the highlighted area and choose Create Solid.
Rename the solid layer descriptively (e.g., "Tabletop Surface," "Wall Plane").
Adjust the solid's dimensions by selecting it and choosing Layer > Solid Settings. Match the dimensions to your intended graphic for optimal workflow efficiency.
Pre-compose the solid layer using Cmd–Shift–C (Mac) or Ctrl–Shift–C (Windows).
- Name the pre-comp descriptively, confirm Leave all attributes… is selected, and click OK.
Double-click the new composition to open it in a separate tab.
Hide or delete the solid layer and add your graphic content to the composition.
Return to the main composition and fine-tune transform properties (position, scale, rotation) as needed.
Reveal blending modes by clicking Toggle Switches/Modes at the bottom of the timeline or pressing F4.
Adjust the blend mode and opacity to integrate the graphic naturally with the surface's color and lighting. Consider using color correction effects for more sophisticated matching of the scene's color temperature and contrast.
Save your project to preserve this advanced integration work.
Surface Alignment Workflow
Select Track Points
Choose three or more points on the same flat surface while holding Shift. The target adjusts as you add points.
Create and Configure Solid
Generate a solid layer from selected points, rename descriptively, and adjust dimensions to match your planned graphic.
Pre-compose and Add Content
Pre-compose the solid layer, then replace or supplement it with your actual graphic content in the new composition.
Final Integration
Return to main comp, adjust transform properties, and use blending modes or color correction to match surface tones.
Use transfer modes (blending modes) and opacity adjustments to make graphics blend naturally with surface colors and tones. Color correction effects can provide additional matching capabilities.