Formatting Cells
Excel offers extensive cell formatting capabilities that go far beyond basic data entry. While we've covered Cell Styles and Number Formatting in previous articles, mastering Excel's visual formatting tools—borders, colors, alignment, fonts, and orientation—is essential for creating professional, readable spreadsheets that effectively communicate your data's story.
All these formatting options are conveniently located in the Home tab's ribbon interface. Let's begin with the comprehensive Font group, which serves as your primary toolkit for text appearance:
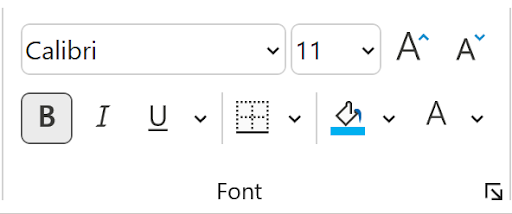
Excel's font dropdown menu provides an extensive library of typefaces to suit any professional need. The selection has grown significantly over recent years, offering hundreds of options ranging from classic business fonts to modern display typefaces:
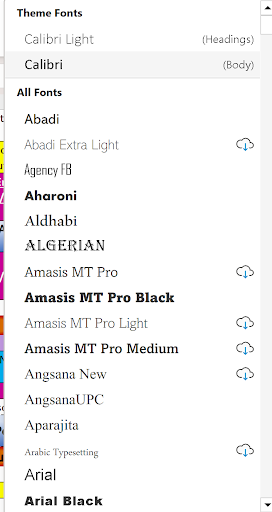
Notice the cloud icons next to certain fonts—this indicates Microsoft's cloud-based font system. These premium fonts aren't installed locally but can be downloaded instantly from Microsoft's servers, ensuring your documents maintain consistent appearance across different devices and platforms:

When hovering over a cloud font, the tooltip clearly indicates you can download it immediately. This feature has revolutionized font management in Office applications, eliminating the need for manual font installation.
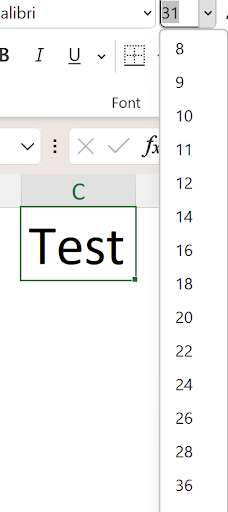
Font sizing offers more flexibility than many users realize. While the dropdown provides standard sizes, you can enter any custom value directly. This precision is particularly valuable for fitting content into specific layout constraints or meeting corporate branding requirements:
Excel's live preview feature enhances your formatting workflow significantly. When a cell contains data, scrolling through font or size options shows real-time previews, allowing you to make informed decisions without applying and undoing changes repeatedly.
The basic text styling options—Bold, Italic, and Underline—appear as toggle buttons beneath the font dropdown. These can be combined for emphasis, though professional documents typically benefit from restraint in styling choices:
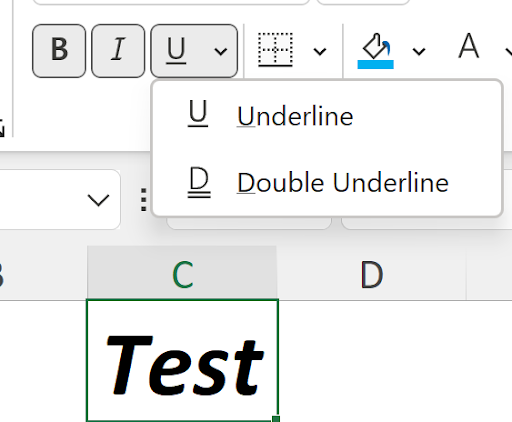
While the ribbon's underline button suggests only single or double options, Excel actually provides five distinct underline styles accessible through the Format Cells dialog (Ctrl+1, Font tab). This expanded functionality caters to specialized formatting needs in financial and academic documents:
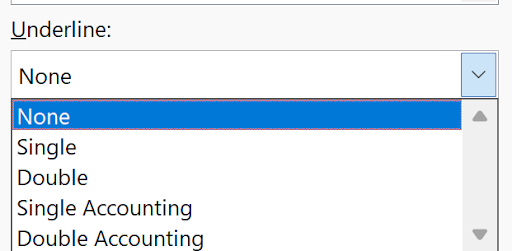
The "Single Accounting" and "Double Accounting" underline styles deserve special attention for financial professionals. These create underlines that span nearly the entire cell width rather than just the text length—a standard practice in accounting presentations that helps align numerical data visually.
Here's how all five underline styles appear when applied:
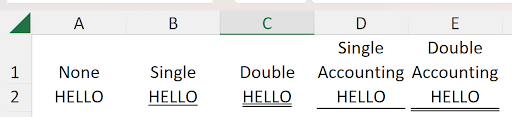
Notice how the accounting underline styles extend nearly across the cell's full width, leaving small margins at the edges. This subtle formatting difference can significantly improve the professional appearance of financial statements and reports:

Color application in Excel involves two distinct elements: font color and cell background color. Understanding this distinction is crucial for effective visual design. Font color affects text readability, while cell color can highlight important information or create visual groupings:
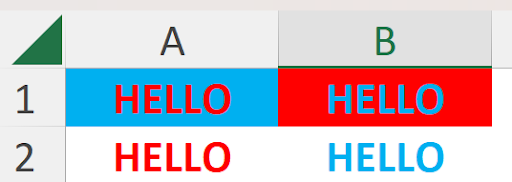
This example clearly illustrates the interaction between font and cell colors. Cells A1 and A2 use red font color, while B1 and B2 use light blue. The background colors are reversed, creating different visual effects while maintaining readability.
A word of caution: matching font and cell colors renders text invisible, though it remains functionally present. This technique can be useful for creating hidden content, but it's generally problematic for accessibility and user experience:
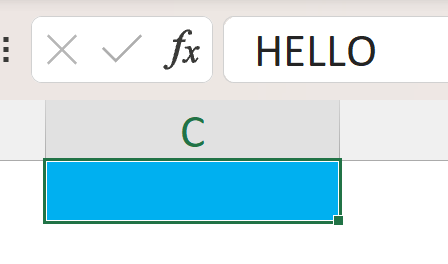
The text exists (visible in the formula bar) but cannot be seen within the cell itself. This demonstrates why color choices require careful consideration in professional spreadsheet design.
Excel's context-sensitive mini toolbar appears when you right-click any cell, providing quick access to the most commonly used formatting tools without navigating to the ribbon:

This toolbar combines elements from multiple ribbon groups—Font, Alignment, and Number—along with the valuable Format Painter tool in the lower right corner. It's designed for efficient workflow, keeping essential tools at your fingertips.
The Format Painter deserves special attention as one of Excel's most powerful time-saving features. This tool functions as an advanced shortcut for copying and applying formatting (equivalent to Copy > Paste Special > Formats), making it invaluable for maintaining consistent appearance across large spreadsheets.
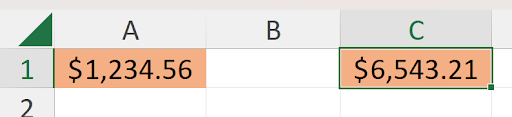
Consider this scenario: you want to apply the formatting from cell A1 to cell C1:

The process is elegantly simple: click the source cell (A1), click the Format Painter icon (available in both the Home tab and mini toolbar), then click the destination cell (C1). The formatting transfers instantly:
Notice the paintbrush cursor icon during the operation. For extensive formatting tasks across multiple non-adjacent cells, double-click the Format Painter icon to keep it active indefinitely. This persistent mode continues until you either click the icon again or press the Esc key—a significant productivity enhancement for large-scale formatting projects.
Excel's border system provides sophisticated options for creating professional table layouts and visual separations. The border dropdown dynamically updates to show your most recently used border style, streamlining repetitive formatting tasks:

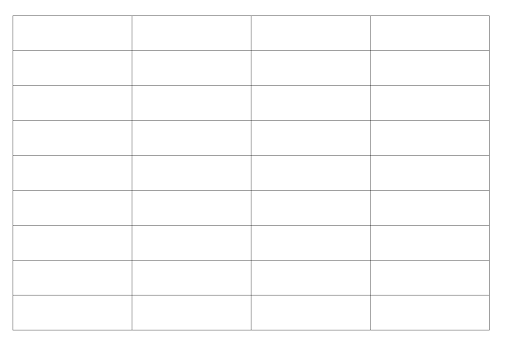
For more creative control, Excel's "Draw Borders" feature transforms your cursor into a drawing tool, allowing you to create custom border layouts by dragging across cell ranges:
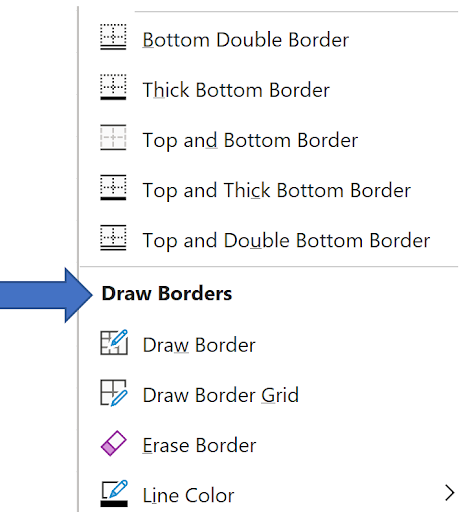
When using Draw Borders, you simply drag from the upper-left to lower-right of your desired grid area. The Line Color option (visible at the bottom) lets you customize border appearance before drawing:
For comprehensive border control, the "More Borders" option opens the full Format Cells dialog's Border tab (equivalent to Ctrl+1), providing access to line styles, colors, and even diagonal borders for specialized layouts:
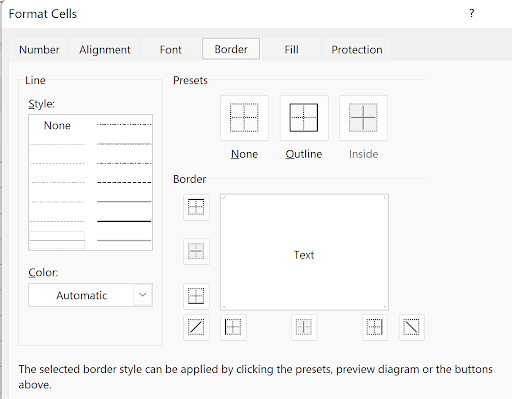
This advanced interface supports complex border designs including diagonal lines, essential for creating sophisticated table headers and mathematical notation in spreadsheets.
Cell backgrounds extend far beyond simple solid colors through the Format Cells dialog's Fill tab. This interface opens up professional-grade design possibilities:
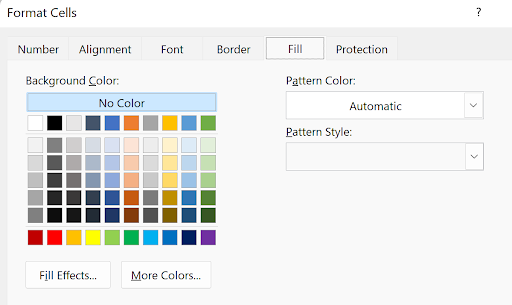
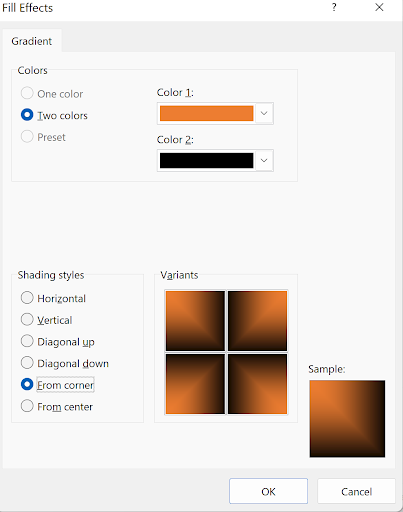
The "More Colors" option provides access to Excel's full color palette—over 16 million colors using RGB values—while "Fill Effects" opens advanced gradient and texture options:
Additionally, the Pattern Style feature provides traditional patterns that can be effective for creating visual distinctions in data presentation, particularly in printed reports:

While these advanced fill effects offer creative possibilities, remember that professional spreadsheets benefit from restraint. Overly decorated cells can distract from data comprehension:
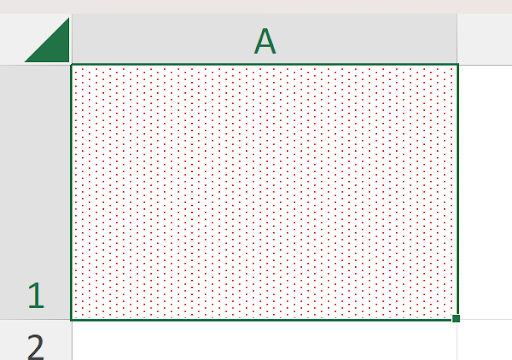
This example demonstrates how excessive formatting can compromise readability. Effective Excel design balances visual appeal with functional clarity.
Cell merging offers a powerful solution for creating headers and improving visual organization. By combining multiple cells into a single display unit, you can create spanning titles that unify related data columns:
In this example, cell A1 spans the entire range A1:F1, creating a unified header. However, merging cells can complicate sorting and filtering operations.
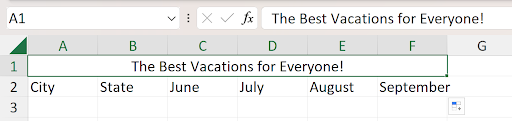
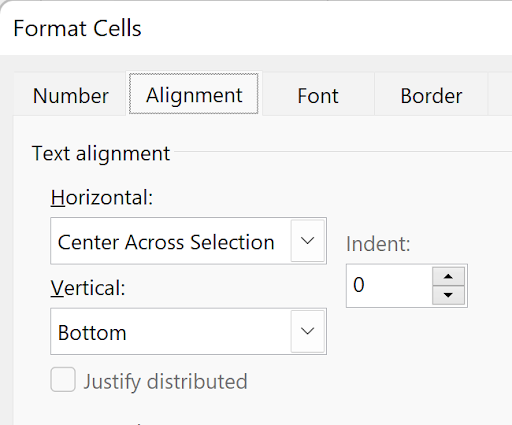
An alternative approach uses "Center Across Selection" from the Alignment tab (Ctrl+1), which achieves similar visual results while preserving individual cell integrity:

Notice that with "Center Across Selection," cell A1 doesn't actually span the range—the selection border reveals the individual cells remain separate. This method requires selecting the entire range (A1:F1) before applying the formatting:
This approach maintains cell independence while achieving the desired visual effect, making it preferable for data tables that may require sorting or filtering.
Text indentation provides subtle but powerful control over content hierarchy and visual organization. Rather than manually adding spaces to text, Excel's indent feature offers precise, consistent spacing that enhances document structure.
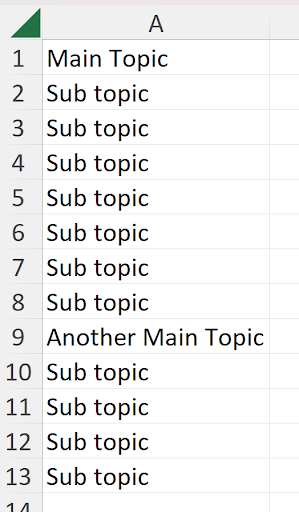
Consider a hierarchical outline like this business report structure:
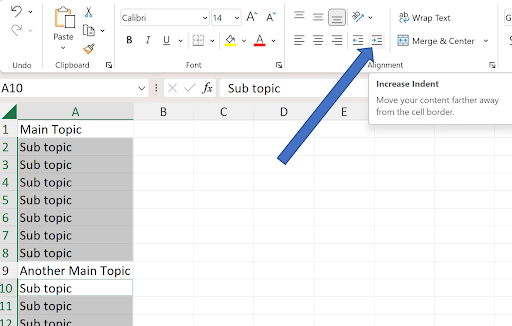
To create proper visual hierarchy, select all subtopic cells using Ctrl+click (A2:A8 and A10:A13), then apply the indent formatting using the ribbon's indent controls:
The result creates clear visual hierarchy without manual spacing, making the document structure immediately apparent:

This professional formatting technique is particularly valuable for project outlines, financial statements, and organizational charts where hierarchy must be immediately apparent.
Finally, Excel's text orientation capabilities extend far beyond standard horizontal text, offering creative solutions for header design and space-constrained layouts. The orientation dropdown in the Alignment group provides several preset angles:

Selecting "Angle Counterclockwise" produces this distinctive vertical text effect, particularly useful for narrow column headers:

For precise control over text angle, the Format Cells dialog's Alignment tab offers a rotational dial allowing exact degree specification. This fine-tuning capability enables perfect alignment with your design requirements:

Mastering these comprehensive formatting tools transforms Excel from a simple data entry application into a powerful document design platform. The key to professional results lies in understanding when and how to apply each technique judiciously, always prioritizing clarity and functionality alongside visual appeal.
All formatting options discussed in this article are conveniently located in the Home tab of Excel's ribbon interface.
Font Formatting Process
Select Font Type
Choose from extensive font dropdown list, including cloud-based fonts that can be downloaded on demand
Adjust Font Size
Use dropdown for standard sizes or type custom size values like 31 for precise formatting
Apply Text Styles
Use Bold, Italic, and Underline buttons, with additional underline options available via Ctrl+1
Underline Options Comparison
| Feature | Ribbon Option | Advanced Options |
|---|---|---|
| Basic Underline | Single underline only | 5 different styles |
| Accounting Format | Not available | Single and Double Accounting |
| Access Method | Home tab buttons | Ctrl+1 Font dialog |
Cloud Fonts Feature
When cells contain data, scrolling through font name or size dropdowns shows a live preview of formatting changes before applying them.
Font Color vs Cell Color
| Feature | Font Color | Cell Color |
|---|---|---|
| What it affects | Text characters only | Entire cell background |
| Visibility impact | Changes text readability | Creates background contrast |
| Warning | Same as cell color makes text invisible | Same as font color hides text |
Format Painter Usage Scenarios
Single Application
Click source cell, click Format Painter, then click target cell. Paintbrush cursor appears temporarily.
Multiple Applications
Double-click Format Painter to keep it active for multiple non-adjacent cells. Click again or press Esc to deactivate.
Format Painter is essentially a shortcut for Copy > Paste Special > Formats, streamlining the formatting transfer process.
Border Application Methods
Quick Borders
Use border dropdown for common border styles. Icon shows last used border type for quick reapplication
Draw Borders
Select Draw Borders option and drag cursor from upper-left to lower-right to create custom border areas
Advanced Borders
Access More Borders or Ctrl+1 Border tab for complete control including colors, diagonal lines, and line styles
Available Color Options
Cell Merging vs Center Across Selection
| Feature | Merge Cells | Center Across Selection |
|---|---|---|
| Cell structure | Actually combines cells | Keeps individual cells |
| Visual effect | Text spans merged area | Text appears centered across selection |
| Data integrity | May lose data in merged cells | Preserves all cell data |
| Access method | Home tab Merge button | Ctrl+1 Alignment dialog |
Instead of manually typing spaces for subtopic indentation, select multiple cells using Ctrl key and use ribbon indent buttons for consistent formatting.
Text Angle Adjustment Process
Quick Angle Options
Use ribbon dropdown for standard angles like Angle Counterclockwise for common orientations
Custom Angle Fine-Tuning
Access Alignment tab via Ctrl+1 for precise degree control and custom text orientation